
Welcome to Tronic Cloud Voice AI
This guide walks you through everything you need to get your AI voice agent answering calls — from logging in and finding your phone number, to creating an agent, switching it on, pointing your number at it, and making your first test call. Every step has a screenshot. Click any image to enlarge it.
Getting your account
How a Tronic Cloud account is created, and what you get on day one.
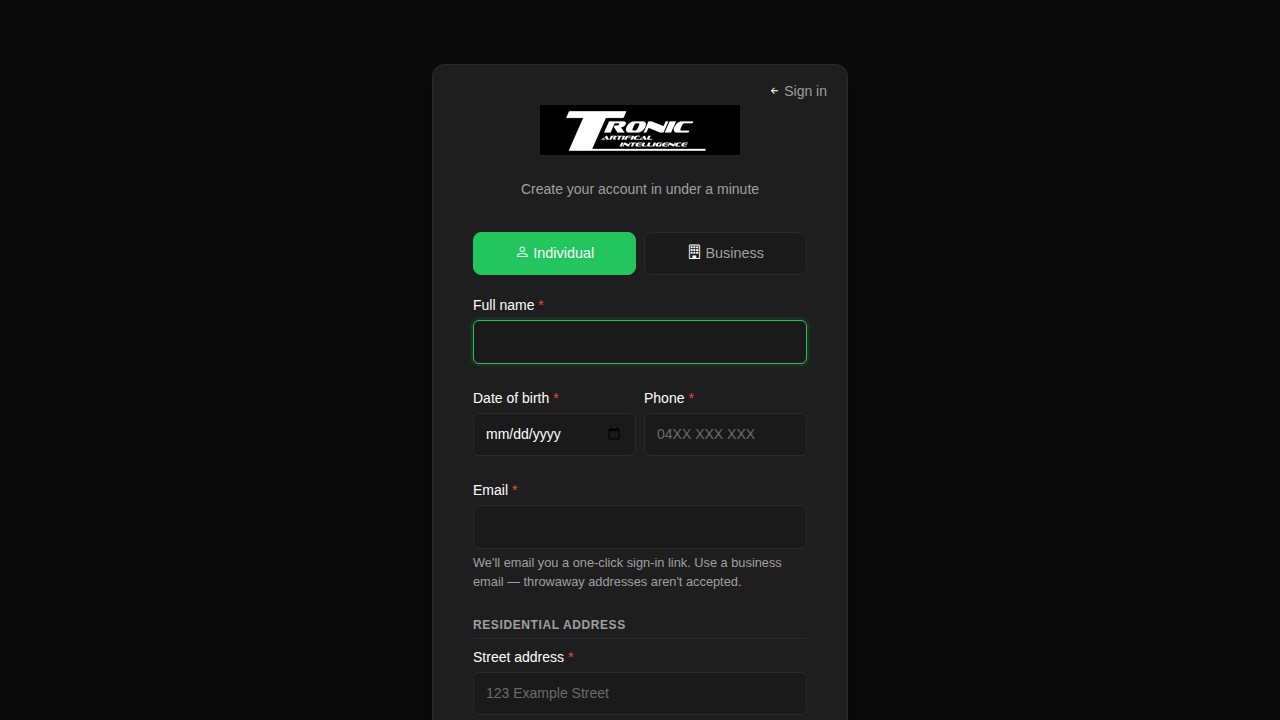
If someone has already set your account up for you, skip ahead to Logging in. To sign up yourself, go to portal.troniccloud.com.au and click Register.
The form asks for:
- Individual or Business — pick whichever matches how you’ll be invoiced.
- Your name, date of birth and phone number.
- Your email address. Use a real business address — throwaway addresses are rejected, and this becomes your login.
- Your address, with the option to give a different billing address.
- Preferred phone area code (optional) — 02, 03, 07 or 08, if you want your number to look local to a particular state. Leave it on No preference and we’ll assign any available Australian number.
1. Logging in
How to get into your Tronic Cloud dashboard the first time and after.
1 Open your welcome email and set a password
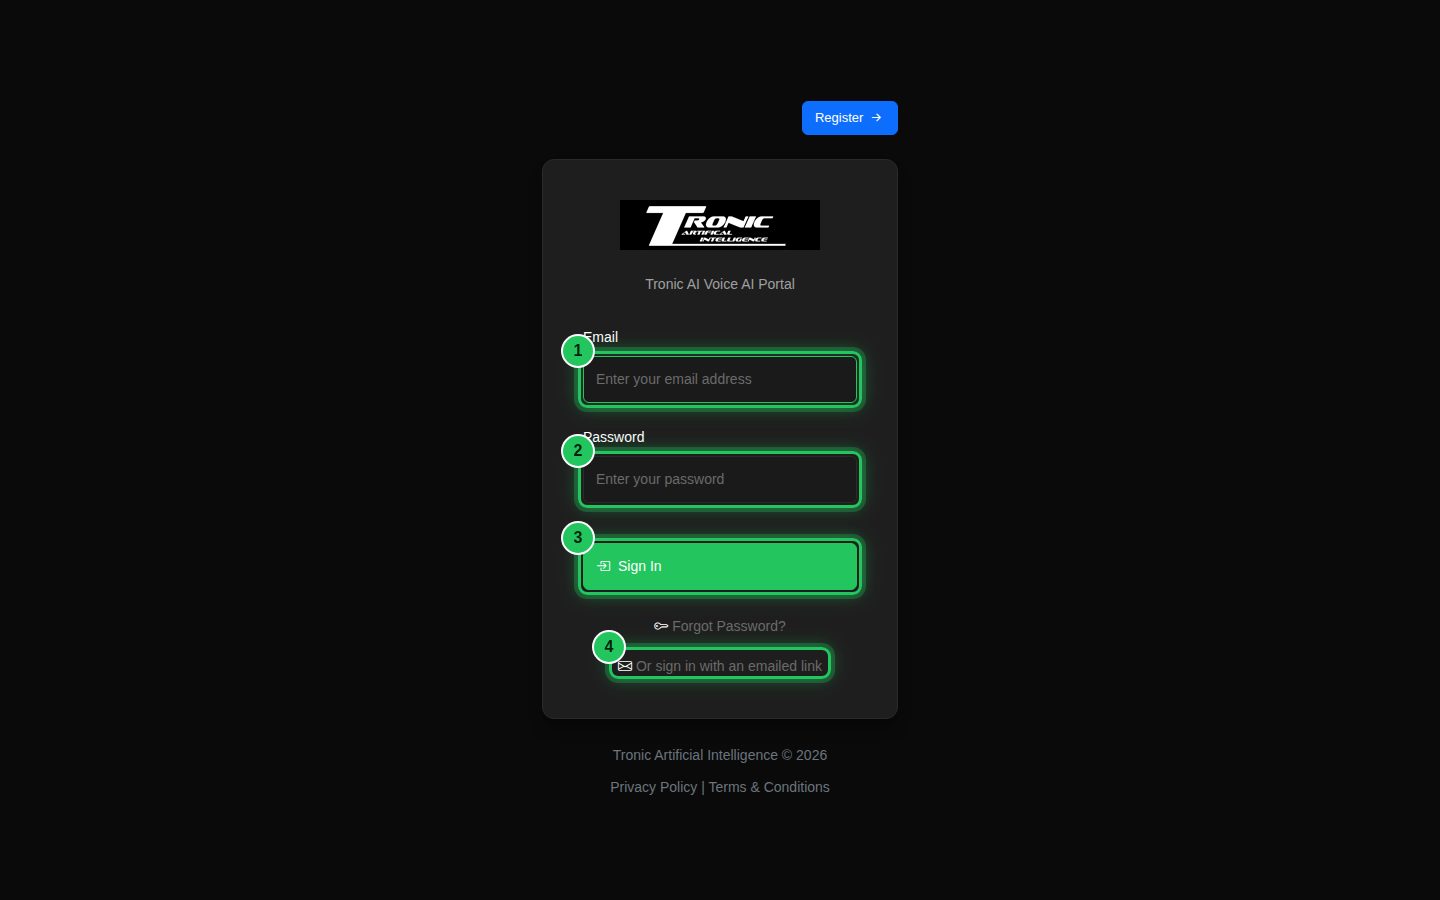
When your account is created you receive an email titled “Welcome to Tronic Cloud — your phone number is ready”. Click the secure link inside to choose your password. After that, you log in any time with your email address and password.
Forgotten your password?
Click Forgot Password? on the login page, or use “Or sign in with an emailed link” to get a fresh one-click link. Sign-in links are single use and expire after a short time, so request a new one rather than re-using an old email.
2. Your dashboard
The overview page you land on after logging in.
2 Get your bearings
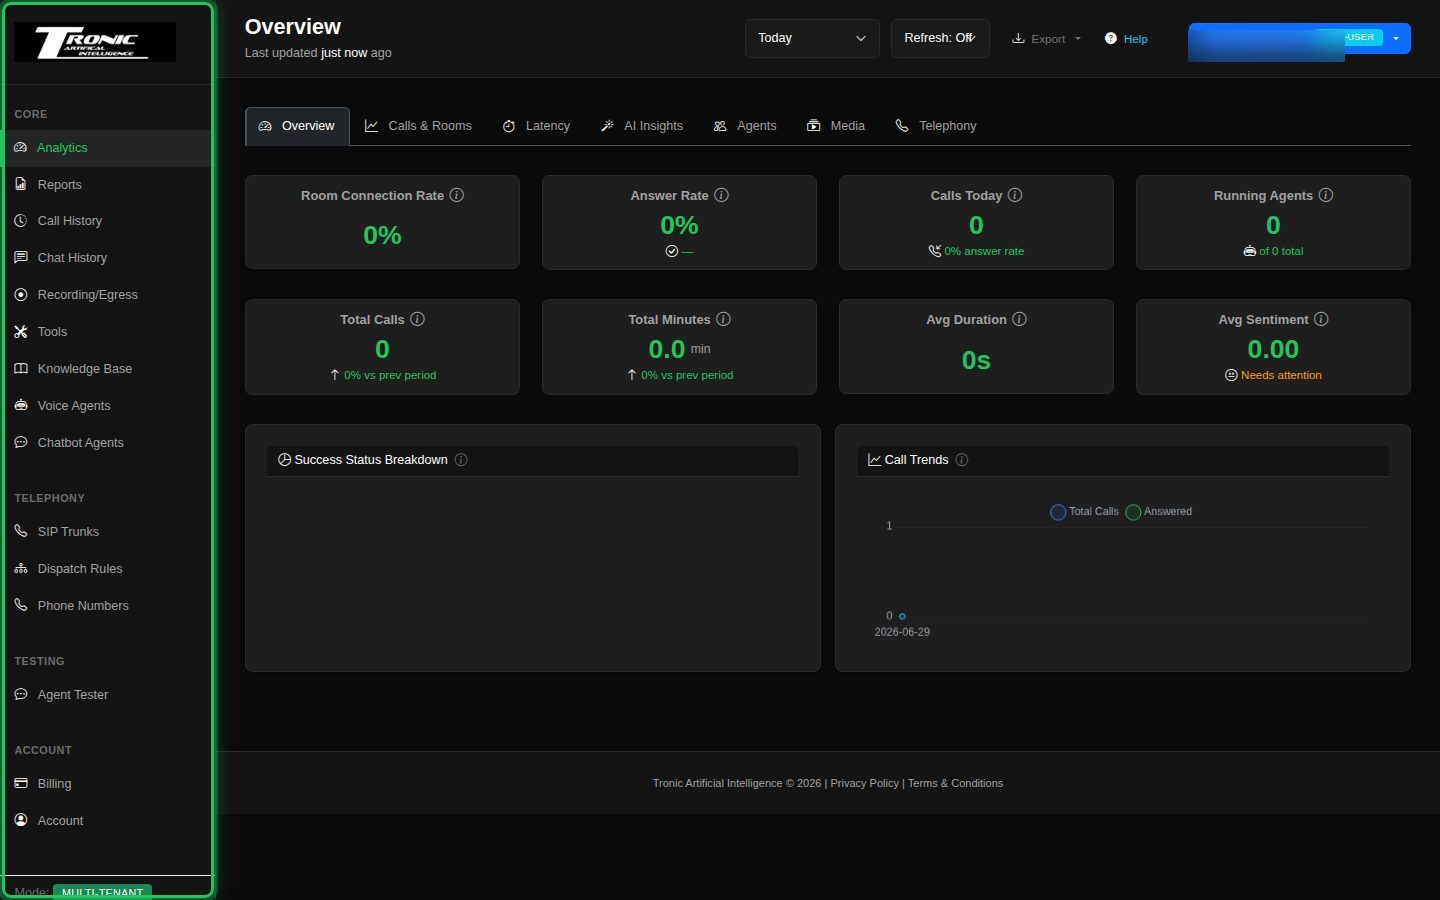
The menu on the left (highlighted) is how you move around the dashboard. The main area shows your call activity, usage and costs at a glance. Don’t worry if your numbers are all zero to start — they fill in once calls come through.
What’s in the menu
- Core — Analytics (this page), Reports, Call History, Chat History, Recording/Egress, Tools, Knowledge Base, Voice Agents and Chatbot Agents.
- Telephony — SIP Trunks, Dispatch Rules and Phone Numbers: the plumbing that connects real phone calls to your agents.
- Testing — the Agent Tester, for trying an agent in your browser.
- Account — Billing and your Account details.
Across the top you’ll find a date-range picker, an Export button, this User Guide, Help, and your account menu (with Log out) on the far right.
3. Your phone number
Where to find the phone number that was set up for you.
3 Open Phone Numbers to see your number
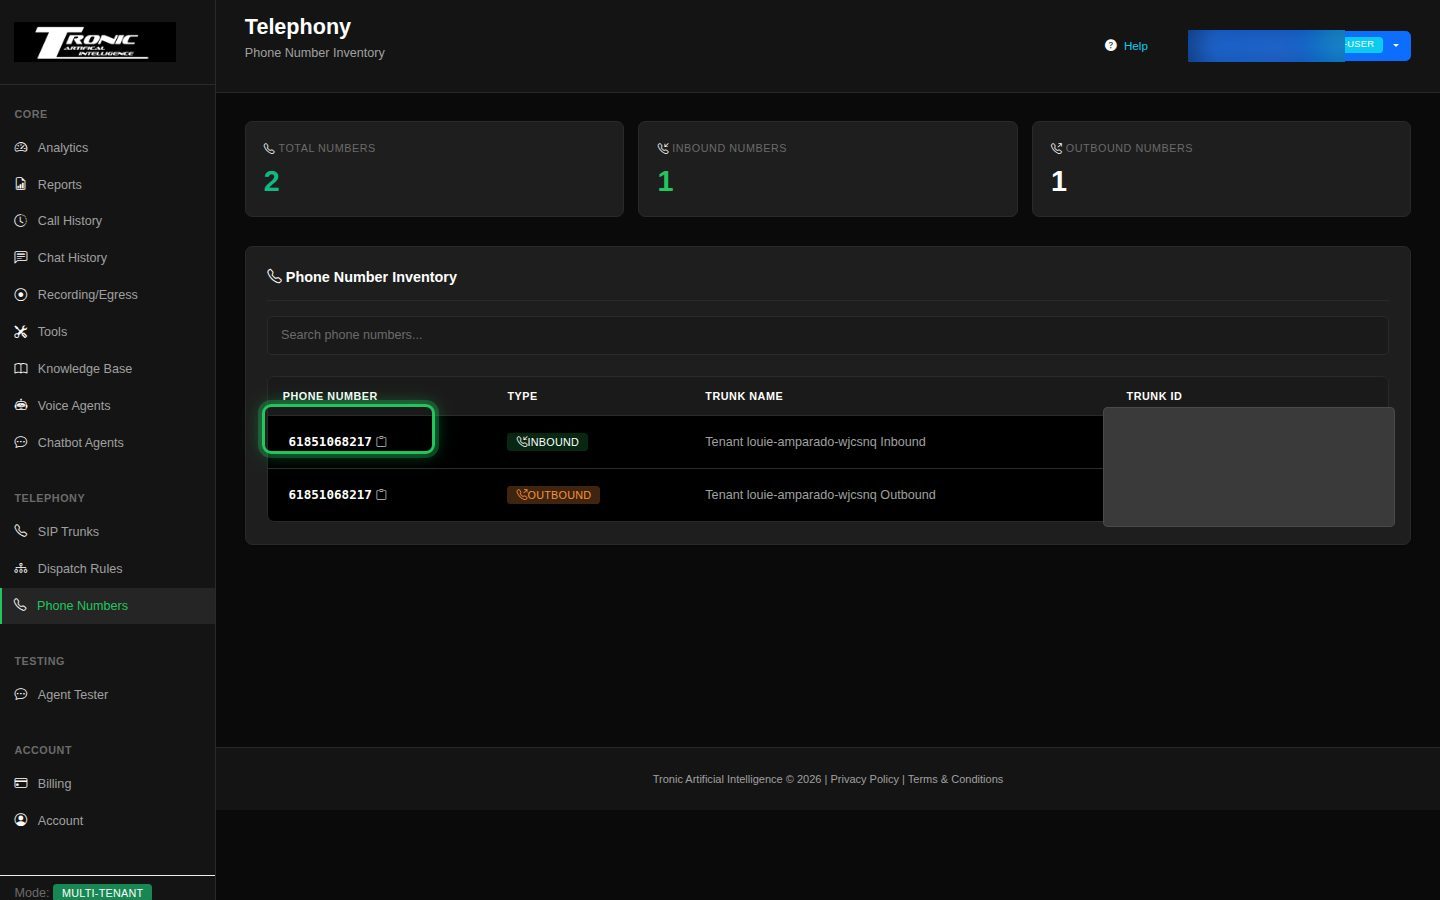
Click Phone Numbers in the menu (under Telephony). Your dedicated number is listed here — this is the number callers ring to reach your agent. The small icon beside it copies it to your clipboard. Your number was also included in your welcome email.
4. Create your first agent
Your “agent” is the AI that answers the phone and talks to callers.
4 Open Voice Agents and start a new agent
Click Voice Agents in the menu, then the green Create Agent button (top right).
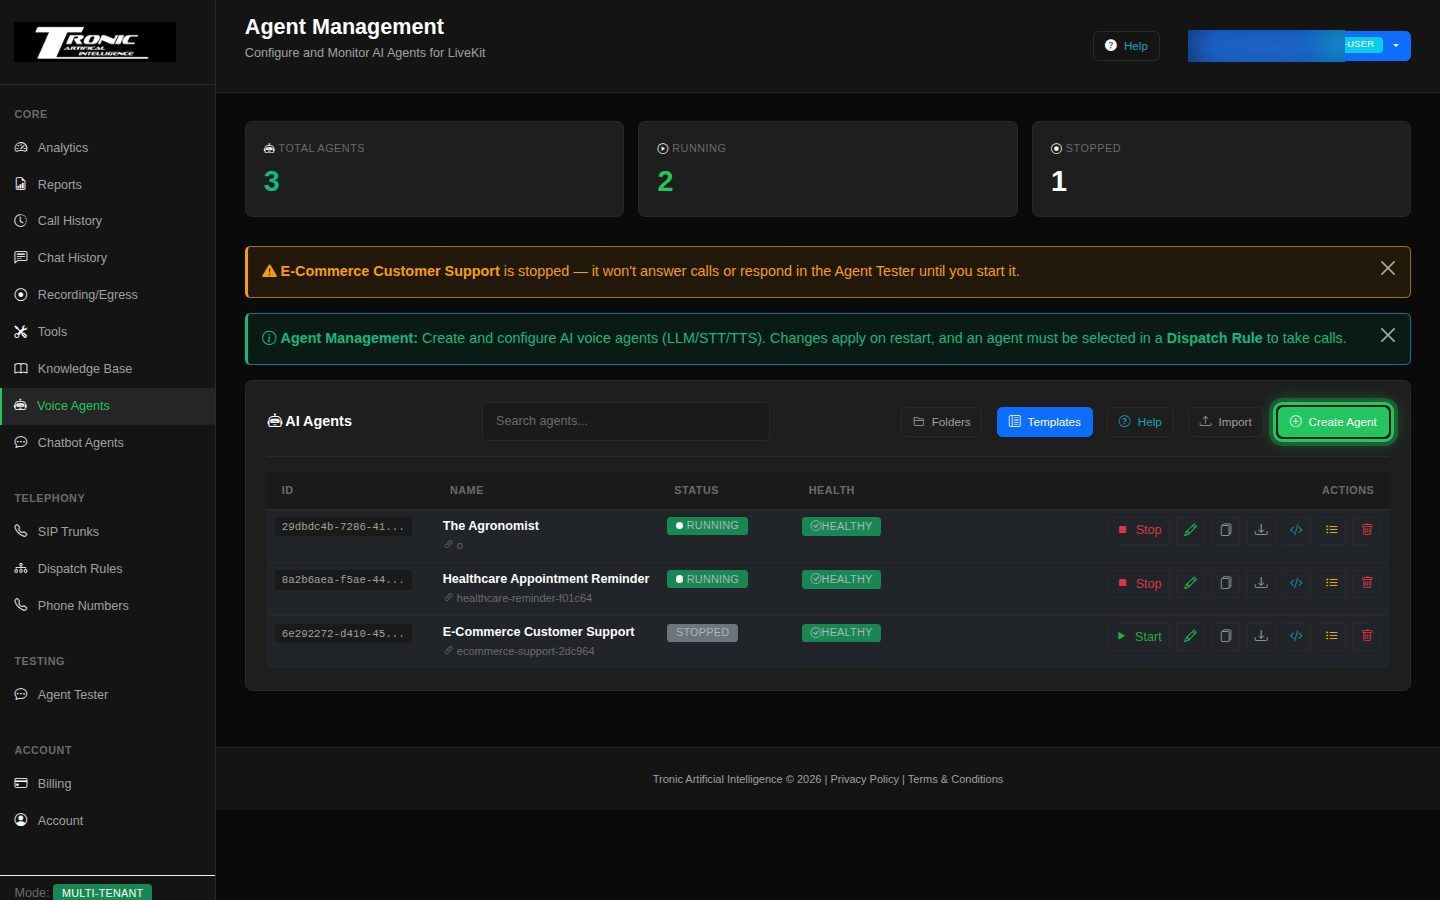
4b Give it a name, a greeting and instructions
Tell the agent who it is and how to behave:
- 1 — Agent Name: a name for your own reference.
- 2 — Initial Greeting: the first thing it says when it answers a call.
- 3 — System Prompt: its instructions — its role, what it should do, and any rules to follow.
The other tabs (Behavior, Speech Recognition, Voice, Advanced) let you choose the voice and AI models, but sensible defaults are already selected — you can leave them as-is to start. When you’re ready to tune them, see Voice Agents below.
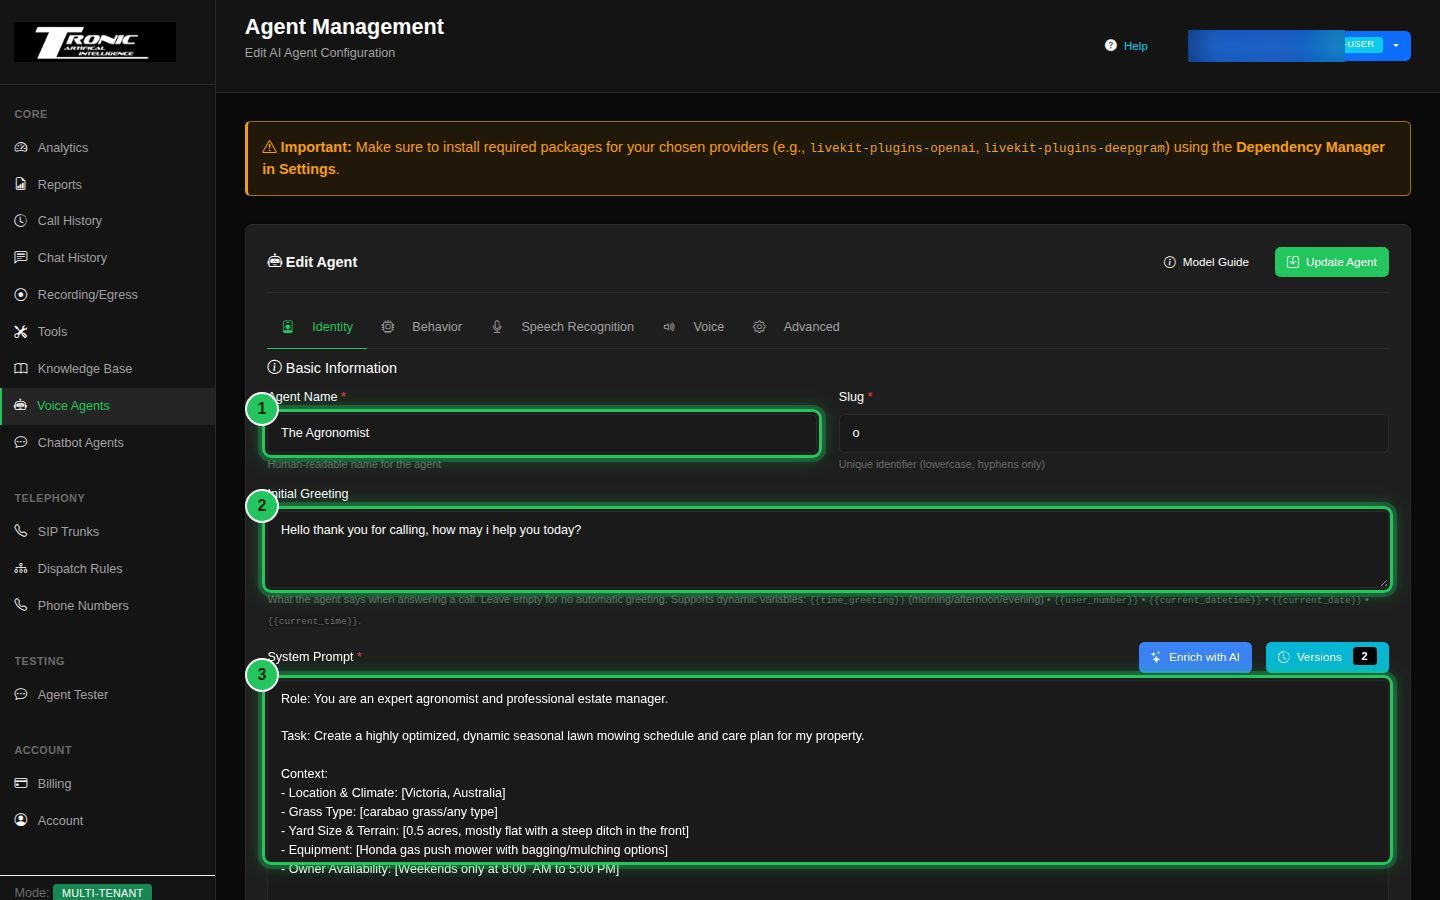
5. Start the agent
5 Click the green Start button
On the Voice Agents list, find your agent and click the green Start button. Its status changes to RUNNING. If an agent is stopped, the dashboard shows a yellow reminder (top) — that’s your cue to start it.
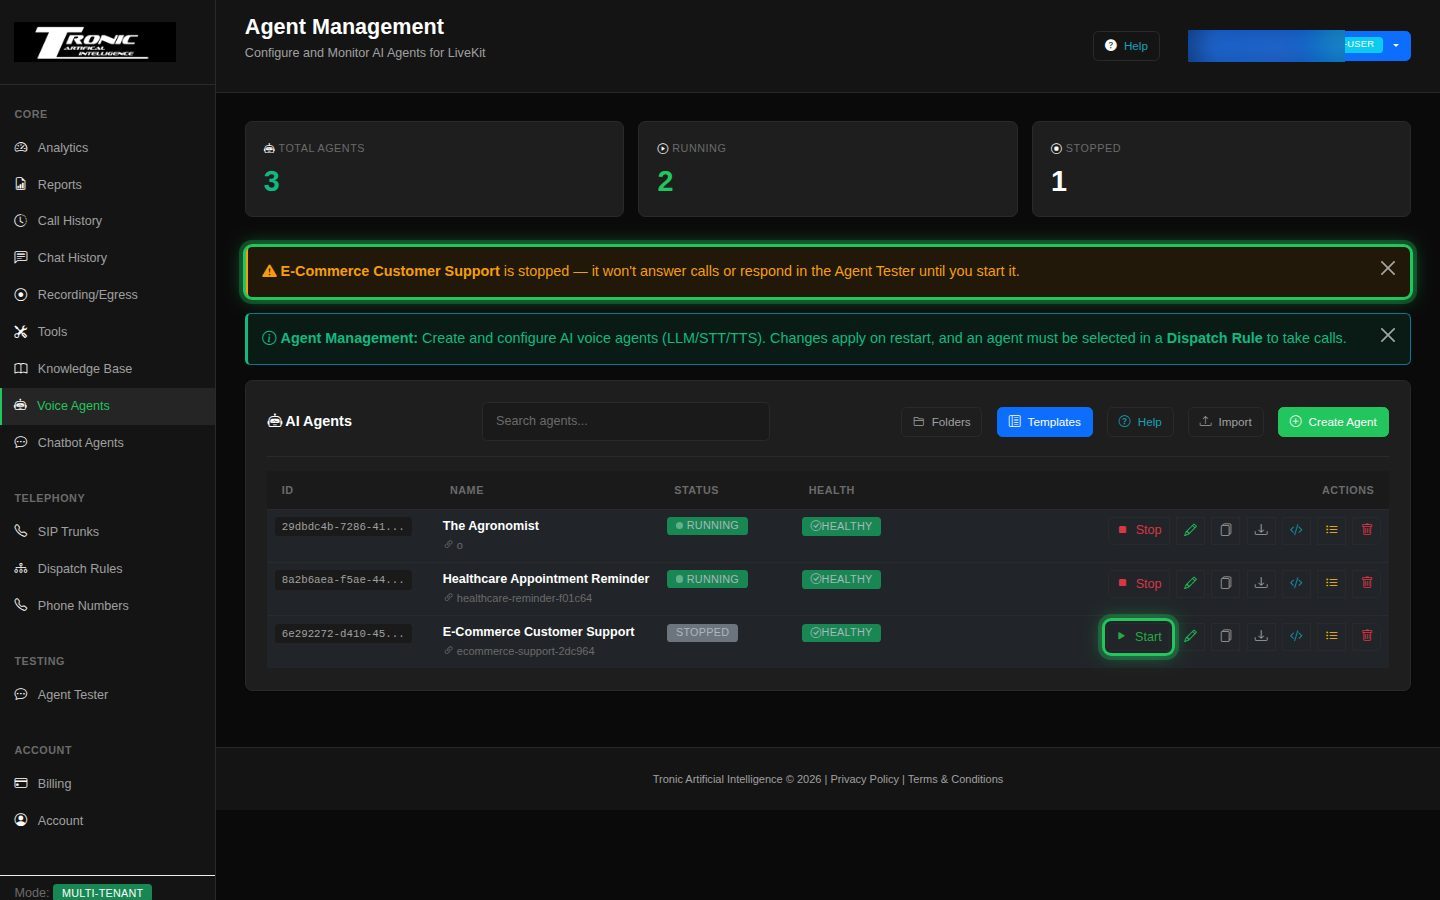
Running vs stopped. A running agent is standing by to answer calls. A stopped agent isn’t — callers will hear ringing with nothing answering. Running an agent costs nothing on its own; you’re only charged for the calls it actually handles, so there’s no reason to stop it between calls.
6. Point your number at it
Connect your phone number to the agent so incoming calls reach it.
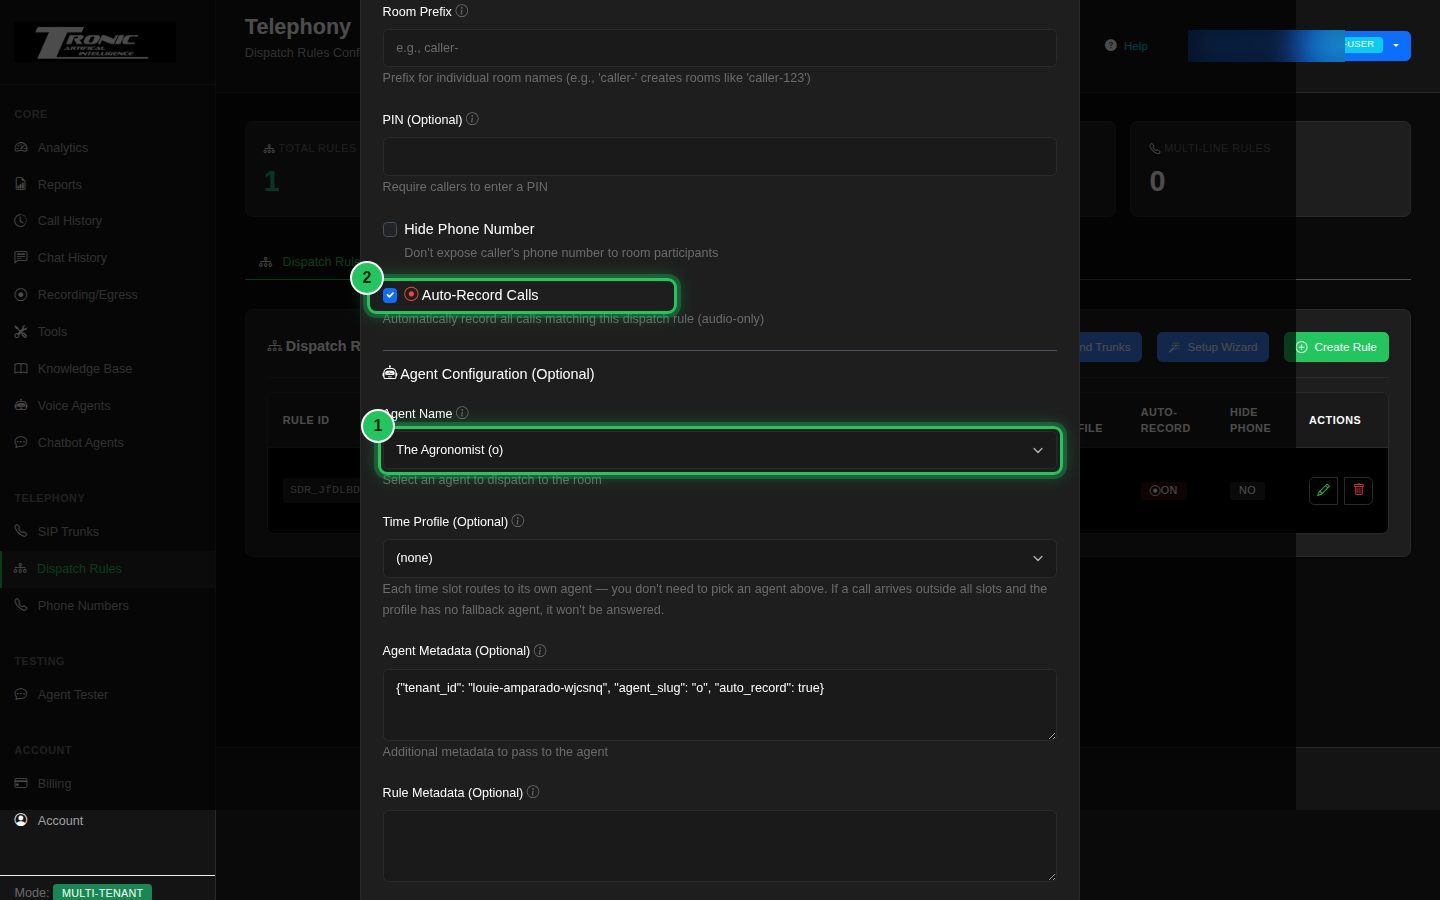
6 Open Dispatch Rules and choose your agent
Go to Dispatch Rules (under Telephony). A rule for your number is already set up for you — click the pencil to open it, then:
- 1 — Agent Name: choose the agent you just started.
- 2 — Auto-Record Calls: tick this if you want calls recorded (optional).
Click Save. Your number now sends calls to that agent.
7. Make a test call
Ring your number from any phone and talk to your agent.
7 Call your number
Dial your Tronic Cloud number (the one on the Phone Numbers page) from your mobile. Your agent should answer within a few seconds with the greeting you set. Every call then appears in Call History with a transcript, summary and (if you turned on Auto-Record) a recording.
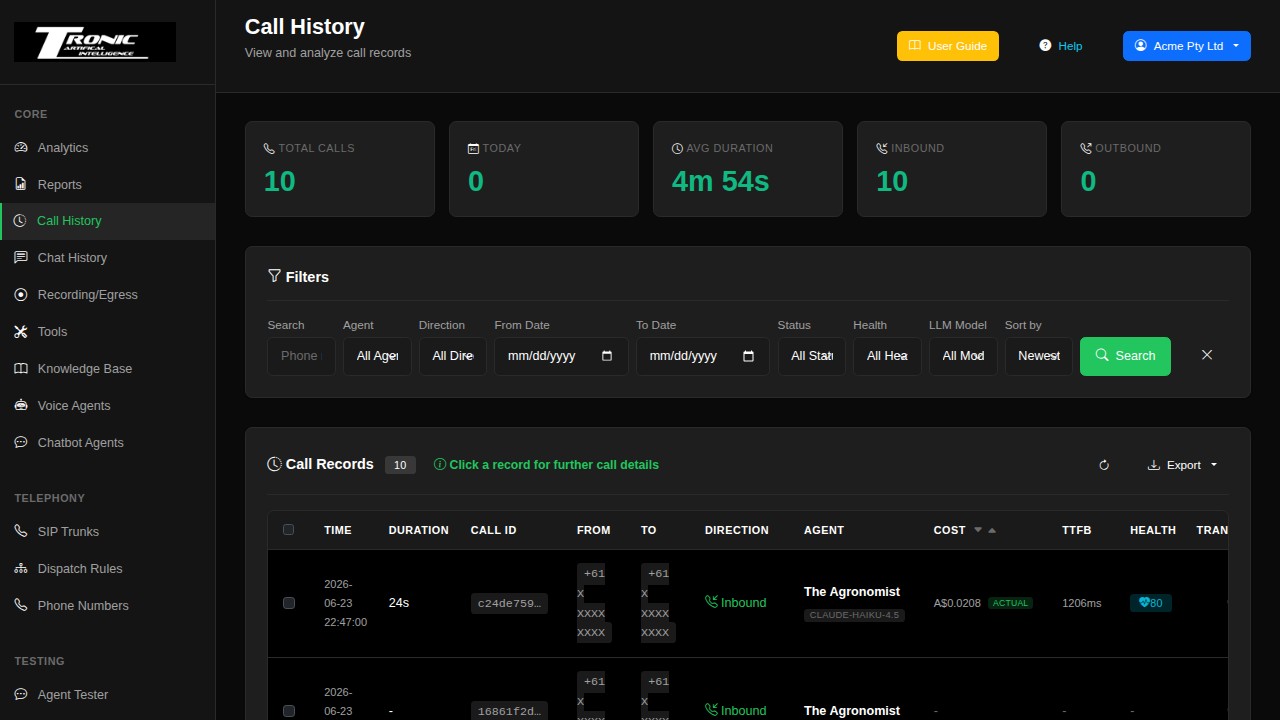
Nothing answered? Work through these in order: is the agent RUNNING (Step 5)? Does the dispatch rule point at that agent (Step 6)? Is your credit above the minimum (see Billing Overview)? There’s a fuller checklist in Troubleshooting.
8. Try it in the browser
Prefer not to use a phone? Test the agent right inside the dashboard.
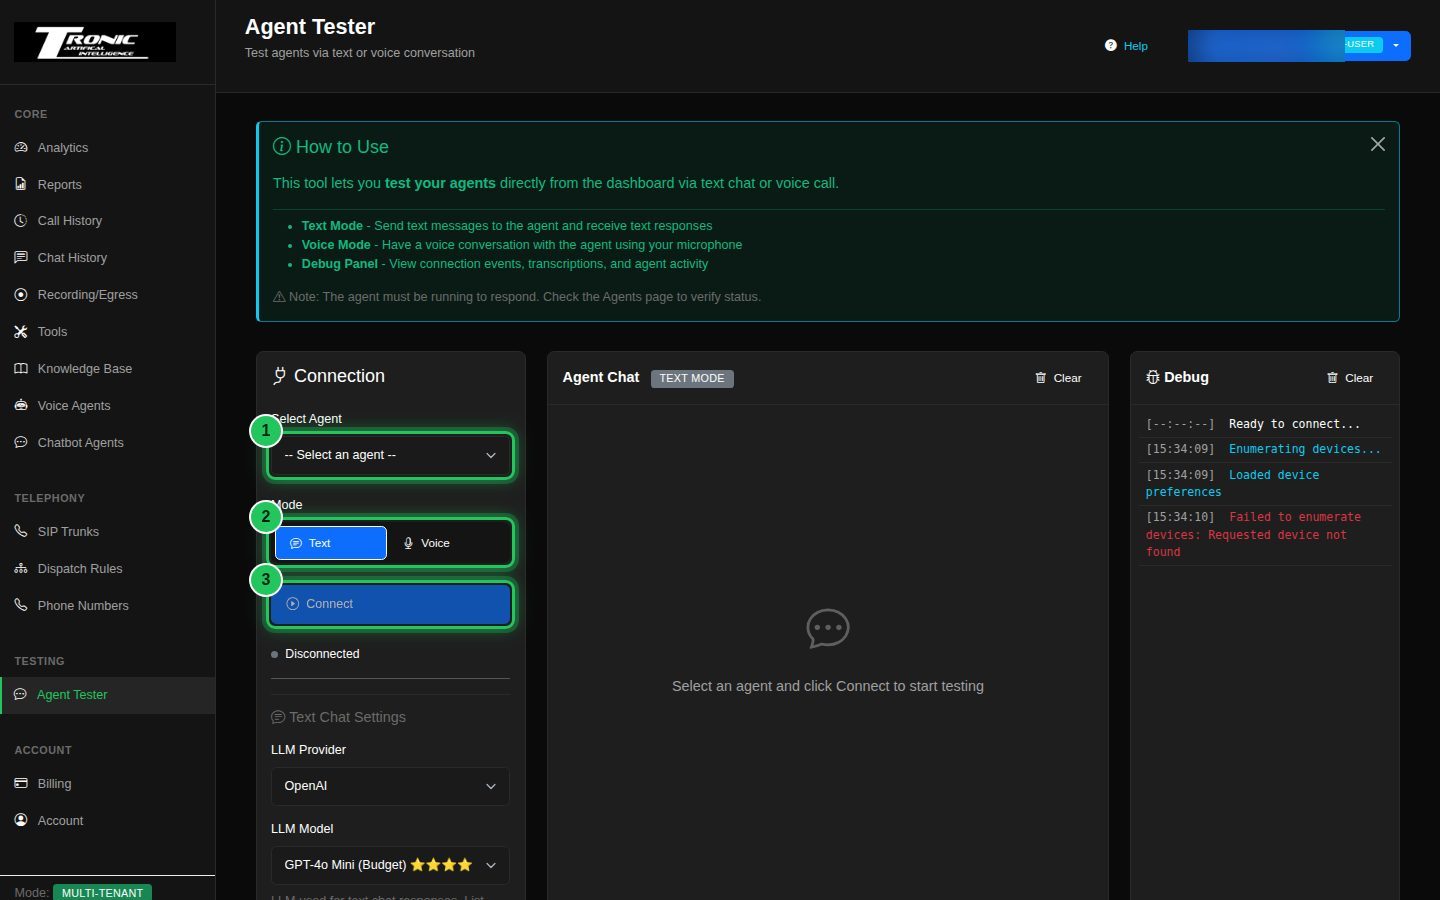
8 Use the Agent Tester
Open Agent Tester (under Testing) to chat or talk to your agent right in the browser — handy for trying changes before they go live:
- 1 — Select Agent: choose the agent to test.
- 2 — Mode: pick Text (type) or Voice (use your microphone).
- 3 — Connect: start the test session.
The agent must be started (Step 5) to respond.
Voice Agents
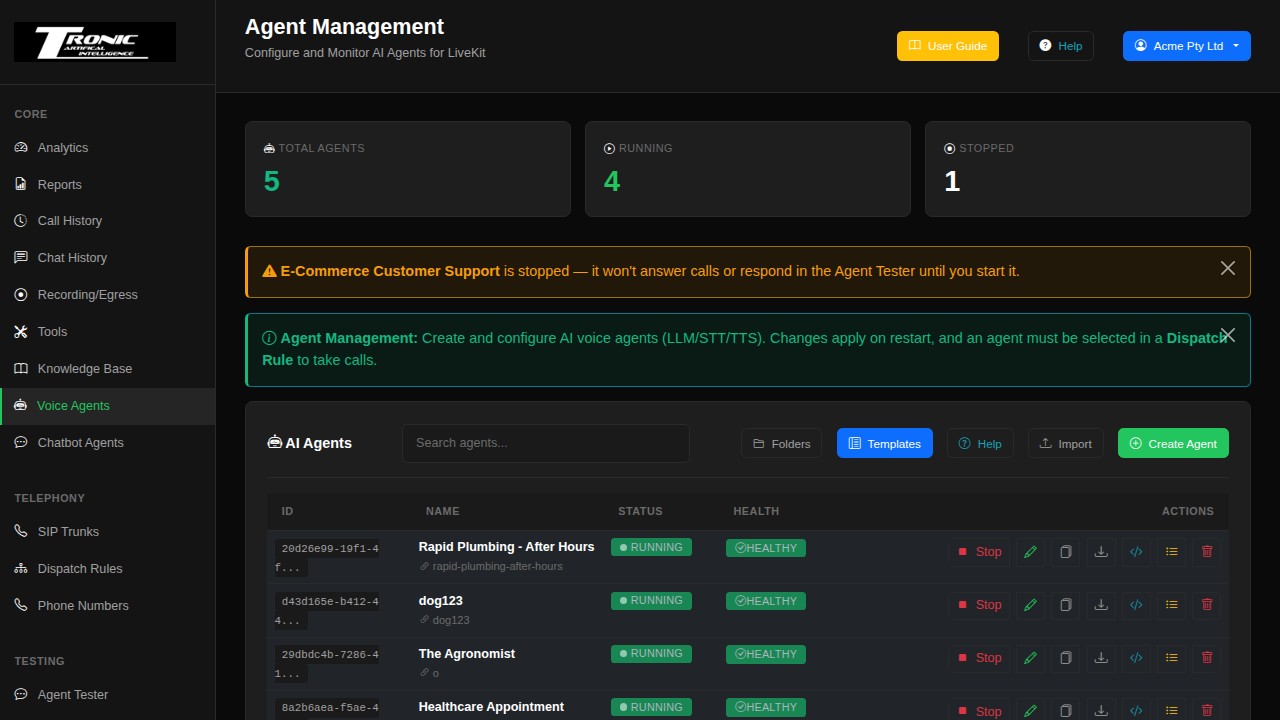
The Voice Agents page is your home base — every phone-answering AI you build lives here.
A voice agent is an AI receptionist, salesperson, or assistant that talks to callers on the phone. Each agent has its own personality, voice, and abilities. The Voice Agents page lists all of them, shows whether each one is switched on, and gives you the buttons to create, copy, back up, and delete agents.
1 Create an agent
Click the green Create Agent button at the top of the page. This opens the agent editor (covered in detail in the next section) where you give the agent a name, write its instructions, and pick its voice. When you save, the new agent appears in the list.
2 Create from a template
Next to Create Agent, the Templates button opens a gallery of nine ready-made agents — a healthcare appointment reminder, a clinic front desk receptionist, e-commerce support, real estate lead qualifier, hotel concierge, restaurant reservations, IT helpdesk, trades job booking, and a customer feedback survey. Each one arrives complete: a full set of instructions (including a shared block of phone-call delivery rules that keep the agent sounding natural — one question at a time, no “let me check” filler, no reading your details back at you), realistic business information, phone tools (hang up, transfer, date lookup) already attached, and sensible settings. Click Use This Template and you land in the editor, ready to swap in your own business details. The same gallery is also available as its own page at Agents → Templates.
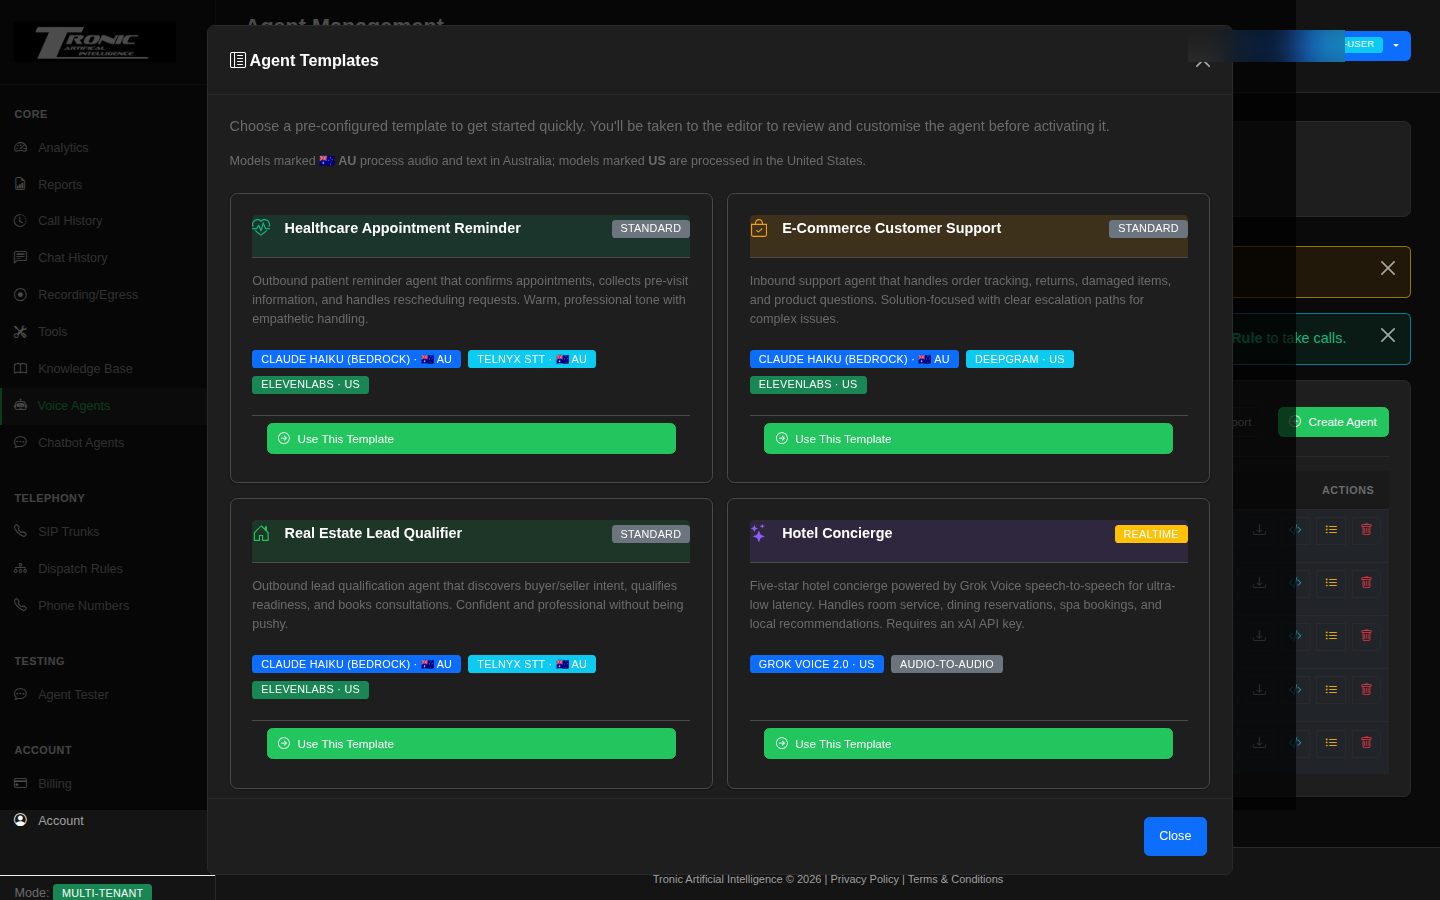
- Model badges: the coloured chips on each card show which AI models the agent will use (language model, speech recognition, and voice). These are chosen automatically to suit your installation.
- Clinic Front Desk: an inbound receptionist for a medical practice — answers practice questions, collects booking and reschedule requests, takes messages, and directs possible emergencies to 000. It's deliberately tuned to speak with unhurried pacing (a longer listening pause before replying) so callers who pause mid-sentence aren't cut off — if you want it snappier, lower Response Delay on the Conversation tab. Each call's details (patient name, request type, preferred times, callback number) are captured as structured data fields when Auto-generate summaries is on.
- Hotel Concierge: this template is the speech-to-speech showcase — it runs on Grok Voice (audio-to-audio).
- Customer Feedback Survey: designed for outbound campaigns. Each answer (satisfaction score, recommendation score, suggestions) is captured as a structured data field on the call record.
3 Start and stop agents
Each agent row has a Start / Stop button:
- Start switches the agent on. It will now answer any calls routed to it.
- Stop switches it off. Useful when you’re editing an agent and don’t want it taking calls mid-change.
The status badge next to the agent’s name shows the current state at a glance: green Running or grey Stopped. If any agent on the page is stopped, a yellow warning banner reminds you at the top.
4 Check agent health
The Health column tells you whether an agent has everything it needs to work:
- A green Healthy badge means all the AI services the agent uses have valid keys and installed software.
- A red badge means something is missing — usually an API key that hasn’t been entered yet, or a software package that isn’t installed. Click the red badge to open a popup listing exactly what’s wrong and where to fix it.
5 Duplicate, export, and import
- Duplicate: makes an exact copy of an agent — perfect for creating a variation without starting from scratch. The copy gets a new name and starts stopped.
- Copy to Chatbot Agent (the ⇄ button): makes a website chatbot out of a phone agent in one click. A preview opens first — pick a name and the chat mode (Full voice is pre-selected), then read the three lists: Copied (prompt, knowledge text, tool instructions, data-extraction fields, speech settings), Adapted (the language model and its fallbacks are rewritten into the chatbot shape, the greeting becomes the widget welcome message, fast-trip stall recovery is always off on chatbots, values outside the chatbot ranges are clamped) and Not carried over (phone transfers, hold, keypad input, voicemail and IVR detection, the routing slug, realtime audio-to-audio settings, resource limits, handoffs). Tools and knowledge-base collections are linked to the copy — a collection is shared, so editing it changes both agents. Warnings above the Copy button flag placeholders that will be blank on a website (
{{user_number}}— a visitor has no phone number) and prompt variables the widget's embed page would have to supply. The chatbot is created switched off so you can review it before it answers anyone. It is a one-time snapshot: changing either agent later does not change the other. A realtime (audio-to-audio) agent copies without a recogniser or voice — tick the acknowledgement, then pick both on the chatbot's Voice tab. - Export: downloads the agent as a JSON file. Use this as a backup, or to move an agent to another system. The file carries everything the editor saves: prompt and greeting, the LLM with its fallback chain, every speech-recognition and voice setting (including per-provider extras), conversation dynamics, handoffs, tool assignments and the knowledge-base collections attached to the agent.
- Import: upload a previously exported JSON file to recreate that agent here. Knowledge-base collections are re-attached by matching a collection with the same name on this dashboard; any that do not exist here are skipped, so open the editor and attach them by hand after importing to another system.
- View Logs: opens that agent’s recent activity log — the first place to look when an agent answers but behaves oddly.
- Move to folder: agents can be grouped into folders to keep a long list tidy; the folder button next to Create Agent manages the folders themselves.
6 Delete an agent
Open the agent, scroll to the bottom, and use Delete Agent. You’ll be asked to confirm. Deleting removes the agent’s configuration — its past calls stay in Call History.
7 Prompt version history
Every time you save a change to an agent’s instructions, the previous version is kept automatically. In the editor, click the teal Versions button to:
- See every saved version with a timestamp and a label showing where the change came from: manual (a browser edit), enrich (the Enrich tool).
- Click Diff on any version to see a colour-coded comparison — green lines were added, red lines removed.
- Click Restore to load an older version back into the editor. You still need to press Update Agent to save it.
By default the last 20 versions are kept per agent (adjustable from 5 to 50). Older ones are removed automatically.
The Agent Editor
The tabs that shape everything about how your agent sounds, thinks, and behaves.
Open any agent (or click Create Agent) and you’ll see the editor with these tabs across the top: Identity, Behavior, Speech Recognition, Voice, Advanced. You can save at any time — you don’t have to fill in every tab. If the agent is running when you save, restart it (Stop then Start) so live calls pick up the change.
Identity tab — who the agent is
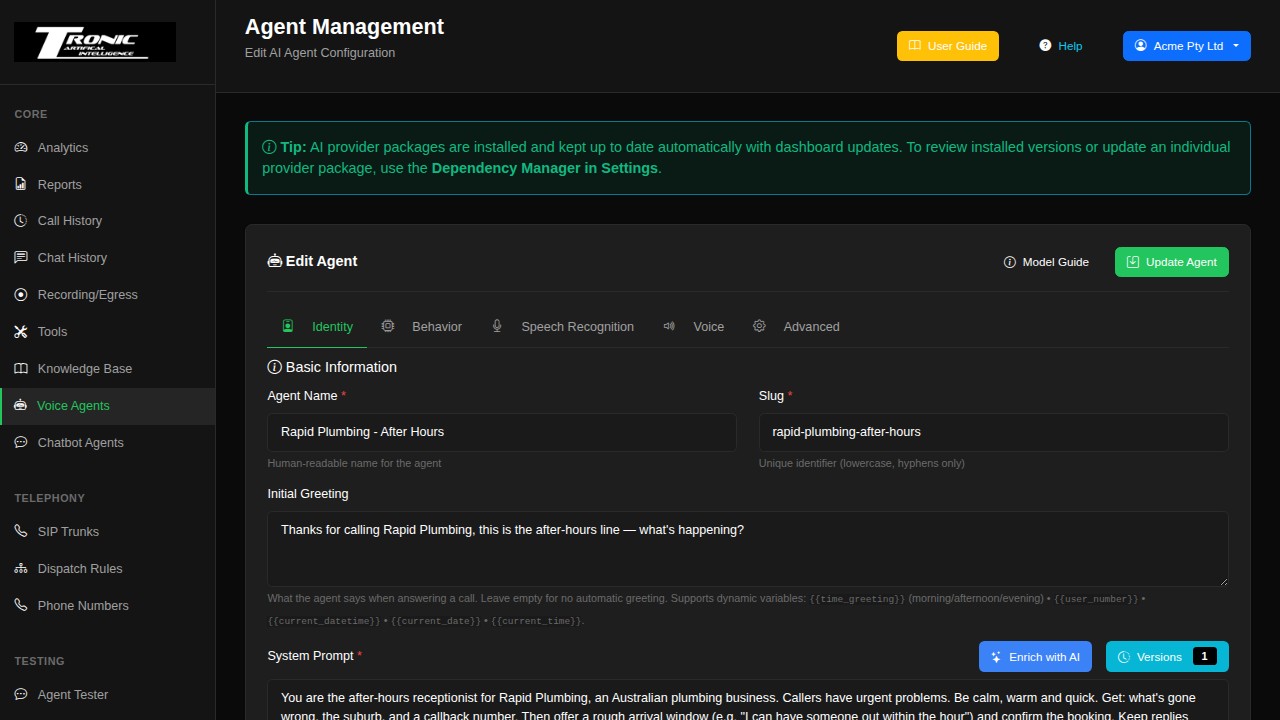
- Agent Name: the display name you’ll see everywhere in the dashboard and in call history. Pick something meaningful like “Reception” or “After-Hours Support”.
- Slug: a short, web-safe version of the name that the system uses internally for call routing. It’s generated automatically from the name — you rarely need to touch it. If you do change it, every dispatch rule that sends calls to this agent is updated automatically when you save.
- Folder: optional grouping so a long agent list stays tidy.
- System Prompt: the heart of the agent. Written instructions that define its personality, its job, what it should and shouldn’t say, and how it should handle situations. Write it like a briefing for a new employee: who they are, who they work for, what a good call looks like. Shorter, focused prompts respond faster than sprawling ones.
- Initial Greeting: the exact sentence the agent speaks when it answers. Leave empty for no spoken greeting (the agent then waits for the caller to talk first).
- Reference Information: facts the agent should always know — opening hours, address, prices, policies. Keeping facts here (rather than buried in the System Prompt) keeps the prompt clean and easy to maintain.
- Tool Usage Instructions: tells the agent when to use each tool it has been given (tools are set up on the Tools page). Example: “If the caller asks for a human, use the transfer tool to send them to Reception.” You describe the when; the system handles the how. Switching a tool on adds its standard line to this box for you, and switching it off removes that line again — but only if you haven’t changed it; a line you have rewritten is always left alone.
- RAG Knowledge Base Collections: attach one or more document collections from the Knowledge Base page. The agent will search them automatically when a caller asks something the documents can answer.
Writing a good System Prompt
The System Prompt is where most of an agent’s quality comes from — it’s worth ten minutes of care. Write it like a briefing for a brand-new employee, covering five things:
- Who it is: a name and role — “You are Sarah, the friendly receptionist for Smith Plumbing in Brisbane.”
- How it speaks: tone and length — “Be warm and professional. Keep answers to one or two short sentences — this is a phone call, not an essay.”
- What its job is: the tasks, in priority order — “Your job is to find out what the caller needs, answer questions about our services and hours, and take a message if a plumber isn’t available.”
- What it must never do: the guard rails — “Never quote exact prices — say a plumber will confirm the cost. Never make up information; if you don’t know, say so and offer to take a message.”
- How calls should end: — “Before hanging up, confirm you have the caller’s name and phone number, and thank them for calling.”
Dynamic variables — personalising every call
You can put placeholders in the System Prompt, greeting and voicemail message that get replaced with real values when each call starts. The most useful ones:
- {{user_number}}: the caller’s phone number on inbound calls, or the number being dialled on outbound calls.
- {{current_datetime}}, {{current_date}}, {{current_time}}: the current date and time in your configured timezone — so the agent always knows what day it is.
- {{time_greeting}}: becomes “morning”, “afternoon”, or “evening” — handy in greetings like “Good {{time_greeting}}, thanks for calling.”
- Campaign variables: outbound campaigns add more, like {{Name}} and {{CompanyName}} — see the Campaigns section.
- Caller lookup variables: with the
lookup_callertool on, every field your lookup returns ({{customer_name}}, {{booking_id}}…) is a placeholder too, filled before the greeting — see Tools → Know who is calling before you say hello.
Enrich with AI
- Enrich with AI (blue button above the System Prompt): the AI rewrites and improves your prompt for you. Paste in rough notes and it turns them into a well-structured prompt. Nothing is saved until you accept the result and click Update Agent.
Behavior tab — the agent’s brain
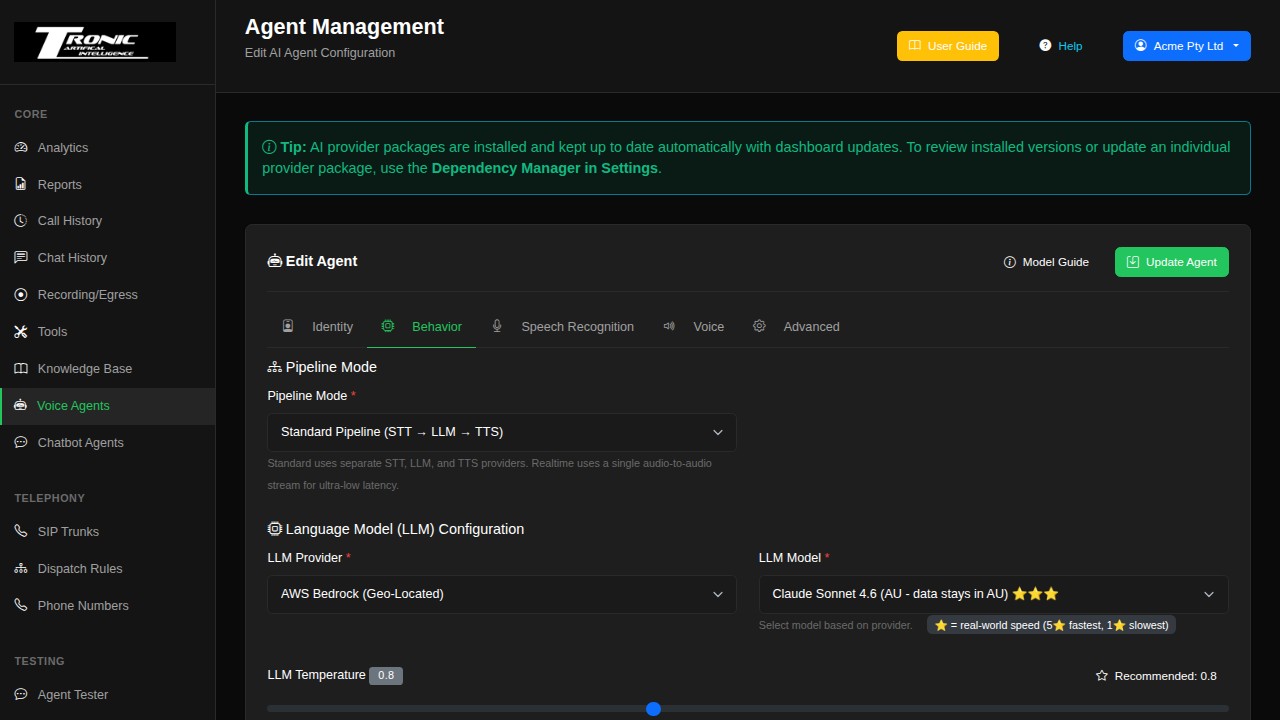
The first choice on this tab is the most important one:
- Pipeline Mode — Standard (STT → LLM → TTS): three separate services work as a relay team. One converts the caller’s speech to text, one (the AI brain) decides what to say, and one converts the reply back into speech. This is the flexible choice: you can mix and match the best provider for each job, and it works with every feature in the editor.
- Pipeline Mode — Realtime (audio-to-audio): a single AI model listens and speaks directly, with no separate speech-to-text or text-to-speech step. Conversations feel very natural and fast, but you’re limited to the voices and behaviours that the realtime provider offers. When you pick Realtime, the Speech Recognition and Voice tabs are mostly replaced by a notice, because the realtime model handles those jobs itself.
Google Gemini Live
Google’s realtime voice models come in two flavours, and which ones you see depends on whether the agent is set to Google AI Studio or Google Vertex AI.
- Gemini 3.8 Live — the current model and the one new agents start on. Google recommends it in place of both older Gemini voice models.
- Gemini 3.8 Live Extended Thinking — the same model, but it reasons in the background before answering. Better on complicated questions, slower to reply, and the caller hears that pause. It has its own Thinking Level setting (Minimal / Low / Medium / High); Low is the default and is usually the right choice on a phone call. This model will not start without a level set, so the dashboard always sends one.
- Gemini 3.1 Flash Live and Gemini 2.5 Flash Native Audio — the previous models, no longer offered: Google switches both off on 17 November 2026. Agents that used them were moved to Gemini 3.8 Live automatically when the dashboard updated. 3.8 Live has no Proactivity, Affective Dialog or Thinking Budget settings, so those switches no longer apply to a moved agent.
Which language Gemini Live speaks
There is no language setting for Gemini Live. Gemini chooses the language from your System Prompt and from the language the caller speaks. We tested this with Malayalam, Hindi and Spanish on both Google AI Studio and Vertex: a language setting was accepted and made no difference, while one line in the prompt did. So the editor shows a note in its place.
- One fixed language: add a line such as
Always speak Malayalam, even if
    the caller speaks English.
to the System Prompt. - Follow the caller: add
Reply in the same language the caller is speaking. - Greeting: write it in the same language — it is spoken first, before the caller says anything, so it sets the tone for the call.
global, Asia, Australia or the
Middle East (tested October 2026).
OpenAI GPT-Live — a different kind of realtime agent
Every other realtime option takes turns: it listens, you stop, it answers. OpenAI GPT-Live does both at once, the way a person does — it is still listening while it talks, so a caller can cut in mid-sentence and it notices immediately. It also decides for itself when to start and stop, which is why none of the usual turn-detection settings appear for it. Pick it from the Realtime Provider dropdown; it uses the same OpenAI key as the other OpenAI options.
The thing worth understanding before you use it is that GPT-Live is two models, not one:
- The voice is GPT-Live itself. It handles the conversation — how the agent sounds, how it chats, and what it says while it is waiting. It takes the agent’s ordinary prompt, the same one every other agent uses.
- The thinking happens in a second model behind it, the Backend Model. That one does the reasoning and runs your tools. It has its own separate Backend Model Instructions box.
- Voice: six voices — Marin, Cedar, Beacon, Cinder, Stone and Vesper. These are not the same list as the other OpenAI realtime models; only Marin appears in both. The voice is fixed once a call starts.
- Backend Model: Luna is the fastest and the sensible default for phone calls. Terra and Sol are more capable but slower, and the caller hears that wait.
- Reconnect After: only worth setting on unusually long calls. The connection renews behind the scenes and the conversation carries over, so the caller hears nothing.
Billing is two lines, not one. The voice is charged by how long the call lasts, and the backend model by how much thinking it does. Both show on the call record.
Azure OpenAI — OpenAI realtime models on your own Azure resource
Pick Azure OpenAI as the Realtime Provider to run the GPT Realtime models on your own Azure OpenAI resource.
- Azure Deployment Name (Advanced Realtime Options): the name of your model deployment in the Azure portal. The editor fills it in with the model name, which is what Azure suggests when you deploy a model. If you named your deployment differently, type your name here; it is kept when you change the model. If the box is left empty, the agent uses the model name.
For Standard mode, configure the AI brain here:
- LLM Provider: which AI company powers the agent’s thinking — OpenAI, Google, and others.
- LLM Model: the specific model. Models in the list carry star ratings for speed — for live phone conversations, faster models feel dramatically better. Smaller “mini”, “nano”, “flash” and “lite” models answer faster and cost less; larger ones reason better but pause longer on a phone line. Models not available in your configured region are greyed out with an explanation.
- Temperature: how creative the agent is, from 0 to 1. Low values (0.1–0.3) give consistent, predictable answers — best for business use. Higher values make replies more varied but less controlled.
- Reasoning effort on voice calls: this dropdown appears only when the selected model can “think” before answering — Claude, GPT (including GPT-OSS), Grok 4.6, Qwen, GLM, DeepSeek, Nemotron and Kimi models on AWS Bedrock, Gemini 3.x on Google / Vertex, Grok 4.5 and Grok 4.7 on xAI (4.7 always thinks a little, so even on Off expect two seconds or more before each reply — at least twice Grok 4.5, and in our launch-week tests occasionally much longer; for busy phone lines Grok 4.5 is the safer choice), DeepSeek V4 Flash on SCX (Au). Off (the default) keeps replies fastest and is the right choice for almost every phone agent. Low / Medium / High make the model reason progressively harder before each reply — smarter on complex questions, but the extra thinking is silence the caller has to sit through, so the dashboard asks you to confirm before saving anything above Off. The note under the dropdown explains exactly what each level does on the model you’ve chosen, because models differ: some always think a little even on Off, some don’t think at all unless you raise the level, and on a few Off actively switches thinking off. If you switch to a model that doesn’t support reasoning, the dropdown hides itself and quietly resets to Off — that’s expected, not a fault.
- Enable prompt caching (Claude on Bedrock): off by default. The provider keeps a copy of the system prompt between calls, so replies start sooner and cached reads cost much less. Leave it off if the prompt keeps changing: writing the cache costs about 25% more than normal input, and that copy may never be used.
For Realtime mode you instead pick:
- Realtime Provider & Model: which audio-to-audio model to use.
- Realtime Voice: the built-in voice offered by that provider.
- Output Modalities: whether the model produces speech directly, or produces text that a separate voice (from the Voice tab) then reads out.
- Provider-specific extras: depending on the model you’ll also see options like Temperature, Thinking Budget / Reasoning Effort (how much the model deliberates before answering — more thought, slower replies), Enable input noise reduction, and Enable context window compression (keeps very long calls from exceeding the model’s memory). The defaults are sensible — each option explains itself inline.
LLM fallback — staying up when a provider goes down
AI providers occasionally have outages or slow periods.
- Enable LLM Fallback: builds a backup chain — primary → backup 1 → backup 2. If the current provider doesn’t reply within the timeout during a live call, the next one takes over mid-conversation. Callers just hear a normal (if slightly delayed) reply.
- Fallback Timeout: how long to wait for a reply before switching (default 4 seconds).
- Fallback Provider / Model and 2nd Fallback: your backups. For best protection, pick a different company than your primary, so one provider’s outage can’t take out your whole chain.
Conversation Dynamics — timing and interruptions (also on the Behavior tab)
Below the model settings, the Conversation Dynamics section controls how the agent waits and handles being talked over. The defaults suit most agents:
- Response Delay: a deliberate pause before the agent replies (0 = fastest). Add a little if the agent feels like it’s pouncing on callers — if it cuts people off mid-thought, try 0.3–0.4 seconds.
- Endpointing Mode: how the agent decides the caller has finished a sentence — a fixed wait, or a dynamic one that adapts to each caller’s speaking rhythm.
- Min Words to Interrupt: how many words a caller must say before the agent stops talking (default 2). Keeping it at 2 or higher stops coughs and background noise from cutting the agent off mid-sentence. Phone agents listening with Deepgram Flux need 2 or higher — a lower value is raised to 2 automatically on those calls.
- Barge-In Threshold: how long the caller must be speaking before it counts as an interruption at all (default 0.5 seconds). 0.3 seconds lets callers interrupt quickly while ignoring a short “uh-huh” or “yes”.
- Discard Audio During Announcements: while the agent plays something callers can’t interrupt, anything they say is thrown away. Leave it on (the default) unless you need to catch what callers say during announcements.
- Echo Cancel Warmup: for a moment after the agent starts speaking, the caller’s audio is ignored so the echo of the agent’s own voice can’t make it stop talking. Leave it on Automatic: 0 seconds on outbound calls (the person’s first words are never lost), 0.5 on inbound phone calls, 3 on web calls. Set a number only if one line has echo at the start of calls; 0 turns it off.
- Resume After False Interruptions: if an “interruption” turns out to be noise, the agent picks up where it left off (the False Interruption Timeout sets how long it waits before resuming).
- Preemptive Response Generation (Advanced): the agent starts composing its answer while the caller is still finishing — faster replies, at a tiny risk of jumping the gun. On by default.
- Filter Markdown from Speech: strips text formatting before speaking so the agent never says “star star” out loud. Leave on.
Speech Recognition tab — how the agent hears
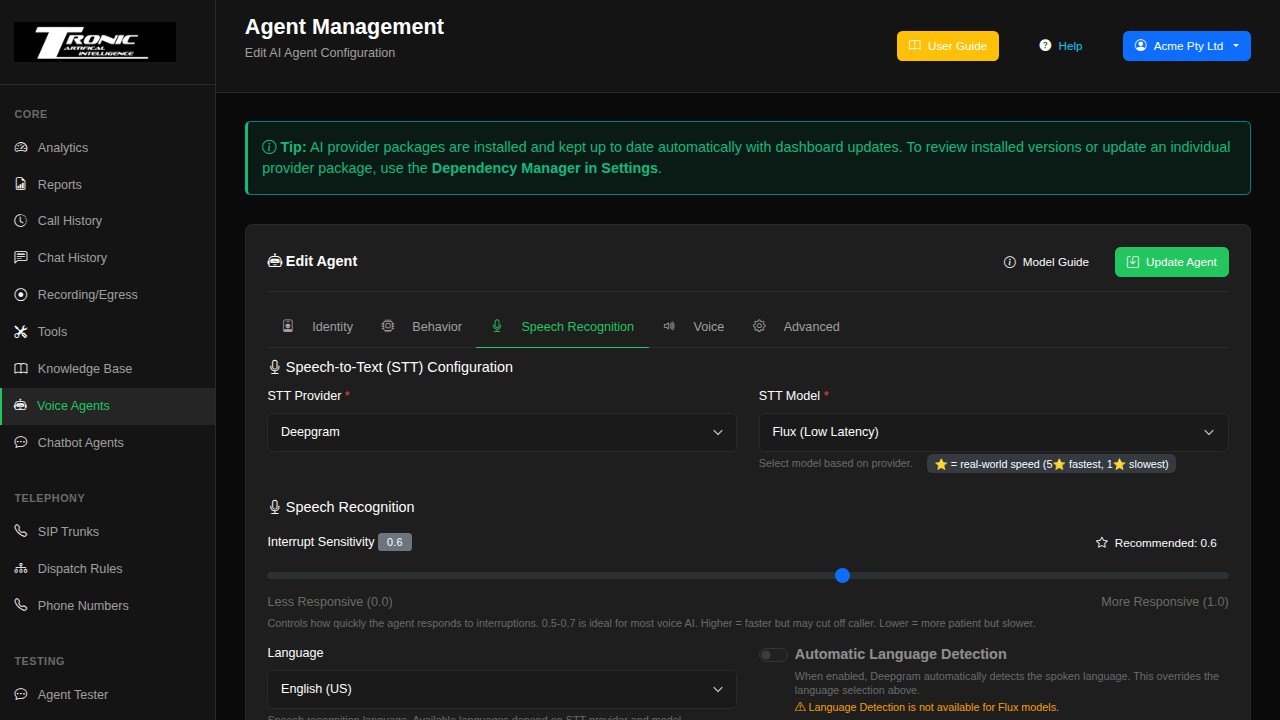
- STT Provider: the service that turns caller speech into text. Deepgram is the popular default; ElevenLabs, Google, OpenAI, and others are also available.
- STT Model: the specific recognition model. Newer models are usually both faster and more accurate, and the list carries star ratings for real-world speed. On Deepgram, a good rule of thumb: Flux for English phone calls (the quickest turn-taking), Flux Multilingual for its ten languages, Nova 3 when accuracy matters most or for many other languages, and Nova 3 Medical for medical vocabulary.
- Language: the caller’s main language (e.g.
en). Some providers offer a multilingual option, and an Automatic Language Detection switch lets the recogniser work it out itself. - Flux Multilingual (Deepgram): the conversational Flux recogniser in a version that understands ten languages (English, Spanish, French, German, Hindi, Russian, Portuguese, Japanese, Italian and Dutch), detects the language automatically, and keeps up even when a caller switches language mid-call. If you set a Language, it is used as a hint to bias recognition; otherwise detection is fully automatic. Standard Flux remains the pick for English-only lines.
- Keywords / Custom Vocabulary / Key Terms: words the recogniser should listen out for — product names, brand names, industry jargon, unusual surnames. Adding them dramatically reduces mishearings of the words that matter most to your business. (The exact field name varies by provider.)
- Smart Formatting (Dates & Currency) / Remove Filler Words: provider niceties — format numbers and dates properly in transcripts, and drop the “um”s and “uh”s so the AI reads cleaner text.
Audio Input Settings — voice detection, turn-taking, and noise (Speech Recognition tab)
Further down the same tab, this section decides when the agent believes someone is talking and when they’ve finished. Change one thing at a time and re-test:
- Enable VAD (Voice Activity Detection): the ear that notices speech starting and stopping, filtering out silence and background noise. Leave on; the Speech Detection Engine dropdown picks which engine does it.
- Microphone Sensitivity: lower picks up quiet speakers but also more background noise; higher ignores noise but can miss soft voices.
- Min Speech Duration / Min Silence Duration: how long a sound must last to count as speech, and how long a pause must last before the agent decides the caller has finished. Raising Min Silence helps with slow, thoughtful callers who get talked over.
- Turn Detector (Advanced): smarter end-of-sentence prediction beyond simple silence. Audio (v1-mini) — recommended — listens to tone and pacing to tell a mid-thought pause from a finished sentence. Text is the older transcript-based method; Off uses silence only (cheapest, but the agent may jump in during thinking pauses). Turn Detection Sensitivity fine-tunes how confident it must be.
- Noise Cancellation: cleans up the caller’s audio before the agent hears it — helpful for callers on speakerphone, in cars, or on noisy sites. Pick an engine and a Suppression Strength (higher removes more noise but can start eating quiet speech). Leave off if your callers are usually somewhere quiet.
- Flux transcript options: with a Deepgram Flux model selected, the Speech Recognition tab also shows Spoken numbers as digits (“eight two seven four one” becomes 82741 — handy for order and phone numbers reaching tools intact), a Profanity filter, and Number redaction (Off / Numbers / Aggressive) which removes spoken numbers from the transcript the agent, its tools and Call History see. All three apply from the next call.
- Google Gemini Live transcription: Google’s newest speech recogniser (Gemini 3.5 Transcribe Live, 85+ languages, about $0.009 a minute). It appears in two places: as its own provider, Google Gemini (AI Studio), which uses the same Google AI Studio API key as the Gemini language models; and as a model under Google Cloud, which uses your Google Cloud service-account file. On Google Cloud it always runs on Google’s global endpoint — Google does not offer it in individual regions yet — so your Speech Recognition region setting does not apply to it; pick Chirp 3 instead if your audio must stay in one region. Set the Language as usual, or leave it on auto-detect. Custom Vocabulary works (brand names, street names and jargon it would otherwise mishear); Smart Formatting and Remove Filler Words are greyed out because Gemini formats the text itself. Google closes each live session after 10 minutes and the dashboard reconnects straight away, so long calls keep being transcribed. Because Google does not report usage for this model, the call’s speech-recognition cost is worked out from the call length.
- Secondary languages (ElevenLabs Scribe v2 realtime): a comma-separated list of language codes (for example
es, fr) the caller may switch to in addition to the main Language. Leave blank to let Scribe choose from every language it supports. - Flux options: when a Deepgram Flux model is selected, extra switches appear (Flux Turn Detection, thresholds, Echo Guard). Their inline notes explain each; the defaults are the recommended setup.
STT Stall Recovery — when the speech-to-text provider has an outage
Occasionally a speech-to-text provider has a brief outage mid-call: the phone line is fine, but the words stop coming through — the agent effectively goes deaf without knowing it, and the caller ends up talking to silence. STT Stall Recovery (on the Speech Recognition tab) protects against exactly this. It is off by default; switch it on per agent to enable it.
- What it does when on: the agent notices within a few seconds that speech has stopped converting to text while the caller is still talking. It first recovers any delayed words automatically; if the words are truly lost it politely asks the caller to repeat (with a hard limit so it can never nag); if the connection to the provider is dead it disconnects and redials it behind the scenes — the caller just hears a short pause.
- Dead-from-the-start connections are fixed fast: when the provider connection is broken from the very first moment of the call (the caller speaks, but not a single word ever comes through), the agent no longer works through several “could you repeat that?” rounds first — it replaces the connection immediately, within roughly the first ten seconds, then apologises once and asks the caller to say it again. This rescues the short calls where a caller would otherwise have given up before recovery finished.
- Recovery Threshold: how long to wait after the caller stops speaking before recovery kicks in. Leave blank for automatic — the system picks a safe value for the selected provider.
- Goodbye Message: the last resort. If the provider cannot be revived at all, the agent speaks this message once and ends the call cleanly — far better than leaving the caller talking to a dead line. Word it however suits your business, but remember it is spoken once, right before the call ends: don’t promise transfers, callbacks, or menu options. Leave blank for the built-in default.
- Backup Transcription Provider (optional): one more rescue attempt before the goodbye. If you pick a backup, then when the main provider can’t be revived the call quietly switches to the backup and keeps going — the caller just hears one “sorry, could you repeat that?” instead of the goodbye, and the backup handles the rest of the call. Pick a different company than your main provider (two services from the same company tend to fail together). If the backup fails too, the goodbye still fires — choosing a backup never removes the safety net. Backup minutes are billed at your main provider’s configured rate. Some providers can’t serve as backups and appear greyed out. Leave on None to go straight to the goodbye instead.
- Turning it off: switch it off and the agent instantly returns to standard behaviour — nothing else about the agent changes.
Voice tab — how the agent sounds
- Google Vertex AI — Cloud TTS voices: Chirp 3 HD and Chirp HD voices speak as the reply streams in. Studio, News, Casual and Polyglot voices can’t stream (a Google limitation), so they speak sentence by sentence — until October 2026 those voices were silent on calls. Studio voices cost about ten times more per character than the others. For Russian, Google has only 8 Chirp 3 HD voices, so the list shows just those.
- Greyed-out models: any Google Vertex AI model, voice or recogniser that Google doesn’t serve in the region chosen is greyed out, with the regions it does work in. An agent that already uses one keeps it selected (marked ⚠) so saving the agent never changes its model behind your back.
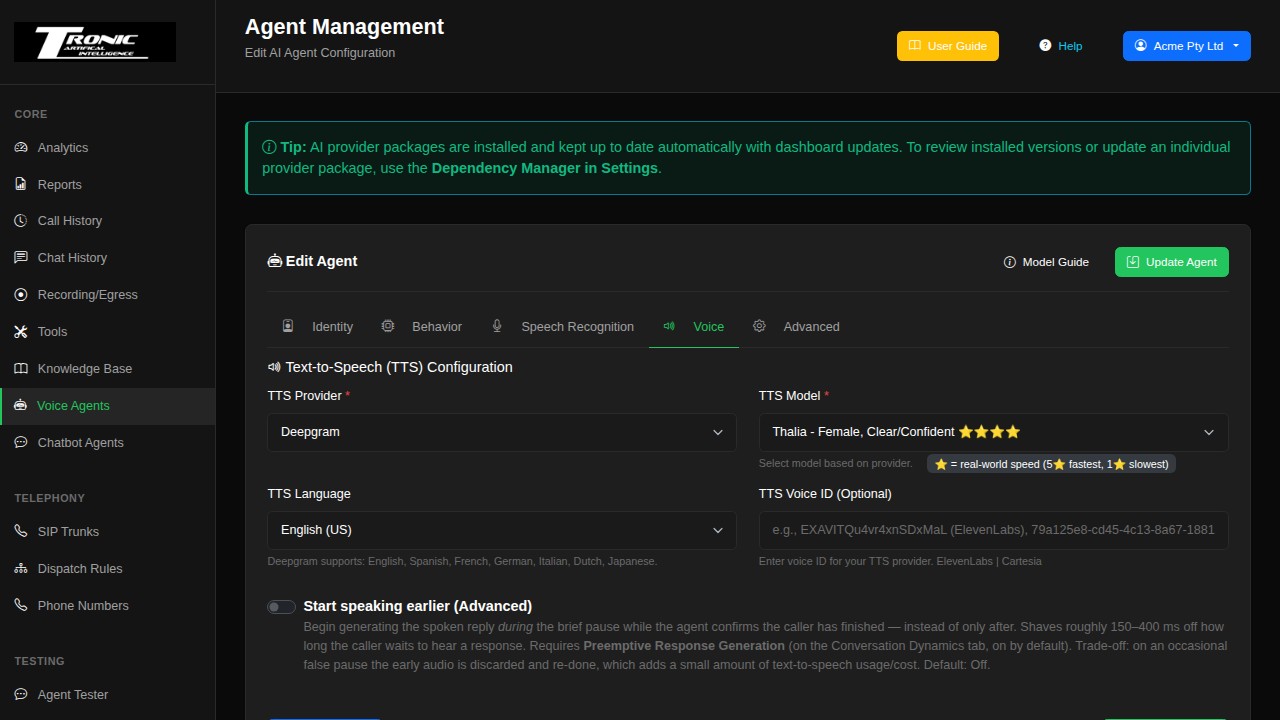
- TTS Provider: the service that speaks the agent’s replies. ElevenLabs is known for the most natural voices; OpenAI, Google, and others each have their own character and price point.
- Voice: the actual voice. Most providers offer a gallery of male and female voices in different accents; some (like ElevenLabs) support custom cloned voices via the TTS Voice ID field.
- ElevenLabs voices: the list shows ElevenLabs’ standard voices, grouped by accent
and labelled with the accent, age and gender ElevenLabs itself gives each voice. They work on every ElevenLabs
plan. Charlie is ElevenLabs’ only standard Australian voice. The
Australian — Advanced group adds more Australian voices from ElevenLabs’ Voice Library
— women: Emma, Sally, Jess, Kylie, two Charlottes, Arabella and Hannah; men: Paul, Tom, Daniel, Ian and Lee; plus
Stevie J, whose accent sits between Australian and British. All are billed at ElevenLabs’ normal rate.
Voice Library voices need a paid ElevenLabs plan, and the person who shared each voice can
withdraw it after a notice period (at least a year for every voice listed except Arabella, six months, and
Hannah, who has no notice period — their labels say so), so make a test call after
choosing one. If a voice ever stops working, the call’s Logs tab shows an
ELEVENLABS VOICE FAILEDline explaining why. For any other voice — another Voice Library voice or your own cloned voice — choose Custom Voice ID… and paste its ID. For the most reliable accent use Flash v2.5 or Turbo v2.5: ElevenLabs checks each voice’s accent on those models, not on V3 or V4 Turbo, and the editor warns when an Australian voice is paired with V3 or V4 Turbo. Speech speed on Flash and Turbo must be between 0.7 and 1.2; a speed outside that is adjusted automatically. The list was rebuilt in October 2026, because ElevenLabs had retired many of the voices the old list offered and several were labelled with the wrong accent. Nothing an agent plays changed:- An agent on a voice whose label was wrong now shows the correct accent (for example Eric — American, previously listed as Australian) with a short note under the Voice box.
- An agent on a voice ElevenLabs retired opens with Custom Voice ID selected and a note naming the old voice. That ID already plays a different voice than its old name; pick a voice from the list to choose again.
- An agent with no voice chosen shows Sarah (default) — the voice it has always used.
- SLNG.ai Fish Audio voices: the list is a starter set of Fish voice IDs; any of the 338 voices on SLNG’s Fish Audio voice page can be pasted in via Custom Voice ID. Demo Voices — Voice ID changes on each turn sends no voice ID at all, so Fish picks a different voice every time the agent speaks — use it only to prove the connection works (for example when a pinned SLNG region can’t find a named voice and calls fail with “Reference not found”), never for a live agent.
- Speech Speed: speaking rate. 1.0 is normal; a touch faster (1.05–1.1) can make agents feel snappier. The slider only appears for voices that support it. For Deepgram that means Flux voices (0.5–1.5 — the ends are gentler than the numbers: 0.5 is about a quarter slower, not half speed; most phone agents sound best between 0.8 and 1.2) and Aura-2 English and Spanish voices (0.7–1.5); other Aura voices have no speed control.
- Deepgram Flux voices: Flux is Deepgram’s conversational voice engine. It keeps its
tone and pacing from reply to reply — but only while the call stays on the same connection to Deepgram;
a new connection starts that memory afresh. The dashboard keeps one connection open for the whole call, and
each call’s Logs tab (Call Details) ends with a line such as
Flux TTS: 9 speech segments on
    1 connection(s)
. If Flux ever has to open a fresh connection part-way through a call you will also see a warning,Flux TTS opened a new Deepgram connection mid-call, at the point where its tone memory restarted. A hand-over to another agent always starts its own connection, so it does not trigger the warning, and the end-of-call line covers the agent that was speaking when the call ended. - Provider extras: some providers add their own sliders — e.g. ElevenLabs’ Voice Stability (lower = more expressive, higher = more consistent) and Similarity Boost (how closely the voice sticks to its original character).
- ElevenLabs V4 Turbo: ElevenLabs’ newest voice model — more expressive than Flash while still quick to start speaking, and billed at the same per-character rate as Flash v2.5. Voice Stability and Similarity Boost apply; ElevenLabs removed the speed control from v4, so the Speed setting hides itself (on chatbots too). Behind the scenes the dashboard speaks each sentence as soon as it is written rather than word-by-word, because v4 does not support ElevenLabs’ word streaming — you don’t need to do anything about this.
- ElevenLabs V3 Conversational: ElevenLabs’ most expressive voice model. Instead of sliders, you direct the performance with audio tags written into your prompts and greetings — e.g.
[whispers],[excited],[laughs],[sighs]— and only the Voice Stability slider applies (Similarity and Speed are controlled by the model, so those controls hide themselves). It takes noticeably longer to start speaking than Flash v2.5 and costs about twice as much per character, so choose it where expressiveness matters more than snappy response — storytelling, empathy-heavy lines — rather than fast-paced phone traffic. - Start speaking earlier (Advanced): begins generating the spoken reply during the brief pause while the agent confirms the caller has finished — shaves a few hundred milliseconds off response time, at a small extra TTS cost when it guesses wrong. Off by default.
Advanced tab — conversation feel
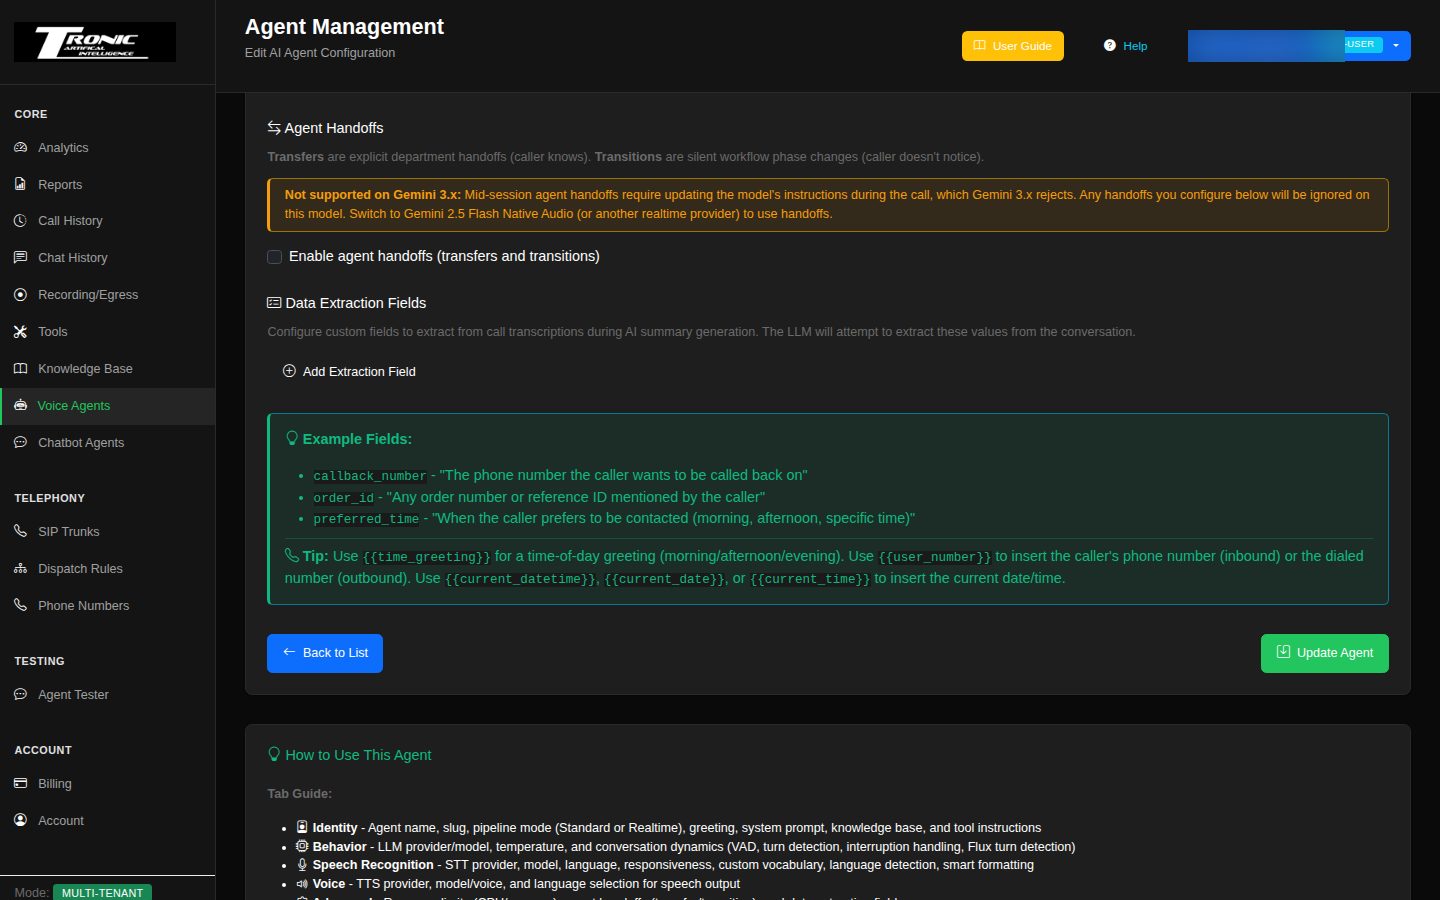
The defaults here work well for most agents. (The fine-grained timing and hearing controls live on the Behavior and Speech Recognition tabs — see the Conversation Dynamics and Audio Input Settings groups above. This tab holds the operational settings.)
Silence behaviour — when both sides go quiet
- Silence before agent re-engages: how many seconds of quiet before the agent speaks first (default 10).
- Re-engage caller on silence: when the timer fires, choose what the agent does — ask “are you still there?”, say an exact custom phrase you write, or stay silent. The agent keeps checking in at the same interval — counted from when it finishes speaking each time — until the caller responds or the attempt limit is reached.
- Max re-engagement attempts before hanging up: after this many unanswered nudges the agent says a polite goodbye (played in full) and ends the call (default 2). Speaking at any point cancels the countdown instantly.
- End Call on Silence & Silence Timeout (seconds): a harder backstop — end the call outright after a continuous stretch of total silence, so an abandoned line can’t stay open racking up cost.
Outbound Call Detection — voicemail and phone menus
These only apply to outbound calls (campaigns and manual dialling), where the agent may reach a machine instead of a person:
- Voicemail Detection: the agent recognises it has hit voicemail. Action when voicemail is detected chooses what happens next — hang up, leave a spoken Voicemail message (written by you), or play an uploaded Recording to play at a chosen volume. Extra detection instructions lets you describe unusual voicemail greetings your callers’ carriers use.
- IVR / Phone Menu Detection: recognises “press 1 for sales” phone menus. Action when IVR menu is detected is either Navigate the menu (the agent presses keys itself — tell it which options to pick in the System Prompt) or Hang up immediately.
Detection method — classic or LiveKit answering-machine detection
The Detection method select at the top of the card decides who does the recognising:
- Ask the AI (classic): exactly what every agent did before this option existed, and what existing agents keep using until you change the setting. The agent’s own language model listens to the call and calls a tool when it believes it has reached voicemail or a phone menu. Your greeting is spoken as soon as dialling starts, so on a slow-to-answer number it can play into the ringing tone.
- LiveKit answering-machine detection (the default for new agents): LiveKit listens to how the call is answered and decides in about a second whether a person, a voicemail greeting, a full or unset mailbox or a phone menu picked up. It then applies the voicemail and phone-menu settings you already have: a person gets your greeting, a voicemail gets your message or recording after the beep, a full mailbox is hung up on, and a phone menu is navigated or hung up on per your IVR setting. Your greeting is held until the callee has actually answered. Outbound calls only — inbound calls, chatbots and the Agent Tester are never affected, and the method only does anything when Voicemail Detection or IVR Detection is switched on.
- Wait for the beep: (LiveKit mode) the detector fires when the greeting ends, but most beeps land a second or two later. Your message or recording starts after this pause (default 2 s) so it is not cut off.
Under Advanced detection settings (LiveKit mode):
- Give up deciding after: counted from the moment the call is answered (default 20 s). When it runs out the result is “uncertain”.
- Give up waiting for any speech after: a callee who answers and says nothing counts as “uncertain” after this long (default 10 s). If the call had already been answered by the time the detector started listening, this is shortened to 3 s so a person who already said hello is not left waiting.
- Short greeting limit: speech shorter than this followed by silence (“Hello?”) is a person straight away; longer greetings are checked by the classifier model (default 2.5 s).
- When the detector cannot decide: Continue as if a person answered (default) or Hang up. Pick Hang up for campaigns where a wrong greeting into a phone tree is worse than a missed person.
- Classifier model: which language model reads the greeting transcript. Leave it on “this agent’s model” unless you want something faster or cheaper. It always runs as a separate copy, so a classifier hiccup can never end the call.
- Detection recogniser: realtime (audio-to-audio) agents have no recogniser of their own, so the detector listens with this one (Deepgram Nova-3 by default). Standard agents reuse their own Speech Recognition setting.
- Wait for the greeting to finish before deciding: on by default, so a voicemail is never talked over. Switch it off to make “Give up deciding after” a hard limit.
AMD fallback: with the
reason. Every result is written to the call’s record and shown on Call Detail as
Answered by: Person / Voicemail / Mailbox unavailable / Phone menu / Unknown. Campaign
counts keep working: voicemail, full mailboxes and hung-up phone menus all count as voicemail.
Extra detection instructions apply to the classic method only.Resource Limits — caps and safety valves
Also on the Advanced tab, the Resource Limits section sets sensible ceilings on each agent:
- Max Call Duration (minutes): the agent politely ends the call when this limit is reached. New agents default to 10 minutes — if your calls seem to cut off at a fixed length, this is why. Raise it, or set it to 0 for no limit. It’s a useful cost guard against a caller (or a misbehaving conversation) keeping a line open for hours.
- Max Tool Steps per Turn: how many tools the agent may use in a row before it must speak (default 3). Raise it only if the agent runs multi-step workflows — e.g. look up an order, then verify the caller, then send a confirmation — and you see it stopping partway through.
Agent Handoffs — passing the caller to another agent
Handoffs let one agent pass the live call to another agent mid-conversation. There are two very different ways to use them: a Transfer behaves like being put through to a different department (a new “person” takes over, and may say so), while a Transition builds one seamless receptionist out of several narrow specialist agents — the call silently moves between a router, a booking phase, a cancellation phase and so on, and the caller believes they spoke to one person the whole time. Picking the Type in the editor snaps the announce and context settings to that style’s recommended defaults. On a silent transition the destination agent simply carries the conversation on (it is handed the previous agent’s last line so it never repeats it); if it has an Initial Greeting written and the route’s tick-box is on, that line is spoken instead, and a route’s Bridge Phrase is spoken first if set. Silent transfers with no greeting wait for the caller. For transitions to stay invisible, every agent in the chain needs the same persona wording and the same Voice settings — the editor warns you if any transition in the chain (even one configured on another agent’s page) would change the voice mid-call.
- Handoff hold line & Play after (seconds): a per-agent setting shown at the top of the Agent Handoffs section — insurance for seamless transitions. If this agent hands the call to another agent and nobody has said anything for that many seconds while the handover is being prepared (for example while a Summary-mode handover brief is written), the caller hears the hold line once (default “One moment.” after 3 seconds) instead of silence. On a normal transition it never plays, and it is never used on transfers. Write it in the agent’s language; leave the text blank to switch it off for this agent. The agent doing the handing off owns the setting.
The full guide — including ready-to-copy example prompts for both styles and a worked multi-phase receptionist setup — is in the Transfers & Transitions section.
- Transfer: an announced handoff. The caller knows it’s happening — “Let me put you through to our billing team.” Use the optional Sign-off Prompt to control the exact send-off line.
- Transition: a silent handoff. The caller never notices — the conversation simply flows into a new phase handled by a different agent (useful for multi-step workflows like verify-then-book). An optional bridge phrase smooths the join.
- Context Mode: how much of the conversation the receiving agent inherits — Full (everything), Summary (an AI-written handover brief — who is calling, what they want, and the exact details collected so far), or Fresh (clean slate).
- Handoff Summary Model & Custom Summary Instructions: shown when Summary mode is selected. Pick which AI model writes the handover brief (default: the agent’s own model) and optionally replace the built-in instructions with your own. Writing the summary adds a short pause — typically 2–5 seconds — at the moment of transfer (an announced transfer’s sign-off line usually covers it; on silent transitions the pause is capped tighter). If the summary can’t be generated in time, the transfer still goes ahead with the most recent part of the conversation attached — it never gets stuck.
- Greeting on handoff: the receiving agent’s Initial Greeting is spoken on announced handoffs; on silent ones it’s skipped automatically.
- When to Transfer / When to Transition: a one-line description the AI reads to decide when this handoff applies — e.g. “Transfer when caller asks about billing or invoices”.
Data Extraction Fields — pulling details out of every call
Also on the Advanced tab: name the specific details you want captured from each call — a callback number, an order reference, a preferred appointment day — and the AI fills them in when it generates the call summary. Each field has a Field Name (short, lowercase), a Display Label (how it appears on the call detail page), and a Description (for LLM) telling the AI exactly what to look for. Extracted values show up on each call in Call History.
Walkthrough: build a production-ready voice agent, stage by stage
Work through the tabs in this order — and prove each stage works before moving to the next. That way, when something misbehaves you always know which stage caused it.
- Stage 1 — Identity. Name the agent, write the System Prompt using the five-part briefing above (or paste rough notes into Enrich with AI), set an Initial Greeting, and put your facts in Reference Information. Save. Prove it: open the Agent Tester in Text mode and have a typed conversation — wrong tone or wrong facts get fixed here, before audio ever enters the picture.
- Stage 2 — Behavior. Keep Standard pipeline unless you specifically want Realtime. Pick a fast LLM (the star ratings are speed), Temperature 0.2–0.3, and set up an LLM fallback with a different company as backup. Prove it: the agent list’s Health badge is green, and Text-mode replies in the Tester come back quickly.
- Stage 3 — Speech Recognition. Pick the STT provider/model, set the language, and — important — add your business’s product names, brand names, and local suburbs to the Keywords/Custom Vocabulary field. Prove it: Agent Tester in Voice mode — say the tricky words and check the transcript panel got them right.
- Stage 4 — Voice. Choose the voice and speed. Prove it: listen in the Tester — if it sounds robotic or too slow, adjust speed (1.05 is a nice nudge) or try another voice before you get attached.
- Stage 5 — Tools & handoffs. On the Tools page assign what the agent needs (hangup at minimum; transfers, take-a-message, send-SMS as required), then come back to Identity → Tool Usage Instructions and write one line per tool about when to use it. Add Handoffs on the Advanced tab if another agent handles part of the job. Prove it: in the Tester, ask for a human / trigger each tool and watch the tool calls appear in the transcript.
- Stage 6 — Safety rails. Advanced tab: check Max Call Duration suits you (new agents default to 10 minutes), set silence behaviour, and — for outbound work — voicemail detection. Speech Recognition tab: consider switching on STT Stall Recovery with a backup provider.
- Stage 7 — real call. Start the agent, point a dispatch rule at it (see Dispatch Rules), and ring it from your mobile. Only a real call proves the trunk, caller ID, and true phone audio.
Transfers & Transitions (Agent Handoffs)
One phone call, several specialist AI agents — handoffs let a call move between your agents without the caller ever being put on hold.
A handoff swaps which of your AI agents is speaking on a live call. The call never leaves the dashboard and never rings another phone — it’s the same call, with a different “brain” taking over. There are two styles, and they serve two very different designs:
The two styles — two different mental models
- Transfer — separate departments. The caller is handed to what feels like a different person: “Let me put you through to our billing team.” The new agent has its own name, its own greeting, and may sound different. Use this when departments are part of the experience — reception → billing, sales → support.
- Transition — one person, several phases. The caller never notices anything. Behind the scenes the call moves between narrow, single-job agents — a router that works out what the caller wants, then a booking agent, a cancellation agent, a question-taker — but to the caller it is one continuous conversation with one person. This is how you build a large, complex receptionist without one giant prompt: each phase gets a short, focused prompt and only the tools that phase needs.
Setting one up
What the caller hears at the moment of takeover depends on the type. On a transition the new agent simply carries on the conversation as the same person: it is given the previous agent’s last sentence so it never repeats it, and it speaks within the normal thinking pause (one to two seconds). If the new agent has an Initial Greeting written and the route’s “Speak this agent’s Initial Greeting on takeover” box is ticked, that exact line is spoken instead — keep it to one short phrase. If the route has a Bridge Phrase, the system speaks it at the handoff (handy over a Summary-mode pause) and the new agent then carries on. If the last thing said before the handoff was a question (“Anything else I can help with?”), the new agent waits for the answer instead of talking over it, and it never hops straight on to a third agent before the caller has spoken. On a transfer the caller is meant to notice: announced transfers say the Sign-off Prompt and the new agent’s greeting; a silent transfer with no greeting waits for the caller. Each call allows up to 12 handoffs as a safety limit against accidental loops.
<role>
You are Alex, the Billing Department agent for {{business_name}}. Callers
reach you when reception transfers billing questions to you. You are a
different person from the receptionist - introduce yourself as Alex from
Billing when you take over.
</role>

<job>
Handle invoice queries, payment issues, and account balances. Verify the
caller's identity (full name + date of birth) before discussing any
account details.
</job>

<style>
Professional and warm. Plain text only - no markdown, your words are
spoken aloud.
</style>
For a Transition target, write a phase of the same person — and leave its Initial Greeting blank so it simply carries the conversation on (a greeting is spoken word for word and can sound like a restart); never a call-opening welcome:
<role>
You are Chloe, the AI receptionist for {{business_name}}. You are MID-WAY
through an ongoing call - the conversation so far is in your context.
This is the BOOKING phase of the call.
</role>

<critical_rules>
- Do NOT greet the caller or introduce yourself. You have already been
  speaking with them.
- Do NOT ask for anything the caller has already told you - check the
  conversation context first. If their name, phone number, or preferred
  clinic is already there, use it.
- Never mention being transferred, connected, or "a different agent".
  You are the same person the caller has been talking to.
- Continue naturally from wherever the conversation left off.
</critical_rules>

<job>
Book the caller's appointment: confirm the service and practitioner,
offer available times, capture any missing contact details, confirm the
booking back to them.
</job>
Example setup: a clinic receptionist built from phases
A proven pattern for a complex receptionist:
- Intro Manager (the agent your phone number points at): greets, answers general questions, works out what the caller needs. Transitions to each specialist phase.
- Booking / Reschedule / Cancel agents (one per site if locations differ): each does one job with only that job’s tools attached. Each can transition back to the Intro Manager or across to another phase (“actually, I also want to ask a question”).
- All of them share the same identity block word-for-word (“You are Chloe…”), the same Voice settings, no greetings, and full-context silent transitions.
Four rules that keep transitions invisible
- Same identity everywhere: the name and persona wording must be identical in every agent of the chain. Any drift is what callers notice.
- Same voice everywhere: a different voice on any hop instantly reveals the swap. The editor shows a warning listing every transition in the chain — including hops configured on other agents — where the voices don’t match.
- No greeting on transition targets: leave the Initial Greeting blank (or untick “Speak this agent’s Initial Greeting on takeover” on the route) and the new agent just carries on — that is what keeps the swap invisible. Untick it on routes that loop back to the entry agent, or its full welcome would replay mid-call; the router then continues naturally, or waits if the last thing said was a question.
- “Don’t re-ask” in every phase prompt: the number-one giveaway in real calls is a phase agent asking for a name the caller already gave. The critical-rules block above prevents it.
Chatbot Agents
Text-chat versions of your AI agents — embed them on your website.
Where voice agents answer the phone, chatbot agents answer typed messages. The same AI brains, prompts, knowledge bases, and tools power both — a chatbot can look up your documents, and even speak out loud if you enable its voice mode. The most common use is the website widget: a small chat bubble in the corner of your site that visitors click to talk to your AI.
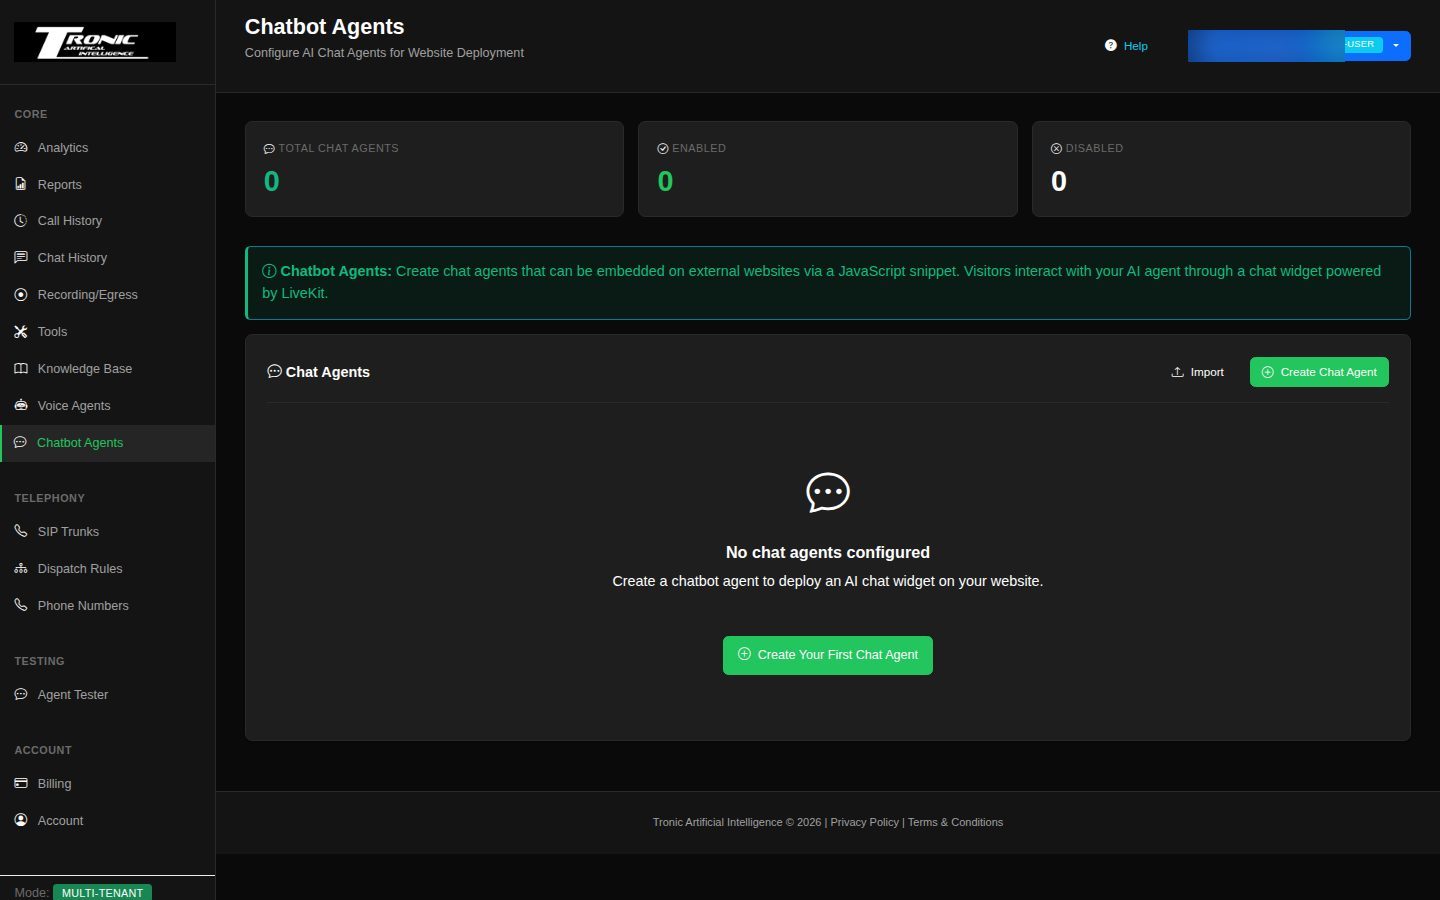
1 The list page
The Chatbot Agents page lists every chat agent with an Enabled / Disabled state. A disabled agent refuses new conversations — handy while you’re still building it. From the list you can create, create from a template, toggle on/off, duplicate, export, import, and delete agents, just like voice agents. Duplicate copies the chatbot’s tools and knowledge-base links along with its settings. Export downloads a JSON backup; Import restores one. The Usage Today column shows how many of today’s allowed sessions the agent has used (e.g. 12/50, from the daily limit on its Session tab) — it turns yellow at 80% and red when the limit is reached and new visitors are being turned away until midnight (UTC).
1b Copy to Voice Agent — and Copy to Chatbot Agent
The ⇄ button on a chatbot row makes a phone agent from that chatbot in one click (the same button on the Voice Agents page goes the other way). Nothing is copied until you have seen a preview:
- Copied: the system prompt, knowledge text, tool instructions, data-extraction fields, and every speech setting from the Voice tab (recogniser, voice, conversation dynamics). Tools and knowledge-base collections are linked to the copy; a collection is shared, so editing it changes both agents.
- Adapted: the language model and its fallback chain are rewritten into the voice-agent shape (the chatbot’s reply-length limit has no phone equivalent), the widget welcome message becomes the greeting, a phone routing slug is generated from the name, and two chatbot-only behaviours are reset to the phone defaults: fast-trip stall recovery is turned back on and the “reconnect the chat” speech-recovery message is cleared.
- Not carried over: the widget look, allowed websites, session limits, error reply, automatic summaries and recording consent — none of them mean anything on a phone call. Going the other way, phone transfers, hold, keypad input, voicemail/IVR detection, realtime settings and handoffs stay behind. Human Handoff settings (and the
handoff_to_humantool) are website features and are not copied to a phone agent. - Warnings: prompt placeholders are never rewritten, only flagged. A chatbot prompt that relies on a variable from the embed page comes out blank on a phone call unless a campaign supplies the same variable;
{{user_number}}works on phones but is blank on a website. - Switched off on arrival: the copy is created stopped (voice) or disabled (chatbot) so it cannot answer a real caller or visitor until you have reviewed it. If the chatbot had no recogniser or voice selected, the preview says “Voice setup required” and asks you to tick an acknowledgement.
- One-time snapshot: the two agents are not linked. Change one later and the other stays as it was. If a copy fails part-way, delete the half-made agent and try again.
2 Create from a template
The Templates button next to Create Chat Agent opens a gallery of nine ready-made text chatbots — the same scenarios as the voice agent templates (healthcare clinic, clinic front desk, e-commerce support, real estate, hotel concierge, restaurant reservations, IT helpdesk, trades bookings, and a feedback survey), each adapted for website chat. Every template arrives with a full set of instructions, realistic business information, and widget styling (title, welcome message, brand colour) already filled in. Click Use This Template and you land in the editor ready to customise.
3 The essentials — General and LLM & Prompt tabs
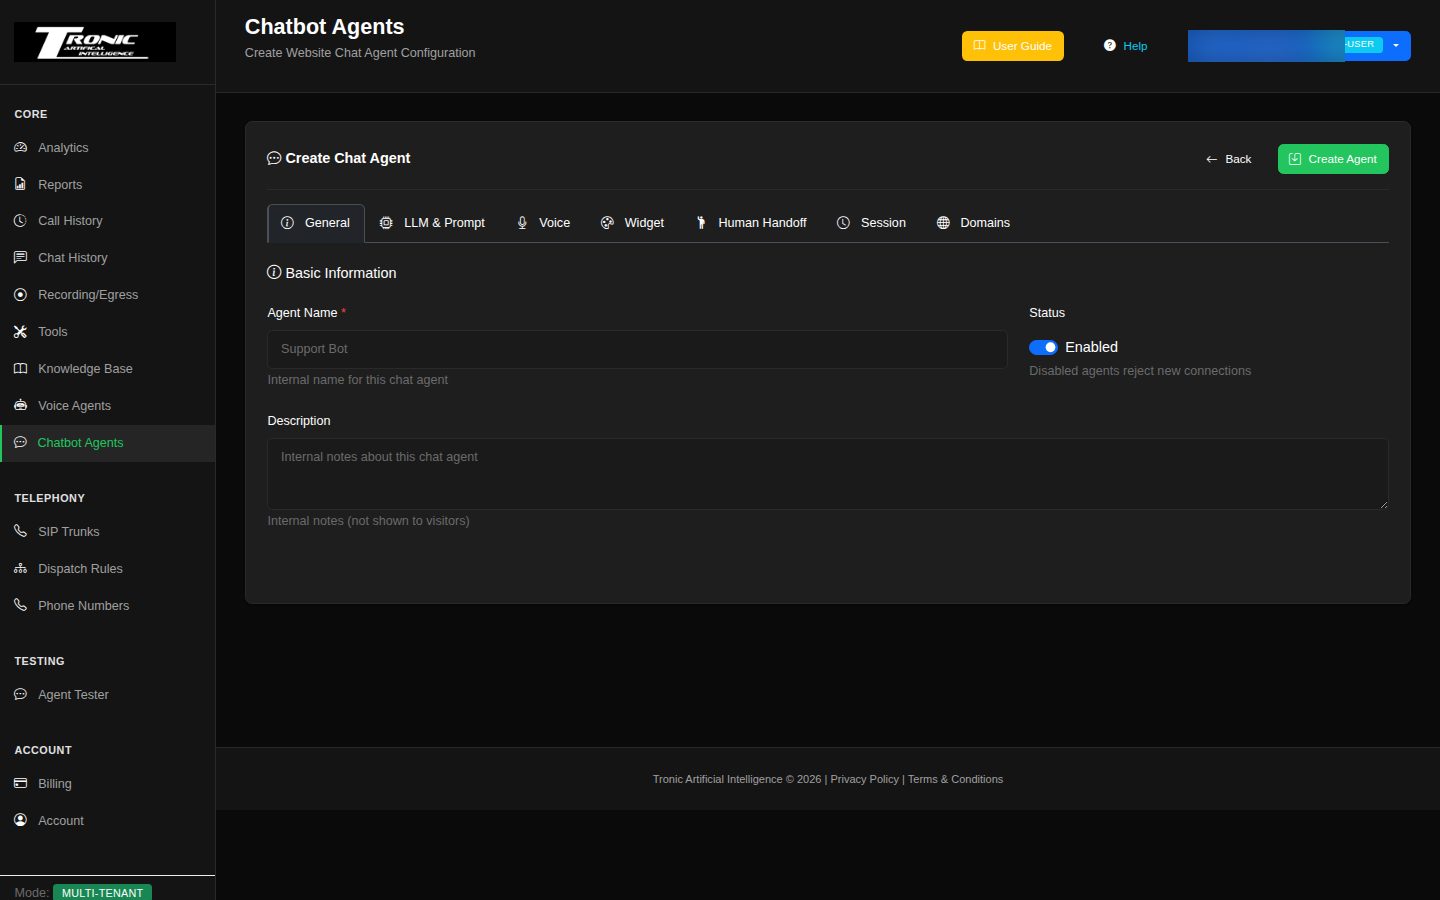
Open an agent and you’ll find the editor organised into tabs: General, LLM & Prompt, Widget, Session, Domains, and Embed Code.
- Name: the agent’s display name in the dashboard.
- Description: internal notes for you — visitors never see this.
- Enabled: the master on/off switch.
- Provider & Model: the AI brain, exactly like a voice agent’s. Because chat doesn’t need split-second replies, you can afford a smarter (slower) model here than you would on a phone agent.
- Fallback models: up to two backup models that take over automatically if the main model fails — an outage, a “too busy” (rate limit) error or a missing key — so visitors just keep chatting. Turn on Enable LLM Fallback and pick one or two models. It works on every chatbot channel: website text chat, website voice chat.
- As soon as the main model reports an error, the message goes to backup 1, then backup 2. Each model gets one try — the main model isn’t retried first.
- Website chat (typed and spoken) works like a phone agent: once the main model has failed, the rest of that chat goes straight to the backup while the main model is checked again in the background. A model that sends nothing at all is given up on after Fallback Timeout for spoken replies, and after about 10 seconds for typed ones.
- If a tool has already run (for example an email was sent), the backup carries on from there — nothing is done twice. Once a reply has started appearing it is not switched halfway through.
- A backup uses the main model’s extra settings where it has the same kind (for example an Azure deployment name or an OpenRouter custom model id).
- Replies a backup wrote are charged at the main model’s price, and the record still names the main model — the same as on phone calls.
- When a backup steps in, the conversation’s page shows a Backup model line (when and which model failed), the Agent Tester’s Debug panel shows a line, and website chats count toward the Provider errors alert if you have set one up.
- Temperature: creativity level, from 0 to 2 (new chatbots start at 0.7). Keep it low for consistent business answers; higher gives more varied, creative replies.
- Reasoning effort: the same Off/Low/Medium/High dropdown as the voice editor, shown only for models that can think before answering (Claude, GPT including GPT-OSS, Grok 4.6, Qwen, GLM, DeepSeek, Nemotron and Kimi models on AWS Bedrock, Gemini 3.x, Grok 4.5 on xAI). Website visitors tolerate a short wait far better than phone callers do, so raising this is more reasonable here than on a voice agent — the note under the dropdown explains what each level does on your chosen model. It hides itself (and resets to Off) when the selected model doesn’t support it.
- Max Tokens: a ceiling on how long each reply can be. Lower it to keep answers short (and cheaper); raise it only if replies are being cut off mid-sentence.
- System Prompt: the agent’s written personality and job description. The teal Versions button above it lists earlier saved versions to compare (Diff) or restore — it works exactly like Voice Agents → Prompt version history.
- Reference Information: short must-know facts (hours, returns policy, contact email) that are included with every reply.
- RAG Knowledge Base Collections: attach document collections from the Knowledge Base page. The agent searches them on demand when a visitor’s question calls for it — across the website widget, voice chat alike.
- Tool Instructions: when and how to use any tools assigned to this agent.
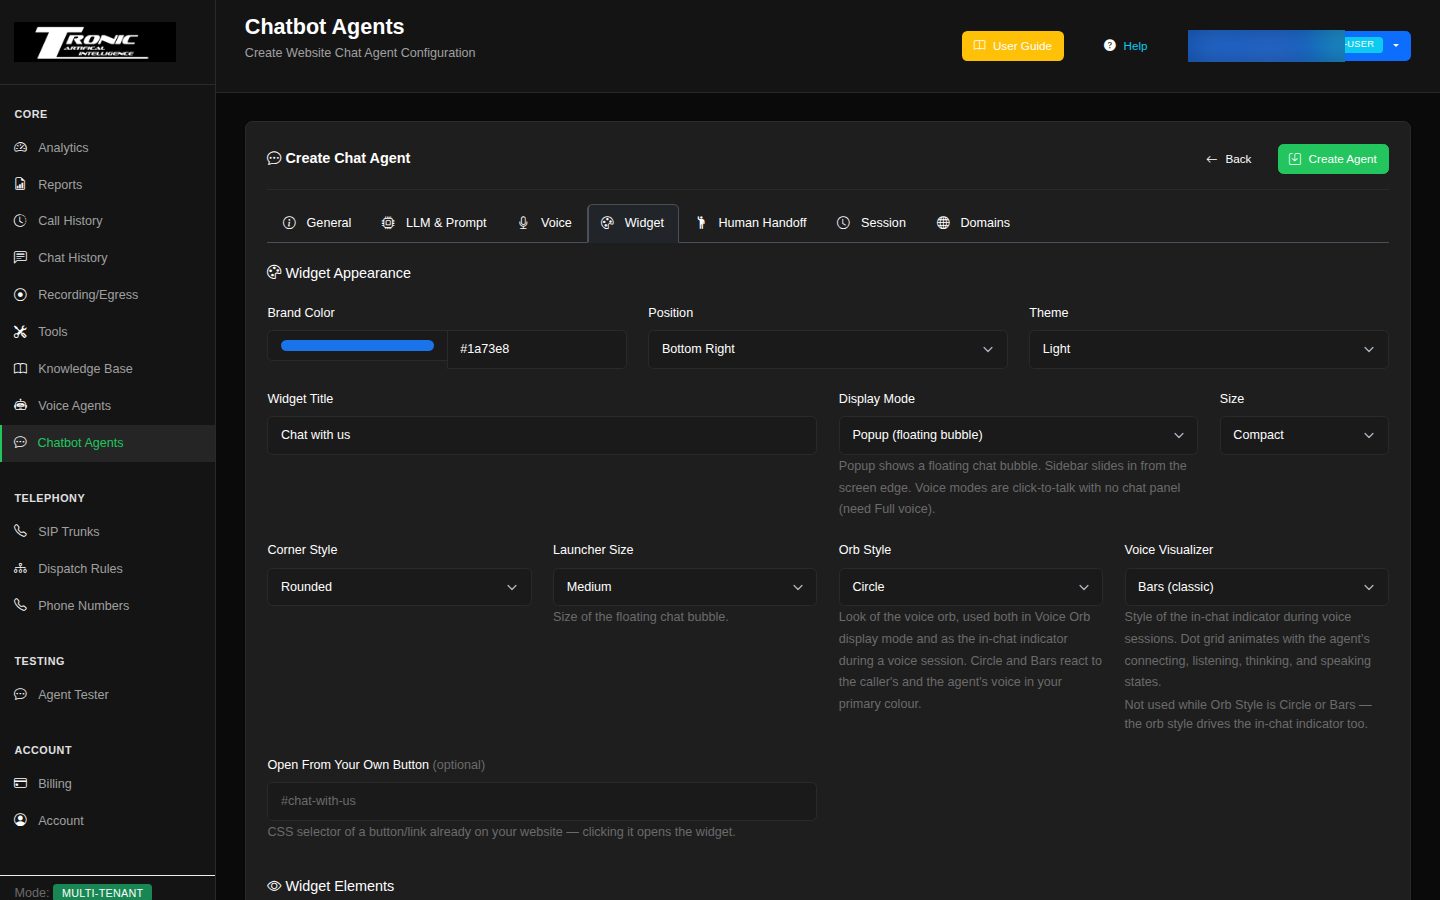
4 Widget appearance
The Widget tab controls how the chat looks on your website:
- Brand Color: the colour of the chat bubble and header — match it to your site.
- Position: bottom-right or bottom-left corner.
- Theme: light, dark, or auto (auto follows each visitor’s own device setting).
- Widget Title: the heading at the top of the chat window.
- Display Mode: how the chat presents itself — Popup (classic floating bubble), Embedded (sits inline inside a section of your page), Sidebar (slides in from the screen edge), Fullscreen overlay (large centred window), Voice Button (a click-to-talk pill with a live waveform), or Voice Orb (an animated orb that reacts to sound). The two voice modes need the agent’s voice mode switched to full voice.
- Orb Style: the look of the voice orb. Classic is the original crescent. Circle is a solid dot that breathes with the caller’s voice and glows while the agent speaks. Bars is a five-bar meter that rises and falls with the voice. Circle and Bars are drawn in your brand colour and are used in two places at once — the big orb in Voice Orb display mode, and the small indicator inside the chat during a voice session. Choosing either one therefore replaces the Voice Visualizer setting below. New chatbots start on Circle; chatbots you created earlier stay on Classic until you change them, so nothing about your live widget changes on its own.
- Voice Visualizer: the style of the small in-chat indicator shown during voice sessions — Bars (the classic animated equaliser) or Dot grid, a 5×5 matrix of dots that animates differently for each moment of the conversation: a ring sweeps while connecting, the centre pulses while listening, a line sweeps while the agent is thinking, and the dots rise and fall with the agent’s voice while it speaks. This setting is ignored whenever Orb Style is set to Circle or Bars, because the orb style then drives the in-chat indicator too.
- Widget Size, Corner Style, Launcher Size: Compact (380 px wide) or Full (440 px), Rounded / Square / Extra-rounded corners, and a small/medium/large chat bubble.
- Open From Your Own Button: already have a “Chat with us” button on your site? Enter its CSS selector here and clicking it opens the widget. It only works in Popup, Sidebar and Fullscreen modes — the other modes have no launcher to open.
- Widget Elements: show or hide the transcript, microphone button, and text input box. The microphone setting only applies in Full voice mode, and the text box can only be hidden in Full voice mode with the microphone shown, so visitors always have a way to talk to the agent.
- Welcome Message: the first message visitors see when they open the chat.
- Branding Text: the small line of text at the bottom of the widget — set it to your own company name or leave it blank.
5 Voice tab — Chat Mode and every speech setting
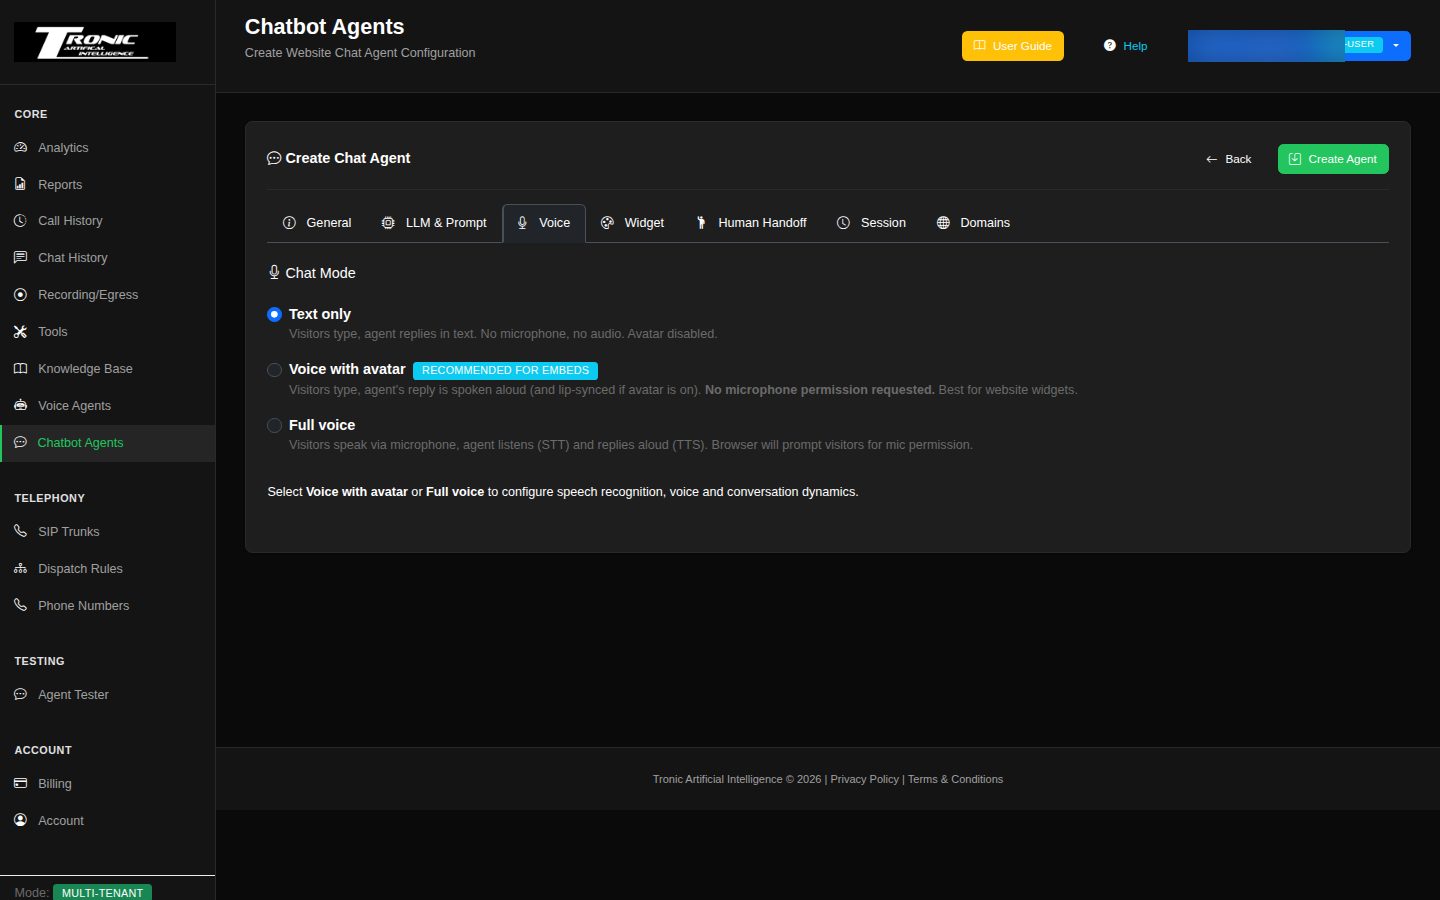
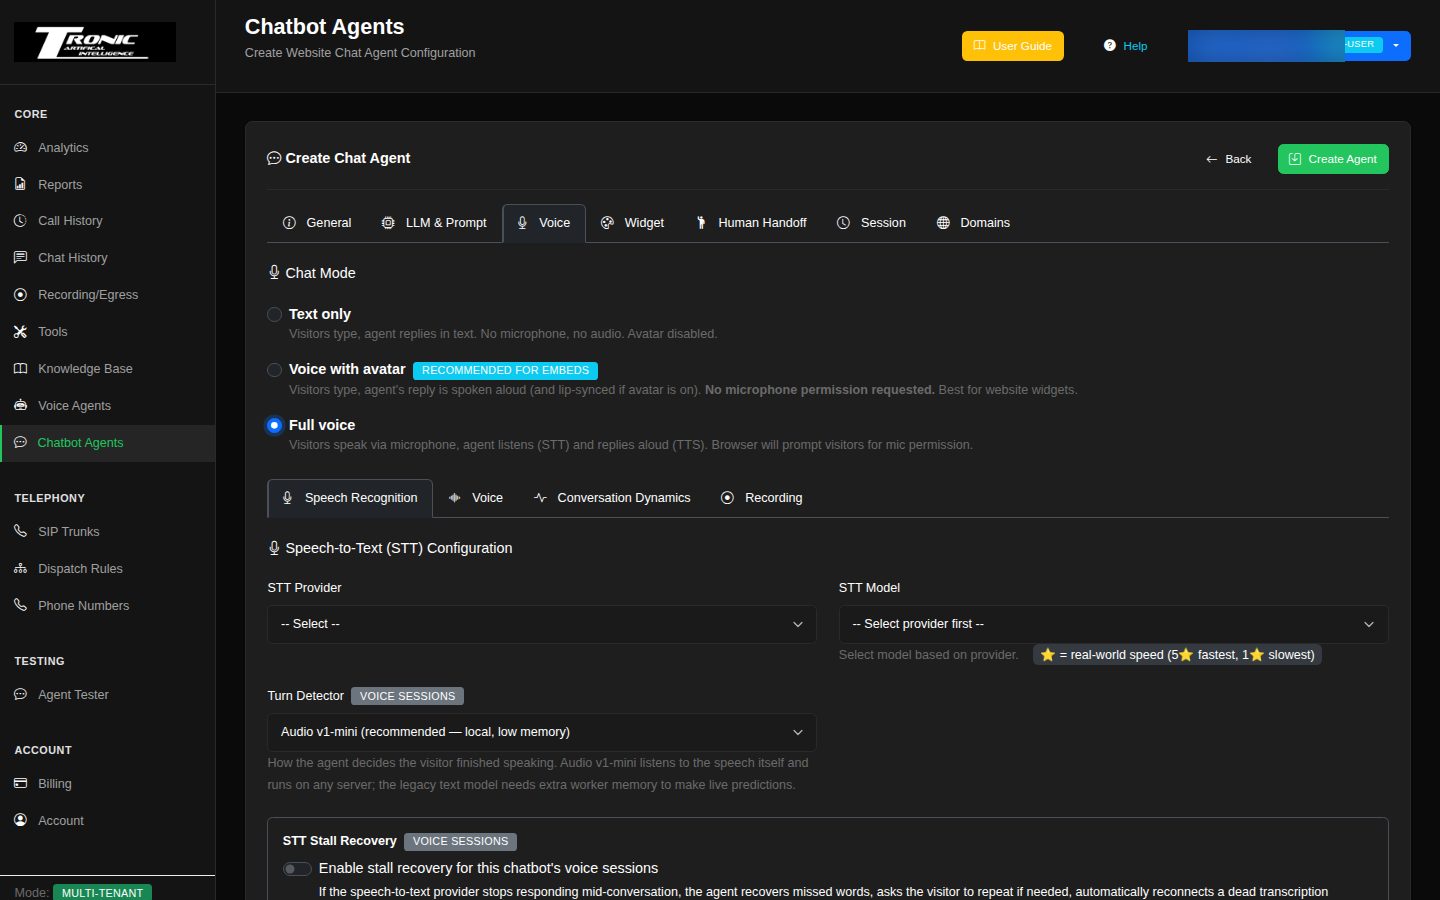
The Voice tab owns the Chat Mode choice and every setting that only matters when a chat has sound. In Text mode the tab shows only the mode selector; pick a voice mode and four sub-tabs appear, laid out like the phone-agent editor: Speech Recognition (recogniser, model, language, turn detector, stall recovery and the advanced recogniser controls), Voice (voice provider, model, voice, output volume, markdown filter and the advanced voice controls), Conversation Dynamics and Recording. The editor remembers which sub-tab you had open, and a save that trips a validation error on another sub-tab switches to it so you can see the field. Nothing is renamed — every setting saves exactly as before.
- Text only: visitors type, the agent replies in text. No microphone, no audio. Only the LLM provider’s API key is needed — no speech-recognition or voice key, and the Speech Recognition / Voice sub-tabs are ignored in this mode.
- Voice with avatar: visitors still type, but the agent’s reply is spoken aloud. The browser never asks the visitor for microphone permission.
- Full voice: a real two-way voice conversation — visitors speak into their microphone and the agent listens and replies aloud. The browser will prompt visitors for mic permission.
Speech recognition (how the agent hears — full voice only)
- STT Provider / Model / Language: the recogniser and the language visitors speak.
- Responsiveness, Custom vocabulary, Smart formatting, Remove filler words, Auto-detect language: tuning that most providers honour. Blank means the provider’s own default.
- Provider extras: some recognisers have their own panel (Deepgram Flux and ElevenLabs Scribe) that appears only while that provider is selected. The Deepgram panel carries the Flux transcript options (spoken numbers as digits, profanity filter, number redaction) and the ElevenLabs panel the Scribe v2 secondary languages, exactly as on voice agents. Chatbots now offer the same recognisers as voice agents — Deepgram, OpenAI, Google Cloud, ElevenLabs, AWS Transcribe, Azure Speech, Azure OpenAI, SCX, xAI Grok, Telnyx, SLNG.ai —. Azure OpenAI recognition needs a transcription deployment name (Azure OpenAI panel) and cannot be a backup recogniser.
- STT Stall Recovery: off by default, and it only affects voice sessions — typed chats are never interrupted. When the recogniser stops responding the session first recovers missed words, then asks the visitor to repeat, then reconnects a dead transcription stream, and only as a last resort apologises with the Goodbye Message and ends the session. Recovery Threshold sets how long to wait after the visitor stops speaking before recovery starts (blank = automatic, about 3.5 seconds). Turn it on to reveal the Backup speech recognition provider used when retries are spent. Only providers that can take over a live stream are listed (Azure OpenAI and non-streaming models are hidden), and with a Deepgram Flux primary only the verified Flux-backup providers are selectable — the same rule the voice-agent editor applies.
Voice (how the agent speaks)
- TTS Provider / Model / Voice ID / Language: the voice visitors hear.
- Speaking speed: 1.0 is normal; not every provider supports it.
- Provider extras: ElevenLabs stability and similarity, Deepgram Flux expressivity — each appears only for its provider. Chatbot voices now match voice agents — Deepgram (incl. Flux), ElevenLabs, OpenAI, Google Cloud, Google Gemini, Azure Speech, Azure OpenAI (needs a TTS deployment name), AWS Polly, SCX, xAI, SLNG.ai and Telnyx (Kokoro voices — Telnyx retired its NaturalHD voices in September 2026; saved NaturalHD voice ids are switched to the Kokoro default automatically).
- Output Volume: louder or quieter agent audio without touching the visitor’s device volume.
- Filter Markdown from Speech: strips formatting before speaking so the agent never says “star star” out loud — leave it on.
Conversation dynamics
- Voice activity detection: whether and how sensitively the agent notices the visitor speaking. Lower sensitivity numbers hear softer speech; Min silence is the pause that ends a visitor’s turn.
- Turn detection & endpointing: the Turn Detector engine is chosen at the top of the tab — Audio v1-mini (recommended, and the default for new chatbots) listens to the speech itself and runs on any server, the older Text model needs extra memory on the agent server, and Off uses silence detection only; here you tune its threshold, the audio detector’s patience (blank = automatic), fixed or dynamic endpointing, and the pause before the agent replies. Deepgram Flux users get the Flux end-of-turn controls.
- Interruptions: how many words it takes to cut the agent off, how long a visitor must speak, and what happens after a false interruption.
- Noise cancellation: Full voice only. Cleans the visitor’s microphone audio on the server before recognition. Browsers already suppress noise, so start with Off and only enable it for noisy environments. The echo-canceller warm-up and microphone input rate sit here too.
- Silence re-engage: Full voice only. When a visitor goes quiet mid-conversation the agent nudges them — ask if they are still there, repeat itself, let the AI improvise, or say your custom text — up to the number of nudges you allow, then says goodbye. This already runs on every Full voice chatbot; the controls simply tune it. In Voice with avatar the visitor has no microphone, so the agent cannot tell silence from reading and these nudges are always off (a reading visitor is never interrupted or cut off). The separate inactivity auto-close on the Session tab still ends idle sessions in every mode.
- Record full-voice sessions: Full voice only. Off unless you switch it on. When on, the visitor sees your Consent notice and must tap Agree before the microphone or the session is even requested — nothing is recorded without that tap, and text or avatar sessions are never recorded. Recording consent decides whether they are asked at all, and has four settings. The two that ask: Ask first — keep chatting unrecorded if they decline (recommended — they still get help, just no audio file) and Ask first — offer text chat instead (voice stays off until they agree; they can still type). The two that do not ask: Don’t ask — show the notice puts your wording on screen as a permanent line the visitor cannot dismiss, and records regardless; Don’t ask — show nothing records with the visitor told nothing at all. In both of those the chat window shows a small “Recording” marker in its header while audio is being captured — but the Voice Orb and Voice Button display modes have no header, so with show nothing those two tell the visitor nothing at all. Recordings appear on that chat’s page in Chat History (player, download, and a consent receipt showing when they agreed and the exact notice they saw) and on the Recording/Egress page behind the Include chat sessions switch. The text transcript is kept either way, exactly as for every chat today. Delete the audio with the chat using Delete with recording on the chat’s page.
- Generation: pre-emptive generation and speech start the reply before the visitor’s turn is fully confirmed (faster, slightly more usage); prompt caching lets supporting LLM providers reuse the system prompt between turns.
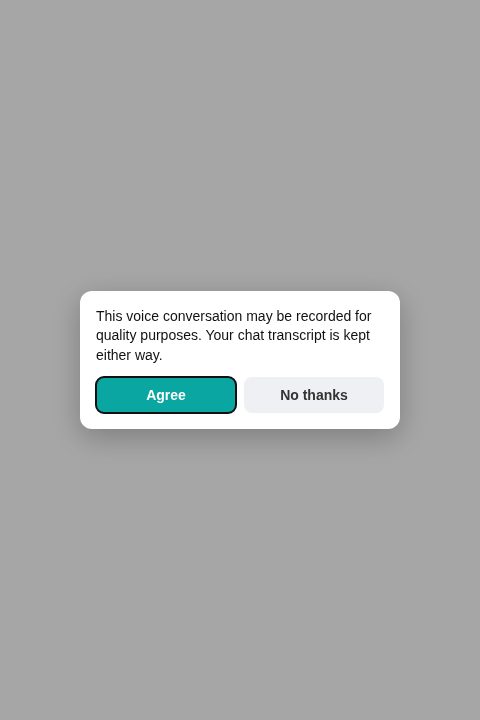
6 Hand a chat to a person (Human Handoff)
Sometimes a visitor needs a human — they ask for one, they are upset, or the chatbot has run out of answers. Human Handoff lets the chatbot pause itself and pass the conversation to your team, then take back over when the person is done. It works on the website widget (text, voice-with-avatar and full voice). Phone calls are not included: phone agents already have the transfer tools.
Turn it on — the Human Handoff tab
Open the chatbot, go to the Human Handoff tab, and fill in the fields below. Saving with the switch on also turns on the handoff_to_human tool for this chatbot — you never need to visit the Tools page.
- Enable Human Handoff: the master switch. It needs a Webhook URL. Switching it off (or changing the URL or secret) while someone is mid-handoff hands those chats straight back to the assistant.
- Webhook URL: where the dashboard sends the conversation, and every visitor message after it. The address must be reachable from this server, and this server's own address must be reachable from there, because replies come back to it.
- Signing secret: every event is signed with it so the receiving side can prove it came from your dashboard. It is created for you the first time you save. If you press Regenerate, update the secret in your n8n workflow or software too, or events will be rejected there.
- Name shown when the person gives none: replies normally carry the person's own name; this is the fallback label.
- While a person is being brought in: what the visitor is told the moment the handoff starts. On full-voice chats the assistant's voice reads it out.
- When the assistant takes back over: what the visitor hears when the person closes the handoff or goes quiet for too long.
- Show a “Talk to a person” button: puts a button in the widget's header so the visitor can ask directly, without waiting for the chatbot to decide. You can change the label. The button hides itself while a handoff is running.
- If the button can't be honoured: shown when the daily limit is reached or the chat cannot be handed over right now.
- Wait for a person / Then / Never wait longer than: if nobody answers within the first number of minutes, the assistant either carries on (with the message below) or keeps waiting — but never past the hard limit, after which the assistant always takes back over.
- Person silent for: if the person stops replying for this long, the assistant takes back over.
- Email me when a handoff starts: one email per handoff. Leave blank to skip.
- Handoffs per day / Visitor messages per handoff / Forwarded messages per day: abuse limits. Reaching a message limit hands the chat back to the assistant.
- Message when a person ends the chat: used only when the person chooses to end the chat instead of handing it back.
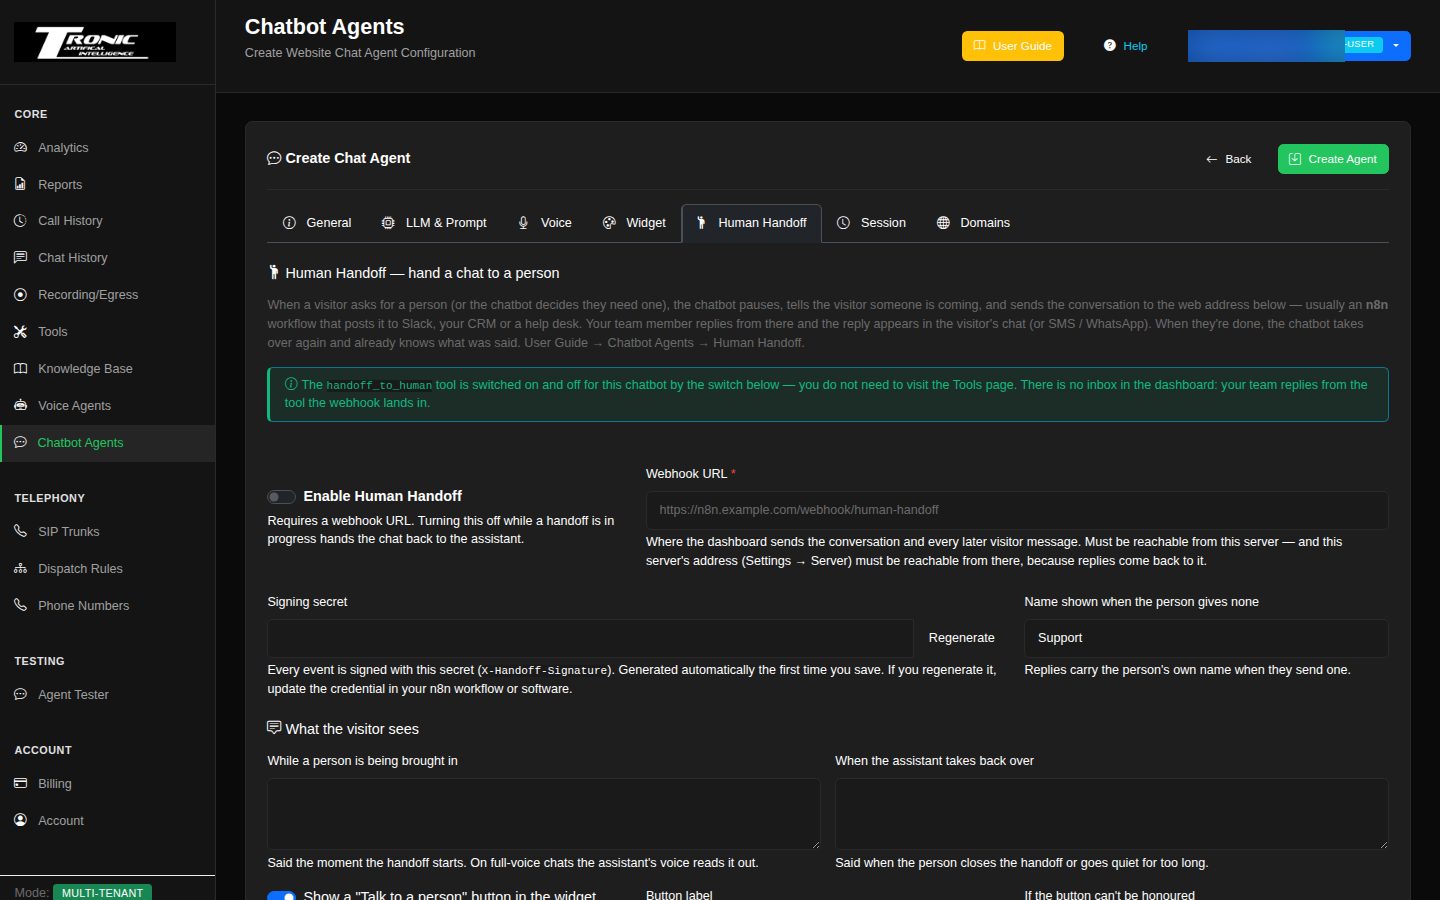
What the visitor sees
A banner across the top of the chat shows the state: Waiting for a person to join…, then You're chatting with Sam once the person replies, and it disappears when the assistant takes back over. Each of the person's replies carries their name above the bubble. If the visitor reloads the page while the chat is still open, the banner comes back; if they leave for longer than the chat's own timeout, the handoff ends and a returning visitor starts fresh with the assistant.
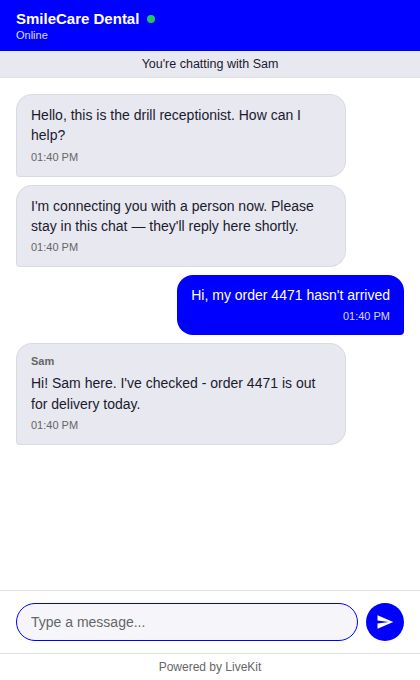
Set up the receiving side with n8n (recommended)
- Save the tab at least once, then press Build n8n workflow (Slack). A workflow file downloads.
- In n8n choose Workflows → Import from file and pick it. Open the three Slack nodes and select your Slack credential and channel.
- Open the Reply form node, copy its Production URL, and paste it into the Slack message text where it says
HANDOFF_FORM_URL(the yellow note in the workflow shows exactly where). - Activate the workflow, copy the address of its Handoff events webhook, paste it into Webhook URL on the tab and save.
- Press Send test event. You should see “Outbound: delivered” straight away and a message in Slack. Open the reply form from that message and send anything — within a minute the tab shows “Inbound: your side replied”. Both directions now work.
Day to day: a Slack message appears when a visitor asks for a person. Open its reply form link, type your reply, and send. Every further visitor message lands in the same channel. On your last reply tick hand back to the assistant and the chatbot resumes — it is told exactly what you and the visitor said.
message.channels, give it the channels:history and chat:write scopes, add it to the channel, then pick your credential on the node and enable it. From then on a reply typed in the thread goes to the visitor, and typing done hands the chat back. The reply form keeps working alongside, and needs none of that — which is why it is the default. You can also swap the Slack nodes for email, GoHighLevel, Zendesk or anything else n8n can post to.Use your own software instead (developers)
Any system that can receive a web request and send one back can be the receiving side. The dashboard sends three events to your Webhook URL as JSON: handoff.requested (the transcript so far, visitor details, and a reply URL + token), handoff.visitor_message (each later visitor message), and handoff.ended (why it ended). Each request carries X-Handoff-Timestamp and X-Handoff-Signature — an HMAC-SHA256 of <timestamp>.<raw body> with your signing secret; reject anything older than five minutes. Answer with any 2xx within ten seconds; anything else is retried three times, and a retried delivery repeats its X-Handoff-Delivery id so you can ignore duplicates.
To reply, call the reply URL with the token as a bearer token. The token only works for that one conversation and stops working when the handoff ends.
# Send a reply
curl -X POST "https://your-dashboard/api/handoff/<conversation_id>/message" \
  -H "Authorization: Bearer <token>" -H "Content-Type: application/json" \
  -d '{"text": "Hi, Sam here - your order ships tomorrow.", "human_name": "Sam"}'

# Hand the chat back to the assistant (or end it with "resume_ai": false)
curl -X POST "https://your-dashboard/api/handoff/<conversation_id>/close" \
  -H "Authorization: Bearer <token>" -H "Content-Type: application/json" \
  -d '{"resume_ai": true, "note": "Delivery question answered"}'

# Check state and recent messages (poll no faster than every 5 seconds)
curl "https://your-dashboard/api/handoff/<conversation_id>" -H "Authorization: Bearer <token>"- 401 invalid_token: wrong or expired token — or your system cannot reach the dashboard's public address.
- 410 conversation_ended: the handoff already ended (the visitor left, a timeout fired, or someone else closed it). Safe to ignore.
- 409 not_in_handoff: someone already handed the chat back.
- 429: more than 60 calls a minute for one conversation.
What happens automatically
- The assistant stops answering the moment a handoff starts and does not answer again until the person closes it or a timeout fires. It is then given a clearly marked record of what was said, so it can continue sensibly — and it treats that record as information, not as instructions.
- If nobody picks up in time, the visitor gets the message you set and the assistant either carries on or keeps waiting up to the hard limit.
- If the person goes quiet for the set time, the assistant takes back over.
- If your webhook cannot be reached when a handoff starts, the visitor is not left hanging: after the retries they get the “nobody available” message and the assistant carries on. The tab shows the last delivery result.
- If the visitor leaves the widget, the handoff ends and your side is told.
- Daily and per-chat limits stop a runaway visitor from flooding your team.
7 Sessions and allowed websites
- Session Management: housekeeping for conversations — Auto-close inactive sessions with an Inactivity Timeout (minutes) and the Inactivity Message shown when it happens, plus Max Messages per Session as a hard cap on any single conversation.
- Max session length (minutes, 0 = no limit, the default): ends a single chat after this many minutes with a polite message asking the visitor to start a new one — it stops a session being held open and running up AI costs.
- Reconnect grace period (seconds, 0 = default): how long the conversation stays open after the visitor closes or leaves the page, so a quick reload rejoins the same chat. The default is about 20 seconds and the maximum 10 minutes; a longer window keeps sessions running after the visitor has gone.
- Error Handling — When the AI hits an internal error: what the visitor sees if something breaks behind the scenes — the standard apology (default), your own Custom error message, or nothing at all (silent).
- Daily Limit (Abuse Protection) — Max sessions per day: once this many new conversations have started today, the widget politely refuses further visitors until midnight (UTC). It’s your protection against a surprise AI bill from bot traffic or a viral page (0 = no limit). To get an email when the limit trips, add a report rule with the Widget Abuse — Daily Limit Reached trigger on the Reports page.
- AI Summary & Data Extraction: the AI reads each finished conversation, writes a summary and pulls out the specific details you name — each extraction field has a Field Name, a Display Label, and a Description (for the AI) telling it what to look for (e.g. “the phone number the visitor wants to be called back on”). Results appear on the conversation’s Chat History page under Extracted Data, and in your AI Conversation Analysis reports.
- When it happens: website conversations are summarised when they end.
- Daily automatic summary limit: the most automatic summaries this chatbot gets per day, across all its channels (default 200, 0 = unlimited). Website visitors are anonymous, so this stops a flood of junk conversations running up AI costs. Conversations over the limit show “Skipped — this chatbot’s daily summary limit was reached”. If you raise the limit, today’s skipped conversations are summarised automatically within about 5 minutes; older ones need the Generate Summary button, which is never counted against the limit.
- Domains tab — Allowed Origins: the security list of website addresses allowed to use this chatbot. Only sites you list here can load the widget — always use
https://addresses on live sites.
8 Put it on your website — Embed Code
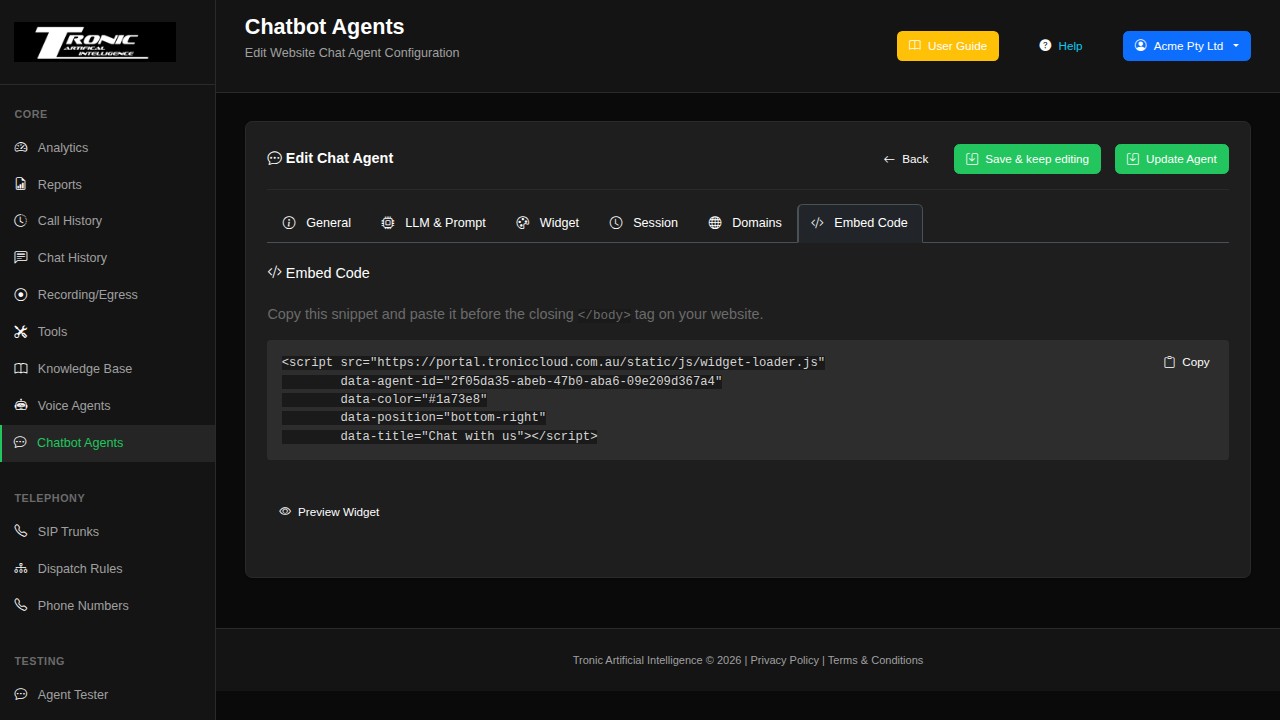
The Embed Code tab generates a single small script tag. Copy it and paste
it just before the closing </body> tag of your website (or hand it to
whoever manages the site). The chat bubble appears automatically. Use the
Preview button first to see exactly how the widget will look and behave
before it goes live.
Passing details about the visitor (data-variables)
Your website can hand the chatbot details about the person — for example a logged-in
customer’s name — by adding a data-variables attribute to the embed
snippet, for example
data-variables='{"name": "Priya", "account_number": "1253566"}'. Each name becomes
a {{placeholder}} you can use in the system prompt and welcome message
(“Hello {{name}}…”). Names are lowercase letters, digits
and underscores (up to 32 characters), up to 10 variables, values up to 200 characters each. A
placeholder you don’t supply is removed from the welcome message automatically.
9 Test it safely
Head to the Agent Tester page (covered later in this guide), pick your chatbot from the dropdown, and chat with it in a throwaway test session — nothing is saved to Chat History, but tools and knowledge lookups run for real. The chatbot must be Enabled to respond.
Ending a chat session from your own code (developer API)
The normal way needs nothing from you: when a visitor ends the chat or closes the page, the widget disconnects them immediately. The session’s room simply sits on the server for a few minutes before it is cleaned up automatically — harmless, though a visitor who reconnects inside that window can land back in the old session.
For websites with their own “End chat” button (or any custom integration), there is an API that closes the session instantly: the agent leaves on the spot, and a reconnect is guaranteed to start a completely fresh session.
- Endpoint:
POST /api/widget/endon your dashboard’s address, with the JSON body{"room_name": "webchat-..."}. - Authentication — no API key needed: send the header
Authorization: Bearer <session token>using the same token your page received from/api/widget/tokenwhen the chat session started. That token proves the caller owns that session, so a visitor can only ever end their own chat — never anyone else’s. - Response:
{"success": true}. Safe to call twice, and safe to call after the session already ended — “the room is gone” counts as success either way, so your hang-up code never needs special error handling for it. - Errors:
401— missing/wrong token, or a token for a different room;400— malformed body or a room name that doesn’t start withwebchat-;429— called too rapidly for the same room (wait the number of seconds in theRetry-Afterheader). - Typical flow: on your own End-chat button, disconnect the widget client first, then fire this call.
Walkthrough: launch a website chatbot, stage by stage
Same principle as building a voice agent — prove each stage before the next:
- Stage 1 — brain and prompt. Create the agent; on General / LLM & Prompt pick a model (chat can afford a smarter, slower one than a phone agent), write the System Prompt, add facts to Reference Information, set two fallback models. Prove it: Agent Tester → pick the chatbot → have a conversation. Fix tone and facts here first.
- Stage 2 — knowledge. Attach the Knowledge Base collections it should answer from. Prove it: in the Tester, ask a question only the documents can answer and check it comes back right.
- Stage 3 — look and feel. Widget tab: brand colour, position, title, welcome message, display mode (start with Popup). Pick the Chat Mode on General — Voice with avatar is the sweet spot for websites (spoken replies, no microphone permission popup).
- Stage 4 — guard rails. Session tab: set the daily session limit
(abuse protection), inactivity timeout, and — if you want summaries — switch
on AI Summary with a daily cap. Domains tab: add your website’s
https://address to Allowed Origins — the widget won’t load anywhere else. - Stage 5 — go live. Enable the agent, Embed Code tab →
Preview to see it exactly as visitors will, then paste the script tag before
</body>on your site. Prove it: open your website in a private/incognito window and have a real conversation — then find it in Chat History.
Knowledge Base
Give your agents your documents to answer from.
Out of the box, an agent only knows what’s written in its prompt. The Knowledge Base changes that: upload your price lists, policies, FAQs, and manuals, and the agent searches them during the conversation to answer questions accurately — instead of guessing. This works for both voice agents and chatbot agents.
1 Create a collection
A collection is a folder of related documents — for example “Product Info”, “Company Policies”, or “Pricing”. Keeping topics in separate collections lets you give each agent only the knowledge it needs. Click the create button, give the collection a name and description, and it’s ready for documents.
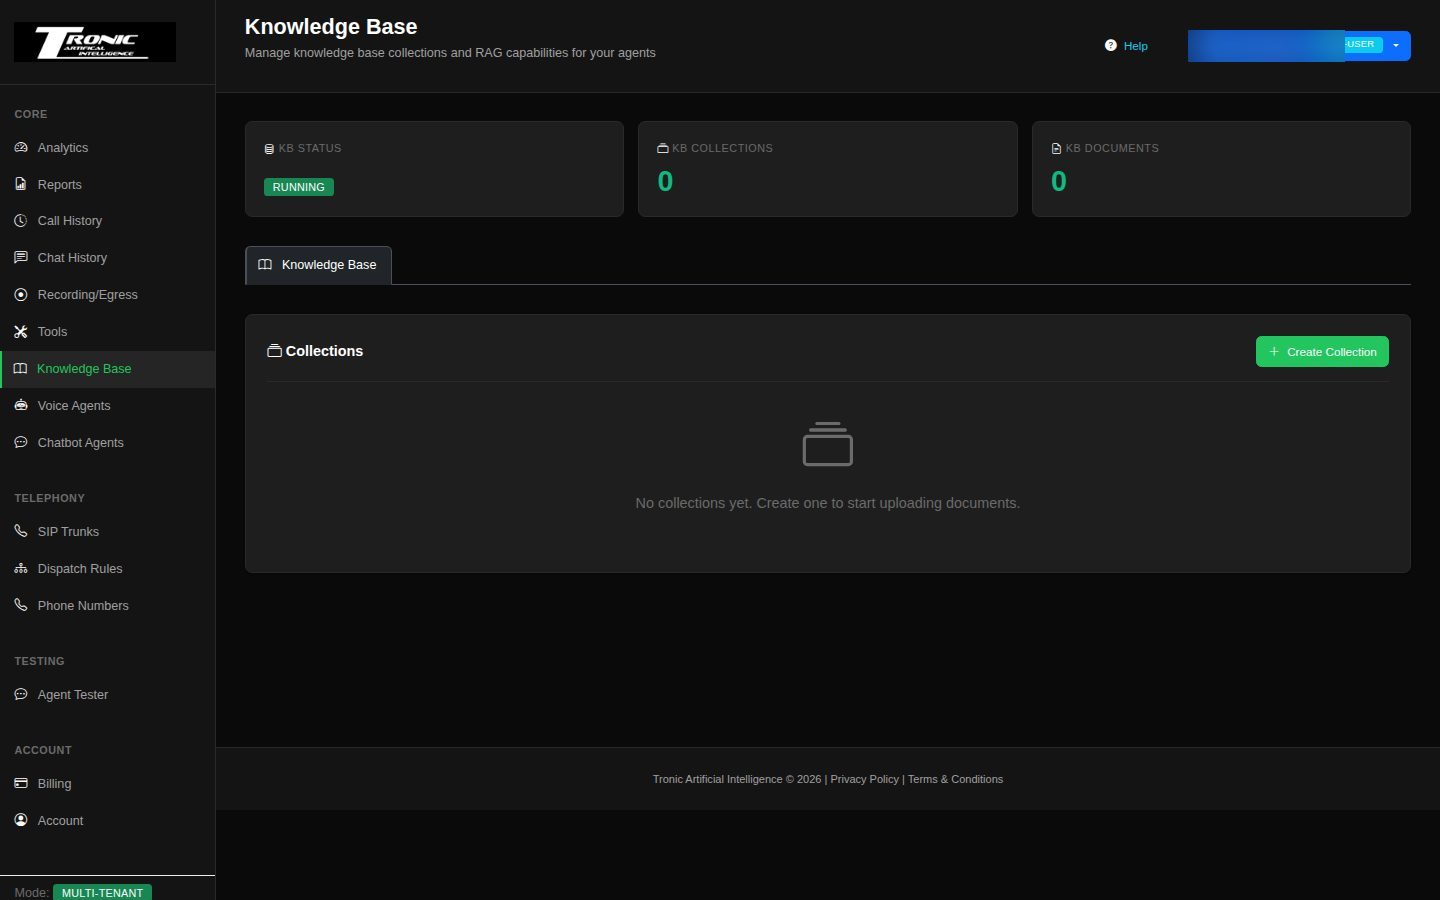
2 Add documents and web pages
- File tab: TXT, MD (Markdown), CSV, PDF and Word (.docx) files up to 10 MB each. Choose several files at once, or drag them onto the upload box — they’re added one after another. PDF and Word files have their text extracted automatically (Word headings and tables are kept). Older
.docfiles aren’t supported — save them as .docx first. Image-only (scanned) PDFs have no text to read. - Text tab: give it a title and type or paste the content — great for FAQs, opening hours and price lists you don’t have as a file. It’s saved as a text document you can re-index, download or delete like any other.
- URL sources: add a web page address, a Google Doc, or a Google Sheet. The content is fetched and indexed automatically, and you can set an auto-refresh interval (every 12 hours, 24 hours, 48 hours, or weekly) so the knowledge stays current when the page changes.
After you add a document, the system splits it into small chunks and processes them for search — you’ll see the chunk count next to each document. Large files take a little while; the rest of the dashboard keeps working normally while one is processed, and uploads are handled one at a time.
Same name twice: if the collection already has a document with the same name, you’re asked what to do: Replace adds the new version first and only then removes the old one (so the agent never has a gap with nothing to search), Keep both keeps both copies (answers may repeat), or Skip. If the old copy can’t be removed, the new row shows Old copy not removed — delete the old one from the list yourself.
Within each collection you can view, download, add, or delete documents at any time. URL sources also show a refresh badge with a “Refresh now” button and a per-source interval picker, and turn red if the last fetch failed.
What the columns mean:
- Collections table — Documents / Vectors / Embedding: how many documents the collection holds, how many searchable chunks they became (Vectors), and which embedding provider/model the collection was built with. To move a collection to another model, use Re-embed (below) — no need to delete and re-upload.
- Collections table — Used by: which voice agents and chatbots search this collection (Not assigned if none do yet).
- Documents table — Size / Chunks / Status: the file size, how many search chunks it was split into, and its state. Processing… means it’s still being added (the list refreshes itself); Failed means it wasn’t added — hover for the reason, delete the row and try again.
- KB Status card (top of page): Running (green) means the search database is up; Stopped (red) or Not Configured (grey) means no knowledge lookups will work until it’s fixed.
3 Attach a collection to an agent
- Voice agents: open the agent’s editor, and on the Identity tab tick the collections under Knowledge Base Collections. An agent can search several collections at once. If you have no collections yet, the editor shows a link to create one.
- Chatbot agents: same idea — the collections picker is on the LLM & Prompt tab.
That’s it — the agent now decides for itself when a caller’s question needs a document lookup. It fires on “what’s your returns policy?” but not on “hi there”. It checks the agent’s Reference Information first and only searches when the answer isn’t there.
Search switches itself on and off. Ticking at least one collection turns on the agent’s Search Knowledge Base tool and adds a short line about it to the agent’s Tool Usage Instructions; unticking them all turns it off and removes that line (if you’ve rewritten the line yourself, it’s left alone). Duplicating an agent copies its collections too, and deleting an agent’s last collection switches its search off. If you switch search off yourself on the Tools page, it stays off until you change the agent’s collections.
Search tool settings (Tools page → Search Knowledge Base, per agent):
- Max results: how many matching passages the agent gets per lookup (default 5). Fewer is faster and cheaper; more gives the agent more to go on.
- Say a filler line on slow lookups / Filler line / Filler delay: the agent starts searching while it is still saying its own “let me check that”. If the search is still running this many seconds after it finishes speaking (default 2), it says the filler line (default “One moment, let me check that.”) so the caller isn’t left in silence. On by default. Realtime voice agents don’t use the filler line.
If the written answer doesn’t come back, a box appears exactly where the answer would have been, and stays there, explaining why:
- AI answer dropped — time limit reached: the answer model didn’t finish within the Answer time limit, so on a real call the agent would read the raw search results shown underneath. Pick a faster answer model (best) or raise the limit, save, and test again. The links in the box open the settings for you.
- AI answer failed: the answer model returned an error (shown in the box, e.g. a wrong model name or a key problem). Again, a call would use the raw results. Some providers report a slow answer as an error of their own, so a very slow model can show here too.
Only administrators see the model name, the error text and the links; other users are asked to contact their administrator.
Re-embed — moving a collection to another embedding model
Each collection is built with one embedding model, and two models’ search data can’t be mixed. Re-embed (in the collection’s row) rebuilds the collection’s search data with a new model in the background, then switches over in one step. The collection keeps its name, its documents and the agents that use it.
- New provider / New model: any configured model except the current one. The line under the model is how quickly it answers one caller question.
- Estimate: how many passages will be re-embedded and roughly what it costs (usually well under a cent).
- Also searched by agents that use other models (only when it applies): an agent that searches this collection and collections on a different model makes one extra lookup per question, and match scores from different models aren’t directly comparable. Re-embed those collections to the same model too.
- Rebuilt from their saved text / will need uploading again (only when it applies): documents with no search data of their own are rebuilt from their saved text or web address; any without either are listed so you can upload them again afterwards.
- Start re-embed: first a test passage is sent to the new model to check the key, the model access and the result size — if that fails you see why and nothing is built.
- While it runs: the row shows a progress bar and a Cancel link. Uploads, text, web addresses, re-index and deletes on that one collection pause (you’re told to try again shortly), and scheduled website refreshes wait for the next cycle. Live calls keep searching the collection the whole time. One re-embed runs at a time per dashboard.
- When it finishes: “Switched to … Live calls use it now.” The very next lookup uses the new model. Check a few answers with Test as agent. The old search data is deleted a minute later. There is no undo button — to go back, re-embed again with the old model.
- Model retired — re-embed needed (red): the provider has switched that model off (for example Google AI Studio’s
text-embedding-004). Calls skip the collection — the agent keeps answering from its other collections — and new uploads are refused until you re-embed it; deleting documents or the whole collection still works. Re-embed opens withgemini-embedding-001already chosen.
Walkthrough: give an agent your price list in five minutes
- Step 1: create a collection called “Pricing”.
- Step 2: upload your price list (PDF, Word or CSV) — or paste it on the Text tab.
- Step 3: in the test search box, ask a real question a caller would ask (“how much is the premium plan?”). If the right chunk comes back, you’re ready; if not, simplify the document (tables with clear headings work better than dense prose).
- Step 4: open the agent’s editor → Identity tab → tick “Pricing” under Knowledge Base Collections → save. Then pick Test as agent in the Test Search box to confirm it finds the price.
- Step 5: prove it in the Agent Tester: ask the price question and watch the transcript show the knowledge lookup happening before the answer.
Tools
Tools are the things your agents can do — transfer calls, send messages, look things up, take action.
Without tools, an agent can only talk. With tools, it can hang up politely, put callers on hold, transfer them to a human, text them a booking link, check an order in your CRM, and much more. The Tools page is where you switch tools on per agent and configure how each one behaves.
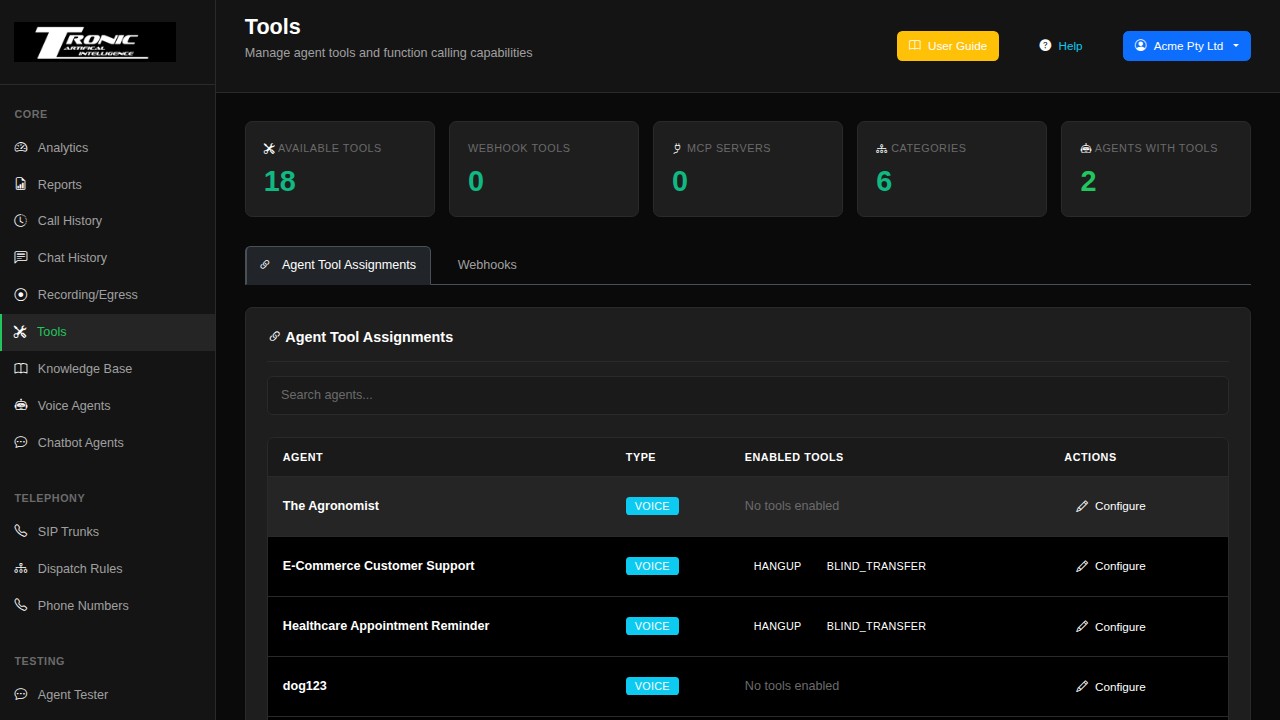
1 Assign tools to an agent
The Agent Tool Assignments section at the top lists your agents. Click Configure next to an agent to open its assignment panel, then flip the toggle for each tool you want that agent to have. Configurable tools (like transfers) show a settings panel under their toggle where you can override the defaults just for this agent.
- Switching a tool off keeps its settings. Untick a tool and save: the agent stops using it, but whatever you typed into its panel for this agent stays saved. Tick it again and the same settings are back — nothing to type in again. The saved settings do nothing while the tool is off. They are cleared only when you press Reset to Global on that tool, when the tool itself is deleted, or when they are no longer allowed (for example an address the dashboard now refuses).
Sometimes an agent has a tool assigned that this page can’t offer right now — for example the tool was renamed. The Configure window then shows a yellow warning box at the top (“1 tool on this agent isn’t available right now”) listing it with the reason, and the agent table shows its badge in yellow with a warning sign.
- “Not found”: the tool was deleted or renamed, or couldn’t be loaded. If it was renamed, switch the new name on in the list above and tick Remove on the old one.
- Remove: tick it and click Save to take the tool off this agent. Its per-agent settings are deleted too.
Let the agent finish speaking before a tool runs
When the agent says something and then uses a tool — “I’ll put you through to Sales now” followed by a transfer, or a goodbye followed by a hang-up — the tool waits for the sentence to finish before it starts. Most sentences take 2–4 seconds. If the agent is still talking after 8 seconds (for example because it repeated the caller’s request back first), this setting decides how much longer it may keep waiting, so the caller hears the whole sentence instead of being cut off mid-word.
- Before a tool runs, let this agent finish speaking (top of a voice
agent’s Configure window):
- Use default: follows the dashboard’s default — up to 15 seconds unless it has been changed. Right for almost everyone.
- Up to 12 / 15 / 20 seconds: a shorter or longer limit for this agent. A sentence longer than the limit is still cut off when the limit is reached.
- Off — stop waiting at 8 seconds: the old behaviour. The tool starts at 8 seconds even if the agent is mid-sentence.
collect_dtmf) is never delayed, and speech-to-speech
(realtime) agents always stop at 8 seconds. One setting covers the whole call: after a
handoff, the agent that answered the call still decides. The setting travels with the
agent when you export, import or duplicate it.
2 Tell the agent when to use its tools
Giving an agent a tool isn’t quite enough — it also needs to know when to reach for it. That happens in the agent editor, in the Tool Usage Instructions box on the Identity tab. Example: “If the caller asks to speak to a person, use the transfer tool and send them to Reception. If nobody answers, offer to take a message.” You describe the when in plain English; the system automatically supplies the technical details and the list of available destinations.
Switching a tool on adds its default instruction to that box for you. Switching it off takes that default text out again — unless you had edited it, in which case your wording is left alone and a notice asks you to open the agent editor and remove what no longer applies.
Built-in tools at a glance
- hangup: lets the agent end the call gracefully when the conversation is done.
- handoff_to_human: chatbot agents only — hands a website conversation to a person via the chatbot's webhook. It is switched on and off from the chatbot's Human Handoff tab, not here; the only thing to edit on this page is its usage instruction.
- hold: puts the caller on hold with hold music. Upload your own music in the tool’s configuration.
- blind_transfer: forwards the caller straight to another destination — a phone number or a phone-system extension — without checking first. You define named destinations (“Reception”, “Sales”) and the agent picks by name.
- attended_transfer: the polite version — the caller waits on hold with music while the agent dials the destination, briefs them privately, then connects the two. If the destination doesn’t answer or voicemail picks up, the agent automatically comes back to the caller and offers to take a message instead.
- take_a_message: captures a message from the caller and delivers it to the right staff member by email and/or SMS. Works on its own or as the fallback when a transfer fails.
- collect_dtmf: collects keypad input (account numbers, PINs) — callers can press keys or say the digits. Configure how many digits, the timeout, and whether the agent reads them back to confirm.
- play_audio: plays a pre-recorded audio file — legal disclaimers, announcements, standard messages. Upload MP3, WAV, or OGG files up to 10 MB.
- cal_check, cal_book, cal_reschedule, cal_cancel: the four Cal.com calendar tools — check free times, book an appointment, move an existing appointment to a new time, and cancel one. They share one setup, described in Setting up Cal.com for your agents.
- get_datetime: gives the agent the current date and time, in your chosen format and timezone.
- send_sms: texts the caller (booking links, addresses, confirmations). Pick a messaging provider in the tool’s configuration. A Test button sends a real test message.
- send_email: sends an email via your configured mail service.
- lookup_caller: looks the caller up by their phone number the moment the call connects — through your n8n workflow or API, and/or from what the dashboard already knows — so the greeting and the whole conversation can use their name, booking or account. Runs while the phone is still ringing. See Know who is calling before you say hello.
- schedule_callback, record_note: shown on the Tools page as Coming Soon — these are preview placeholders and can’t be configured or used yet.
Configuring the transfer tools, field by field
The two transfer tools carry the most options of any built-in tool. What each field in their Configure popups means:
- Default Outbound SIP Trunk: which of your outbound trunks dials the destination. Individual destinations can override it.
- Transfer Destinations: the named places the agent can send callers. Each destination has a name the agent refers to (“Reception”, “Sales”), a type (a phone number, or a SIP address for phone-system extensions like 3CX), and the number/address itself. The agent only ever picks from this list — it can’t invent destinations. On a PBX-type trunk a phone-number entry must be an extension, queue or SIP user name and is dialled exactly as written; a number starting with + is refused, so give that entry a Trunk override pointing at a PSTN trunk.
- Play Dial Tone (blind transfer): what the caller hears during the connection moment.
- Transfer Mode (Advanced) (blind transfer): how the handover is executed — leave on the default unless your phone system needs the alternative.
- Play Hold Music / Hold Music File / Volume (attended transfer): what the caller hears while the agent talks to the destination privately. Upload your own file or use the built-in music.
- Consultation Timeout / Ring-out timeout (seconds) (attended): how long the private briefing may last, and how long to let the destination ring before giving up.
- Detect voicemail and pivot automatically (attended): if the destination’s voicemail answers instead of a person, the agent notices and treats it as no-answer instead of briefing a machine. The two advanced fields tune how long it listens and how confident it must be.
- When transfer fails, the agent should: the fallback — apologise and continue (default), take a message (needs the take_a_message tool enabled on the same agent), or apologise and end the call.
- Auto-Hang-Up … When Caller Leaves: if the caller hangs up mid-transfer, the dialled destination is hung up too instead of being left saying “hello?” to no one.
- Minimum Consultation Time Before Merge (seconds) (attended): a brief guaranteed private moment with the destination before the caller can be merged in.
- Hold tool extras: the hold tool shares the hold-music fields and adds Max Hold Time (seconds) so nobody can be left on hold forever.
Walkthrough: set up “transfer to a human” that can’t dead-end
- Step 1: pick your outbound trunk, add a destination named “Reception” with the real phone number, leave hold music and voicemail-pivot on.
- Step 2: set When transfer fails to Take a message.
- Step 3: in Agent Tool Assignments, enable attended_transfer AND take_a_message on your agent (configure take_a_message’s delivery email/SMS so messages actually reach someone).
- Step 4: agent editor → Tool Usage Instructions: “If the caller asks for a person, use the attended transfer to Reception. If nobody answers, take a message.”
- Step 5: prove both paths with real calls: one where Reception answers (you’ll hear the agent’s private briefing before the merge), and one where you let it ring out — the agent should come back and take a message. Check the message arrived.
Setting up Cal.com for your agents
Your agents can work with a Cal.com calendar through four built-in tools. Together they cover the whole appointment conversation:
- cal_check: finds the free times on a day or range of days.
- cal_book: books a new appointment in one of those free times.
- cal_reschedule: moves an appointment the caller already has to a new free time. Cal.com keeps it as one appointment and sends a single “rescheduled” email.
- cal_cancel: cancels an appointment the caller already has.
This works with a Cal.com cloud account (cal.com). Everything below is done once; after that you just switch the tools on for each agent that should take bookings.
Step 1 — Your Cal.com account and calendar
- Sign in to Cal.com (or create a free account) with the business account whose calendar the agent should book into.
- Connect your real calendar (Google, Outlook or Apple) in Cal.com under Settings → Calendars, then switch on each calendar under Check for conflicts that holds your real appointments. Cal.com treats anything in those calendars as busy, so the agent never offers a time you’re not free — a connected calendar with its switch off is ignored. Add events to chooses which calendar the agent’s bookings appear in.
- Set your working hours in Cal.com under Availability. The agent can only offer times inside them.
Step 2 — The event type the agent books
In Cal.com an event type is a kind of appointment — for example “30 minute consultation”. The agent books, moves and cancels appointments of one event type. Create one (or pick an existing one) under Event Types, and set its length, buffers and minimum notice the way you want them — the agent follows the same rules as your online booking page.
A few event-type settings decide whether the tools can work at all. Open the event type and check them before you go live (the tab names below are the ones in the event type’s left-hand menu):
- Privacy & security → Requires booker email verification — turn OFF. With it on, Cal.com emails a code the caller would have to read out, which they can’t do on a call. Booking and moving appointments then fail.
- Privacy & security → Requires confirmation — your choice. If it’s on, new and moved appointments wait as “pending” until you confirm them in Cal.com. The agent tells the caller the business still has to confirm the new time.
- Reschedule & cancel → Disable cancelling / Disable rescheduling — leave OFF. If either is on, Cal.com refuses the matching tool and the agent tells the caller it couldn’t make the change. (Require cancellation reason doesn’t get in the way — the agent always sends one.)
- Payments & Seats → Offer seats — leave OFF. The agent can’t move or cancel a seat in a group booking; it will tell the caller the team will help. Paid bookings aren’t supported by the agent either.
- Phone number question — only if you want phone matching. If you plan
to turn on Also require the caller’s phone number to match (see Step 5), the
booking has to store the caller’s number. Add a phone question under the event
type’s Booking form, and switch on Send caller’s phone number in
cal_book.
Step 3 — Create an API key and find the Event Type ID
- API key: in Cal.com go to Settings → Developer → API
keys, click New, give it a name such as “Voice agent”, and copy the
key (it starts with
cal_live_). Cal.com shows it only once. If you set an expiry date, put a reminder in your diary: an expired key makes every Cal.com tool fail with “The calendar API key appears to be invalid”.
- Event Type ID: the number Cal.com uses for the event type the agent
books. Cal.com no longer shows it in the address bar (the editor link now looks like
app.cal.com/links/…, and that code is not the ID), so the dashboard looks it up for you:- Open the Cal.com tool’s settings (Step 4 says where) and paste the API key.
- Under Event Type ID, press Find my Event Type ID, then Load my event types. You see every event type on your Cal.com account (and its teams) with its length and ID.
- Press Use this next to the right one. The number goes into the box. Press Save, then Run Test (Step 5).
cal.com/yourname/30min) and paste it into the box above Load my event types: the matching event type is highlighted and marked Matches your link.
- What the button uses: the API key typed in the same settings, or, if that box is blank, the key the tool already has saved (the same key the tool books with). It only reads from Cal.com — nothing is booked or changed.
- If you paste Cal.com’s editor link (
app.cal.com/links/…) the panel tells you it holds no ID and leaves the list showing — just pick from the list. - Older Cal.com screens: if your address bar still shows
app.cal.com/event-types/1234567, that number is the Event Type ID and you can type it in directly. - A team event marked “Managed team template” can’t be booked directly; pick the team member’s own copy of it instead.
Step 4 — Put the key into the tools
Each of the four tools has its own copy of the settings, so fill in the same Cal.com API Key, Event Type ID and Timezone in every Cal.com tool the agent uses.
- For one agent: Tools page → Agent Tool Assignments → Configure next to the agent → switch the tool on and fill in its settings panel. Use this when different agents book into different calendars.
- Timezone: set it to the timezone your Cal.com working hours are in (for
example
Australia/Sydney). It is how the agent reads out times and understands “the appointment on Tuesday”. If you leave it blank the dashboard’s own timezone is used, which may not be yours — set it on every Cal.com tool.
Step 5 — Choose the tools and test them
- Book only:
cal_check+cal_book. - Book and change: add
cal_rescheduleand/orcal_cancel. If callers ever ring to change a time, switch oncal_reschedule— without it the agent can only book a second appointment and the old one stays in your calendar. - Also require the caller’s phone number to match (on
cal_rescheduleandcal_cancel): an extra check that the booking belongs to the person calling. Leave it off unless your bookings save the caller’s phone number (Step 2) — with it on, a booking that has no phone number can never be found. - Test: after saving, press Run Test in each tool’s settings. It only reads from Cal.com — it never books, moves or cancels anything.
Then try the whole conversation in the Agent Tester with a test booking under your own email: book one, ring back and move it, ring back and cancel it. Check Cal.com after each step.
If something goes wrong
What the agent (or the tool result in Call History) says, and what to do:
- “The calendar API key appears to be invalid”: the key was mistyped, deleted or has expired. Create a new key in Cal.com (Step 3) and paste it into every Cal.com tool.
- “The configured calendar event type was not found” or
“Event Type ID is not configured”: the Event Type ID is missing
or belongs to a different Cal.com account (the first message comes from
cal_checkandcal_book). Look it up again with Find my Event Type ID (Step 3), using the same API key. - “I couldn’t find an upcoming appointment under that email address on that date”: the caller gave a different email or date from the one on the booking, the booking is for a different event type, or it is in the past. The agent should check the spelling and the date with the caller.
- “I wasn’t able to find that appointment … the team will follow up”: three look-ups failed in the same conversation, so the tool stopped trying (this stops people guessing their way into someone else’s booking). Call the customer back.
- “That time slot is no longer available”: someone took the time between the agent offering it and the caller choosing it. The agent checks again and offers another time.
- “That appointment has already been cancelled”: nothing to do — it was cancelled earlier (by the caller online, or by you).
- “… can’t check the caller’s phone number in this conversation”: phone matching is on, but the conversation has no phone number (for example a website chat). Turn phone matching off for that agent, or handle changes from the website yourself.
- Every look-up fails although the details are right: phone matching is on and your bookings don’t store a phone number. Turn it off (Step 5).
Know who is calling before you say hello (lookup_caller)
Most agents that need a booking number, an account or a name have to ask for it
and wait for the caller to find it. With lookup_caller switched on, the dashboard
looks the caller up by their phone number the moment the call connects —
in your own booking system through an n8n workflow, and/or in what the dashboard already knows
— and hands the result to the agent before it speaks. The greeting can then be
“Hi Sarah, is this about your appointment on Tuesday?” instead of “Can I have
your booking number?”.
How it works, step by step
- A call connects. The dashboard reads the caller’s number from the phone line (on an outbound call, the number being dialled). Calls with no number — a withheld caller ID, the Agent Tester, a website chatbot — skip the lookup and greet straight away.
- The lookup starts. Everything you switched on runs at once: your webhook (an n8n workflow or any web address that answers with JSON) and the built-in sources described below.
- The agent waits, briefly. Up to the Maximum wait you set (2 seconds by default; the hard ceiling is 5). The phone keeps ringing during this time.
- The result becomes placeholders. Every field that comes back —
customer_name,booking_id, whatever your workflow returns — becomes a{{name}}placeholder in the greeting and the System Prompt, exactly like{{user_number}}. A Caller Information note listing all of them is added to the prompt automatically, so the agent knows them even if you never mention a single placeholder. - The agent greets. With the normal greeting, or with the greeting your workflow returned for this caller, or — when nothing was found — with the Fallback greeting.
- Late answers still count. If the reply arrives after the greeting has started, it is added to the prompt in the background and marked after greeting in the call’s transcript. The agent cannot change a greeting it has already spoken, but it knows the details from the next sentence on.
What you need to add to the prompt
Nothing, to begin with. With Add a Caller Information note to the prompt on (the default) the agent receives a block like this at the start of every call where something was found, and it will use the details the way it uses anything else in its prompt:
## Caller Information
customer_name: Sarah Chen
booking_id: BK-1234
booking_time: Tuesday 10:00
Three things are worth adding once you have seen it work:
- Placeholders in the greeting:
Hi {{customer_name}}, thanks for calling
          Riverside Dental.
A placeholder the lookup did not fill is left out, and if the greeting would start with a blank the Fallback greeting is spoken instead — so a found caller gets the personal version and an unknown caller never hears “Hi , thanks for…”. - A rule about what to do with it: the agent knows the booking; tell it how to behave. For example: “If Caller Information includes a booking, confirm it with the caller (‘I can see your appointment on Tuesday at ten’) instead of asking for their booking number. If there is no Caller Information, ask for their name and booking number as usual.”
{{caller_info}}to choose where the note goes: if your prompt contains this placeholder the whole Caller Information block is placed there instead of at the end. Useful when a long prompt has a “What you know about this caller” section.
{{customer_name}} only
fills if the lookup returned a field called exactly customer_name. The Test button on the
tool shows the names that actually came back — copy them from there. The names
user_number, current_datetime, current_date,
current_time, time_greeting and caller_info are reserved and
are dropped if a workflow returns them.
Switching it on
- For one agent (agent level): Agent Tool Assignments → the agent →
Configure next to
lookup_caller. A per-agent webhook is the usual reason: a dental agent looks up the dental system, the gym agent the gym system. - New agents start with it off. Nothing changes on an agent until you tick the tool.
Where the details come from
Tick any mix. All of them run at the same time and their fields are merged; when two sources return the same field name, the webhook wins.
- Your webhook (the usual choice): a web address that receives the caller’s number and answers with what you know about them — an n8n workflow in front of your booking system, CRM or database, or your own API. The n8n Wizard builds the workflow for you (next section).
- Built-in source: last call’s extracted fields: if the agent has Data Extraction Fields (Voice Agents → the agent → Behavior), the values it pulled out of this caller’s previous call are reused — the name they gave, the product they asked about. The dashboard only starts remembering calls once the tool and this switch are on for the agent, and only calls where the summary actually picked something out (a two-second call that extracted nothing does not replace the useful one before it). Fields the caller never mentioned are left out, never read out as “null”. No webhook needed.
- Built-in source: campaign contact: when this agent dialled the caller in an outbound
campaign, the contact’s
Name,CompanyName,JobTitleand custom columns are reused — handy when they ring back. - Built-in source: caller location:
caller_country,caller_regionandcaller_local_timeworked out from the number itself (the state for Australian landlines, the country for mobiles). Lets the agent say “good evening” to someone ringing from Perth after your Melbourne office has closed.
Setting it up with n8n
- Tools → n8n Wizard tab → Caller lookup (who is calling).
- Choose the agent and paste your n8n address. Click Create. The wizard saves the workflow’s address and its secret straight into the tool’s settings and switches the tool on for that agent — nothing to copy.
- Download the workflow and import it into n8n (new workflow → ⋯ → Import from File…).
- Replace the Look up the caller (REPLACE ME) step with your own lookup — an
HTTP Request to your booking system, a Google Sheets or database lookup, a HubSpot search —
keyed on
{{ $json.body.caller_phone }}. Give it one item with the fields you want the agent to know. Leavefoundfalse when there is no record. - Publish the workflow (the Active toggle, top right), then go back to the Tools page and press Run Test with your own mobile number.
- The workflow must be published. Until it is, n8n only has a test address; the dashboard sees a 404 and the agent greets without details. The Last lookup line on the tool shows the 404.
- The Webhook node must stay on “Using ‘Respond to Webhook’ node”. Respond immediately answers “Workflow was started” before your lookup has run. The dashboard treats that as not found and Run Test says to change the node.
- “Listen for test event” answers once. It is for clicking through a single run in n8n. Use the published workflow and the dashboard’s Run Test instead.
What your workflow receives, and what it should send back
Received (a JSON POST, available in n8n as {{ $json.body.… }}):
event (call_started for the automatic lookup, lookup when the
agent asks mid-call, test from the Test button), caller_phone,
caller_phone_formatted, called_number, direction,
call_id, room_name, agent_slug, agent_name,
timestamp, and when they exist dynamic_vars (campaign variables),
sip_headers, custom (your Extra fields) and
requested_number (a different number the caller stated, only if you allow that).
Sent back — any of these shapes work:
- The full shape:
{"found": true, "variables": {"customer_name": "Sarah Chen", "booking_id": "BK-1234"}, "context": "VIP. Prefers SMS.", "greeting": "Hi Sarah, calling about Tuesday?", "metadata": {"crm_id": "C-88"}}.variablesbecome placeholders;contextis plain text added to the prompt as-is;greetingreplaces the agent’s greeting for this call;metadatais kept on the call record (and sent with post-call webhooks) but never spoken. - A flat object:
{"customer_name": "Sarah Chen", "booking_id": "BK-1234"}— every top-level text or number becomes a placeholder. - Not found:
{"found": false}, an empty object, or a 404. - n8n’s “All Entries” array with one item is unwrapped automatically.
Limits, so a runaway reply cannot bloat the prompt: at most 50 fields, 2,048 characters per field, 4,096 characters of context, 1,024 characters of greeting, and a 64 KB reply. Line breaks and control characters inside values are removed.
Testing and watching it
- Run Test (on the tool card and on the per-agent Configure window) takes a phone number, runs the real lookup and shows the fields returned, the greeting override, the context, the raw reply and exactly what was sent. Test it with a number you know is in your system and with one that is not.
- Last lookup line: under each agent’s
lookup_callerrow — “ok (420 ms) 2 minutes ago · 14 found, 3 not found, 1 error”. The first place to look when a greeting was not personal. - In the call’s transcript: a Caller lookup entry at the top shows found / not found / timed out / error, the sources, the field names and the time taken. Values are never stored in the transcript — only the names.
- Automatic pause: after five webhook errors in a row (not “not found”, not slow), counted across all calls, the webhook is paused for ten minutes so a dead address does not add a ring to every call; built-in sources keep running. The Last lookup line shows “webhook PAUSED” with the minutes left. A successful Run Test lifts the pause immediately.
- “Webhook failing”: if your webhook errors but a built-in source still found something, the call still gets that data, and the Last lookup line and Run Test say the webhook failed — a broken address is never hidden behind the built-in sources.
- Time limits: each built-in source gets most of the ring time and is dropped if it runs over; a lookup the agent makes during the call gives up after five seconds (the agent carries on without it); Run Test gives up after ten.
Privacy and safety
- Caller numbers leave this box the moment you enter a webhook address. Only send them to a system you control, and say so in your privacy notice.
- Only the caller ID is looked up unless you switch on Allow looking up a number the caller states. Leave that off unless you need it: with it on, anyone who rings can ask the agent about any phone number, and the agent will read back whatever your system holds.
- Secrets stay secret: the API key or password is masked after saving and never appears in Test output, logs or the call record.
- Caller ID can be faked. Someone can ring showing another person’s number and hear what the lookup holds for it. Never put anything in the lookup reply, or in Data Extraction Fields you reuse, that you would not tell a stranger on the phone. Withheld and “anonymous” callers are never looked up.
- Local time: worked out only where the country has one time zone (and per state for Australian landlines). Countries with several — including the US, Canada, Spain, Portugal, Chile and New Zealand — give the country only.
R Every tool, and every setting it has
Below is each tool you can switch on, what it does in plain terms, a picture of its settings, and what every field is for.
Fields marked required must be filled in before the tool will work. Where a default is shown, that is what the tool uses if you leave the field alone.
attended_transfer
Warm transfer. The agent rings the destination, speaks to them privately while your caller waits on hold, then connects the two. If nobody answers it comes back to the caller.
Settings
- Outbound SIP Trunk: SIP trunk to use for outbound consultation calls (pick one from a list)
- Transfer Destinations: Destinations the agent can warm-transfer to. Each entry has a name (shown to the agent), a type (PSTN phone number or SIP URI for 3CX/PBX queues), and the destination value. Optionally a per-destination trunk override, and a notification email and SMS number: when the agent takes a message for this destination (for example after it doesn’t answer),
take_a_messagesends it there instead of to its default recipient. attended_transfer always uses bridged dial — SIP REFER mode (available on blind_transfer) does not apply here because the multi-step consult/merge flow needs the destination as a room participant. On a PBX-type trunk a phone-number entry must be an extension, queue or SIP user name (letters, digits, . _ -) and is dialled exactly as written; a number starting with + is refused, so give that entry a Trunk override pointing at a PSTN trunk. (a named list of destinations) - Play Hold Music: Whether to play hold music while caller is on hold during transfer (on or off; default: True)
- Hold Music File: Audio file to play while caller is on hold during consultation. Leave on (None - use default) to play the built-in hold music. (pick one from a list)
- Hold Music Volume: How loud the hold music plays to the caller. The slider is perceptual (50% sounds about half as loud as 100%); values below ~10% are near-silent on phone calls. 80 is the recommended default. (a slider; default: 80)
- Consultation Timeout (seconds): How long the consultation can run before it auto-cancels and the caller is returned. The countdown starts when the transfer is initiated and INCLUDES the time spent dialling and ringing the destination (typically 5–15s), so set this comfortably higher than the conversation alone — 90 seconds or more is recommended. Default 120. Set to 0 to disable auto-cancel entirely. (a whole number; default: 120)
- Ring-out timeout (seconds): How long to wait for the destination to pick up before treating it as no-answer. Lower = faster pivot to taking a message, higher = more tolerance for slow mobiles. Typical range 15-25. (a whole number; default: 18)
- Detect voicemail and pivot automatically: When enabled, the agent listens briefly to the destination's first few seconds after pickup and pivots back to the caller if it hears a voicemail greeting. Disabled automatically in audio-to-audio (realtime) pipelines where no separate STT is available. (on or off; default: True)
- Voicemail detection window (seconds) — advanced: How long to listen to the destination before deciding voicemail vs human. Shorter = faster pivot, longer = more accurate. Typical range 4-10. (a whole number; default: 6)
- Voicemail confidence threshold — advanced: How confident the detector must be before auto-cancelling. Lower = more sensitive (more pivots, but more false positives on hands-free / flat-tone humans). 0.7 is a balanced default. (a slider; default: 0.7)
- When transfer fails (no-answer or voicemail), the agent should: Choose what happens when the destination doesn't pick up or voicemail is detected. Selecting 'Take a message' ALSO requires the take_a_message tool to be enabled on this agent — otherwise the LLM will be told to call a tool it doesn't have. (pick one from a list; options: Apologise and continue talking with the caller (default), Take a message from the caller (requires the take_a_message tool to be enabled), Apologise briefly and end the call; default: Apologise and continue talking with the caller)
- Auto-Hang-Up Recipient When Caller Leaves: When the original caller hangs up after the transfer completes, automatically end the recipient's leg too — so the recipient doesn't hear silence waiting for the call to drop. Default: enabled. Disable only if you have a specific reason to let the recipient leg stay alive after the caller leaves. (on or off; default: True)
- Minimum Consultation Time Before Merge (seconds): Prevents the LLM from merging the transfer immediately. Default 8 seconds. Set to 0 to disable the guard entirely (trust the LLM to merge whenever appropriate). Maximum 60 seconds. (a number; default: 8)
101 is
dialled exactly as typed. A destination starting with + is refused on a PBX
trunk; give that row its own Trunk override pointing at a PSTN trunk. Earlier versions
dialled PBX extensions as +<extension> and the transfer failed.
background_audio
Plays quiet background sound during the call, such as gentle office noise, so silence does not feel dead.
Settings
- Background Audio File: Select a built-in clip or uploaded file to loop during calls (pick one from a list)
- Audio Volume: Controls background audio volume. 0-100% is normal range, above 100% boosts quiet clips for phone calls. (a slider; default: 80)
- Audio Probability: Probability of the ambient sound playing at any given moment (0% = never, 100% = always) (a slider; default: 100)
Background audio starts by itself when the agent joins the call and loops under the whole conversation. The agent never calls it, so you don’t need to mention it in Tool Usage Instructions.
blind_transfer
Straight transfer. The agent forwards the caller to a destination you set up in advance, chosen by name.
Settings
- Default Outbound SIP Trunk: SIP trunk used for transfers when a destination doesn't specify its own trunk override. (pick one from a list)
- Transfer Destinations: Destinations the agent can transfer to. Each entry has a name (shown to the agent), a type (PSTN phone number or SIP URI for 3CX/PBX queues), and the destination value. Optionally a per-destination trunk override, and a notification email and SMS number that
take_a_messageuses when the caller leaves a message for this destination (Attended Transfer’s boxes are checked first if both tools list the same name). On a PBX-type trunk a phone-number entry must be an extension, queue or SIP user name (letters, digits, . _ -) and is dialled exactly as written; a number starting with + is refused, so give that entry a Trunk override pointing at a PSTN trunk. (a named list of destinations) - Play Dial Tone: Whether to play a dial tone to the caller during transfer (on or off; default: False)
- Transfer Mode (Advanced): bridge (default, recommended) — dashboard dials the destination and bridges the caller in; if the destination doesn't answer, the agent stays on the call and can recover. refer (advanced) — sends a SIP REFER to your upstream provider so the call is handed off cleanly and the dashboard's room ends; requires a REFER-friendly provider (Telnyx, or 3CX-as-direct-trunk). Twilio rejects REFER for non-PSTN URIs. With REFER you lose the wait-for-answer safety net — if the destination is unreachable the caller lands on a dead leg. (pick one from a list; options: bridge, refer; default: bridge)
- Auto-Hang-Up Transfer Target When Caller Leaves: When the caller hangs up after being transferred (Bridge mode only), automatically end the destination leg too — so a 3CX queue agent doesn't pick up to silence. Default: enabled. Disable only if you have a specific reason to let the destination leg stay alive after the caller leaves. Not relevant in REFER mode (the destination is on a separate carrier-owned call the dashboard can't control). (on or off; default: True)
cal_book
Books an appointment in Cal.com during the call. To move an appointment the caller
already has, use cal_reschedule instead —
booking again leaves the old appointment in your calendar. Setup:
Setting up Cal.com for your agents.
Settings
- Cal.com API Key: Your Cal.com cloud API key (starts with cal_live_…). (a secret, stored hidden; required)
- Event Type ID: The number Cal.com uses for this event type. Press Find my Event Type ID to look it up (Cal.com no longer shows it in the address bar). (a whole number; required)
- Timezone: IANA timezone recorded on the booking (e.g. Australia/Sydney). Leave blank to use the dashboard timezone.
- Attendee Language: Locale code for the booking confirmation (e.g. en). (default: en)
- Send caller's phone number: Attach the caller's phone number to the booking (for Cal.com SMS reminders). Only sent when it is in E.164 format. (on or off; default: False)
- Bookings API Version (advanced): Cal.com cal-api-version for the bookings endpoint. Leave default unless Cal.com changes it. (default: 2024-08-13)
- Usage Instruction: Guidance appended to the agent's prompt for when/how to use this tool. (a longer block of text; default: To book an appointment, call cal_book with the caller's full name, their email address, and start_time. CRITICAL: start_time must be copied VERBATIM from a cal_check slot — never invent or reformat a timestamp. Confirm the spelled-out email with the caller before booking. If a slot is no longer available, call cal_check again once and offer another time; do not retry more than twice.)
cal_cancel
Cancels an appointment the caller already has in Cal.com. The agent finds the booking from the email address it was booked under and the date of the appointment, reads it back, and only cancels once the caller says yes. First set up Cal.com as described in Setting up Cal.com for your agents.
How a cancellation sounds
- Caller: “I need to cancel my appointment.”
- Agent: “Sure — what email address is it booked under, and what day is it?”
- Caller: “jo@example.com, it’s on Tuesday the 1st.” (the agent looks it up — nothing is changed yet)
- Agent: “I’ve found your appointment on Tuesday 1 December at 11:00am. Would you like me to cancel it?”
- Caller: “Yes please.” (only now is it cancelled)
- Agent: “Done — your appointment on Tuesday 1 December at 11:00am has been cancelled.”
Settings
- Cal.com API Key: Your Cal.com cloud API key (starts with cal_live_…). Use the same key as your other Cal.com tools. (a secret, stored hidden; required)
- Event Type ID: The number Cal.com uses for this event type. Press Find my Event Type ID to look it up. The agent can only change bookings of this event type — use the same ID as
cal_checkandcal_book. (a whole number; required) - Timezone: IANA timezone the caller’s appointment date is in (e.g. Australia/Sydney) — also the timezone the agent reads times out in. Leave blank to use the dashboard timezone, but setting it is strongly recommended.
- Also require the caller’s phone number to match: Only find bookings whose phone number matches the number the caller is ringing or texting from. Bookings saved without a phone number can then never be found, and website chats (which have no number) can’t use the tool at all — only turn this on if your bookings record the caller’s phone. (on or off; default: off)
- Bookings Lookup API Version (advanced): Cal.com cal-api-version for finding bookings. Leave default unless Cal.com changes it. (default: 2024-08-13)
- Cancel/Reschedule API Version (advanced): Cal.com cal-api-version for cancelling and rescheduling. Leave default unless Cal.com changes it. (default: 2026-02-25)
- Usage Instruction: Guidance appended to the agent's prompt. The default tells the agent to ask for the email and date, read the appointment back, and only cancel after a clear yes; and to use
cal_rescheduleinstead if the caller wants a different time. (a longer block of text)
- Existing agents don’t change: the tool does nothing until you switch it on for an agent.
- Repeating (recurring) appointments: only the one occurrence the caller named is cancelled; the rest of the series stays.
- Group (seated) bookings: can’t be cancelled by the agent — it tells the caller the team will help.
- Test runs never cancel real bookings: the tool is recorded as used but not actually run.
cal_check
Checks what appointment times are free in Cal.com so the agent can offer them — for a
new booking (cal_book) or a new time for an existing one
(cal_reschedule). Setup: Setting up Cal.com for
your agents.
Settings
- Cal.com API Key: Your Cal.com cloud API key (starts with cal_live_…). (a secret, stored hidden; required)
- Event Type ID: The number Cal.com uses for this event type. Press Find my Event Type ID to look it up (Cal.com no longer shows it in the address bar). (a whole number; required)
- Timezone: IANA timezone for availability (e.g. Australia/Sydney). Leave blank to use the dashboard timezone.
- Slot Duration (minutes, optional): Only for variable-length event types. Leave blank to use the event type's own duration. (a whole number)
- Slots API Version (advanced): Cal.com cal-api-version for the slots endpoint. Leave default unless Cal.com changes it. (default: 2024-09-04)
- Usage Instruction: Guidance appended to the agent's prompt for when/how to use this tool. (a longer block of text; default: When the caller asks about availability or wants to book, call cal_check with the requested date range (start_date and end_date, ISO dates like 2026-07-01). State the timezone you are quoting and confirm it with the caller. Read back a few of the returned slot times. Do NOT invent times — only offer slots cal_check returned. When the caller picks one, pass that slot's exact value to cal_book without reformatting it.)
cal_reschedule
Moves an appointment the caller already has to a new free time. It uses Cal.com’s own
“reschedule”, so there is still one appointment afterwards (Cal.com
marks the old time as rescheduled) and the caller gets one “rescheduled” email.
Without this tool an agent can only book a second appointment and the old one stays in your
calendar. Needs cal_check switched on too, to find the new time. Set up Cal.com
first: Setting up Cal.com for your agents.
How a reschedule sounds
- Caller: “I need to move my appointment.”
- Agent: “No problem — what email is it booked under, and which day is it on?”
- Caller: “jo@example.com, Monday the 30th. Could I do Tuesday
morning instead?” (the agent checks Tuesday’s free times with
cal_check) - Agent: “I have 11:00 or 11:30 on Tuesday.” Caller: “11 is great.” (the agent looks up the booking — nothing is changed yet)
- Agent: “So that’s moving your appointment from Monday 30 November at 11:30am to Tuesday 1 December at 11:00am — shall I go ahead?”
- Caller: “Yes.” (only now is it moved) Agent: “Done — you’re now booked for Tuesday 1 December at 11:00am.”
Settings
- Cal.com API Key: Your Cal.com cloud API key (starts with cal_live_…). Use the same key as your other Cal.com tools. (a secret, stored hidden; required)
- Event Type ID: The number Cal.com uses for this event type. Press Find my Event Type ID to look it up. The agent can only change bookings of this event type — use the same ID as
cal_checkandcal_book. (a whole number; required) - Timezone: IANA timezone the caller’s appointment date is in (e.g. Australia/Sydney) — also the timezone the agent reads times out in. Leave blank to use the dashboard timezone, but setting it is strongly recommended.
- Also require the caller’s phone number to match: Only find bookings whose phone number matches the number the caller is ringing or texting from. Bookings saved without a phone number can then never be found, and website chats (which have no number) can’t use the tool at all — only turn this on if your bookings record the caller’s phone. (on or off; default: off)
- Bookings Lookup API Version (advanced): Cal.com cal-api-version for finding bookings. Leave default unless Cal.com changes it. (default: 2024-08-13)
- Cancel/Reschedule API Version (advanced): Cal.com cal-api-version for cancelling and rescheduling. Leave default unless Cal.com changes it. (default: 2026-02-25)
- Usage Instruction: Guidance appended to the agent's prompt. The default tells the agent never to use
cal_bookto move an appointment, to find the new time withcal_check, read back both the old and the new time, and only move it after a clear yes. (a longer block of text)
cal_cancel — a look-up that changes nothing and gives the agent a
one-time code, then the move itself with that code. If someone takes the new time in between,
the agent hears “That time slot is no longer available” and offers another. If the
event type requires confirmation, the new time waits as “pending” in Cal.com
and the agent tells the caller the business still has to confirm it. The move is recorded in
Cal.com as made by the caller (their email), not by you.
- Existing agents don’t change: switch the tool on for each agent that should move appointments. Once it’s on, the agent is told to use it instead of booking a second appointment.
- Repeating (recurring) appointments and group (seated) bookings can’t be moved by the agent — it tells the caller the team will help.
- Who can move a booking: the same as
cal_cancelabove.
collect_dtmf
Lets the agent collect numbers the caller types on their keypad, such as an account or reference number.
Settings
- Number of Digits: How many digits to collect (a whole number; default: 10)
- Input Timeout (seconds): How long to wait between digit inputs (a number; default: 4.0)
- Terminator Key: Key to end input early (pick one from a list; options: #, *; default: #)
- Confirm with Caller: Read back digits and ask caller to confirm (on or off; default: True)
get_datetime
Tells the agent the current date and time, so it can answer 'are you open now' and talk about days correctly.
Settings
- Timezone: Timezone the agent reports the date and time in. Set it to where your business is (pick one from a list; options: Australia/Melbourne, Australia/Sydney, Australia/Brisbane, Australia/Perth, Australia/Adelaide, America/New_York, America/Chicago, America/Denver, America/Los_Angeles, Europe/London, Europe/Paris, Europe/Berlin, Asia/Tokyo, Asia/Singapore, Asia/Hong_Kong, Pacific/Auckland, UTC; default: Australia/Melbourne)
- Date Format: How dates should be formatted (pick one from a list; options: Tuesday, 14 January 2025, 14 January 2025, January 14, 2025, 14/01/2025, 01/14/2025, 2025-01-14; default: Tuesday, 14 January 2025)
- Time Format: How times should be formatted (pick one from a list; options: 2:30 PM, 14:30, 2:30:45 PM, 14:30:45; default: 2:30 PM)
handoff_to_human
Chat only. Hands the conversation to a real person on your team.
Settings
- Usage Instruction: When the chatbot should hand a conversation to a person. Switch the feature on and set the webhook in the chatbot's Human Handoff tab — this tool is managed from there. (a longer block of text; default: Use the handoff_to_human tool when the visitor asks to speak to a person, is clearly upset, or you have been unable to help after two attempts. Call it with a short reason. Do NOT announce the handoff yourself and do NOT add anything after calling it — the tool tells the visitor exactly what happens next.)
hangup
Lets the agent end the call politely when the conversation is finished.
Settings
- Usage Instruction: Instructions appended to the agent's system prompt for when and how to use the hangup tool (a longer block of text; default: Use this tool to end the call when the conversation is complete, when you have achieved your goal, or when the caller requests to hang up. Before calling this tool, always deliver your closing words — if the caller has already said goodbye or asked to end the call immediately, a single brief acknowledgment is enough. Do not call this tool mid-sentence or without any spoken closing. After calling this tool the call disconnects immediately — do not generate any further text or response.)
The agent says its closing words first; the call only drops once they have finished playing, plus a couple of seconds so the phone network delivers the last word. A speech-to-speech (realtime) agent that hangs up without saying anything gets a short goodbye generated for it first.
hold
Puts the caller on hold with music while the agent does something, then brings them back.
Settings
- Play Hold Music: Whether to play hold music while on hold (on or off; default: True)
- Hold Music File: Audio file to play while on hold. Leave on (None - use default) for a silent hold. (pick one from a list)
- Hold Music Volume: How loud the hold music plays to the caller. The slider is perceptual (50% sounds about half as loud as 100%); values below ~10% are near-silent on phone calls. 80 is the recommended default. (a slider; default: 80)
- Max Hold Time (seconds): Told to the agent as the longest a caller should wait on hold. Guidance for the agent, not a hard cut-off (a whole number; default: 300)
Holding is two steps: the agent puts the caller on hold, and must call the tool again with resume to take them off — the caller can’t hear the agent in between. You can pick a built-in clip or upload your own (MP3, WAV or OGG, up to 10 MB).
lookup_caller
Looks the caller up by phone number when the call connects (and, if allowed, again mid-call) and gives the agent the result as placeholders and a Caller Information note. The full walkthrough — how it works, what to put in the prompt, the n8n workflow and the reply format — is in Know who is calling before you say hello. Voice agents only.
Settings
- Look up the caller automatically when the call connects: the whole point of the tool. Runs while the phone is still ringing so the greeting can use the result. Off = the agent can only look up mid-call, when it decides to (on or off; default: on)
- Let the agent re-check during the call: gives the agent a
lookup_calleraction for when nothing was found at connect time, or the caller asks it to check again (on or off; default: on) - Allow looking up a number the caller states: off (recommended) only ever looks up the caller ID. On lets the agent look up a different number the caller gives — which means anyone who rings can ask about any number (on or off; default: off)
- Lookup webhook URL: your n8n / Make / API address. Receives a JSON POST with
caller_phone,called_number,direction,call_id,agent_slugand more; replies with the caller’s details. Leave blank to use built-in sources only. - Authentication: how the webhook recognises this dashboard — None, API key header, Bearer token or Basic (username + password) (default: None)
- Header name: for API key header: the header the key is sent in (default: X-API-Key; the n8n Wizard uses X-Webhook-Secret)
- API key / token: the value sent in the header, or as the Bearer token. Masked after saving
- Username / Password: for Basic authentication. The password is masked after saving
- Extra fields (JSON object): added to every request as
custom, e.g.{"location": "Melbourne clinic"}— lets one workflow serve several agents - Run the automatic lookup on: Inbound calls (the caller’s phone keeps ringing while we wait), Outbound calls (the lookup overlaps the dial; if the person answers within the wait, the greeting still uses it) or Both (default: Inbound)
- Wait for the result before greeting: on = the greeting can use the caller’s name. Off (safe mode) = greet instantly and let the details arrive for the conversation (on or off; default: on)
- Maximum wait (ms): every call on this agent rings up to this much longer. 2000 is a good default; above 3000 callers start hanging up (300–5000; default: 2000)
- Fallback greeting: spoken when nothing comes back in time — not found, slow, or down. Leave blank to use the normal greeting with any missing placeholders left out
- Add a Caller Information note to the prompt automatically: lists everything the lookup returned so you need not reference each placeholder by name. Skipped when your prompt already contains
{{caller_info}}— the block goes there instead (on or off; default: on) - Built-in source: last call’s extracted fields: reuses the Data Extraction Fields the agent pulled on this caller’s previous call. Calls after this update only, once that call’s summary has run (on or off; default: off)
- Built-in source: campaign contact: if this agent dialled the caller in a campaign, their Name, CompanyName, JobTitle and custom fields are reused (on or off; default: off)
- Built-in source: caller location:
caller_country,caller_regionandcaller_local_timefrom the number, where the number reveals them (on or off; default: off)
play_audio
Plays a recorded audio file to the caller, for disclaimers or announcements.
Settings
- Default Audio File: Default audio file to play if none specified (pick one from a list)
- Audio Volume: Controls how loud the audio plays to the caller (0% = silent, 100% = full volume) (a slider; default: 80)
record_note
Saves a note against the call.
Settings
- Storage Mode: Where to save notes (pick one from a list; options: redis, webhook, both; default: redis)
- Notes Webhook URL: Webhook to receive notes (for CRM integration)
schedule_callback
Arranges for someone to ring the caller back later.
Settings
- Callback Webhook URL: Webhook to receive callback requests (n8n, Make.com, etc.) (required)
- Minimum Delay (minutes): Earliest a callback can be scheduled (a whole number; default: 15)
- Business Hours Only: Only allow callbacks during business hours (on or off; default: True)
- Business Hours Start: Start time in 24h format (e.g., 09:00) (default: 09:00)
- Business Hours End: End time in 24h format (e.g., 17:00) (default: 17:00)
- Timezone: IANA timezone the business hours are in, e.g. Australia/Melbourne (default: Australia/Melbourne)
search_knowledge_base
Lets the agent look up answers in your Knowledge Base instead of guessing. It switches on and off by itself when you tick or untick Knowledge Base collections for an agent (see Knowledge Base). The search starts while the agent is still saying “let me check”, so the caller waits less.
Settings
- Max results: Maximum number of search results to return (a whole number; default: 5)
- Say a filler line on slow lookups: if the search is still running a couple of seconds after the agent finishes its own “let me check”, say the filler line so the caller isn’t left in silence. Standard (non-realtime) voice agents only (on or off; default: on)
- Filler line: what the agent says while a slow lookup finishes (default: One moment, let me check that.)
- Filler delay (seconds): how long after the agent stops talking to wait before the filler line (default: 2)
send_email
Sends an email during the call, for example a confirmation or a link.
Settings
- Email Provider: Choose your email sending method (pick one from a list; options: smtp, ses; required; default: smtp)
- SMTP Host: SMTP server address (e.g., smtp.gmail.com)
- SMTP Port: SMTP port (587 for TLS, 465 for SSL) (a whole number; default: 587)
- SMTP Username: Login name for your mail server. Leave blank if the server needs no login
- SMTP Password: Password for that login. Masked after saving (a secret, stored hidden)
- Use TLS: Enable TLS encryption (on or off; default: True)
- AWS Region: AWS SES region (pick one from a list; options: us-east-1, us-east-2, us-west-1, us-west-2, eu-west-1, eu-west-2, eu-central-1, ap-south-1, ap-southeast-1, ap-southeast-2, ap-northeast-1; default: ap-southeast-2)
- AWS Access Key ID: Access key of an IAM user allowed to send through SES
- AWS Secret Access Key: The matching secret key. Masked after saving (a secret, stored hidden)
- From Email Address: The address the email is sent from. Must be allowed by your mail server or verified in SES (required)
- From Name: The name shown next to the From address, e.g. your business name
- Reply-To Address: Where replies go if different from the From address
This tool has its own mail settings above. The agent fills in the recipient, subject and message when it calls the tool.
send_sms
Sends a text message to the caller during the call.
Settings
- SMS Provider: Custom (n8n) sends through your own n8n workflow. (pick one from a list; options: Custom (n8n); required; default: Custom (n8n))
- From Number / Sender ID: Sender phone number (E.164, e.g. +61412345678).
- n8n Send-webhook URL: Production URL of the imported Send-SMS n8n workflow (download it below, import into n8n, activate, paste the URL here)
- Shared Secret (send_sms tool): Sent as the X-SMS-Secret header so your n8n workflow can verify the request came from this dashboard. Baked into the downloaded workflow — regenerate = re-download + re-import. (a secret, stored hidden)
- SMS API URL (legacy direct HTTP): Direct SMS gateway HTTP endpoint — only used when the n8n Send-webhook URL above is empty
- HTTP Method: HTTP method for API requests (pick one from a list; options: POST, GET; default: POST)
- Request Body Template: JSON template with placeholders: {{to}}, {{from}}, {{message}} (JSON; default: {"to": "{{to}}", "from": "{{from}}", "message": "{{message}}"})
- Authentication Type: How to authenticate with your SMS API (pick one from a list; options: none, bearer, token, basic, api_key_header, api_key_query; default: none)
- Auth Token/Key: API key, bearer token, or basic auth credentials (a secret, stored hidden)
- Auth Header Name: Header name for API key (e.g., X-API-Key) (default: Authorization)
- Success Check Path: JSONPath to check success (e.g., $.status or $.success) (default: $.success)
- Success Value: Expected value for success (e.g., 'sent', 'true', '200') (default: true)
take_a_message
Takes a message when the person the caller wants is not available, and sends it on. Each message is also stored for 90 days, but no page in the dashboard shows it: the email or text message is how you receive it.
Settings
- How to deliver captured messages: Captured messages can be sent by email only, SMS only, or both. SMS requires the agent's SMS provider to be configured under the Messaging tab. (pick one from a list; options: Email only, SMS only, Email and SMS; default: Email only)
- Default recipient email: Email used when the message is not for a transfer destination that has its own notification email (set on that destination in the Attended or Blind Transfer tool, which must be switched on for the agent). Leave blank to send only to destinations' own addresses.
- Default recipient SMS number: SMS number (E.164 format, e.g. +61412345678) used when the message is not for a transfer destination that has its own notification SMS number. Leave blank to text only destinations' own numbers.
- Include call recording link: If call recording is enabled for this agent, include a link to the recording in the message email/SMS so the recipient has full context. (on or off; default: True)
- Usage Instruction (advanced): Instructions appended to the agent's system prompt for when and how to use take_a_message. Leave default unless you have a specific reason to override. (a longer block of text)
threecx_messaging
Sends a message INTO your 3CX system so it lands in a named user's chat. Not for texting customers.
Settings
- 3CX Webhook URL: Full 3CX Generic SMS webhook URL including the token path (e.g. https://yourtenant.3cx.ph/sms/generic/ABC123...). Find this in 3CX Admin → SIP Trunks → your trunk → Generic SMS tab. (a line of text; required)
- 3CX DID (fallback): The 3CX DID registered for SMS, in E.164 format with leading + (e.g. +61488883111). Used as the 'to' number only when no destinations are configured below. Must match the DID in 3CX EXACTLY. (a line of text)
- Default Country Code: E.164 country prefix (e.g. +61) used to normalize numbers entered in national format (e.g. 0412000001 → +61412000001). Must include the leading +. (a line of text; default: +61)
- Recipients (3CX Users): Named list of 3CX user DIDs the agent can message. Each entry has a Name (what the agent picks by, e.g. 'Sales', 'Support') and a Number (the 3CX DID that routes to that user, in E.164 with leading +). (a named list of destinations)
- Sender Identities: Named list of sender identities the message can appear to come from. Each entry has a Name (what the agent picks) and a Number (mobile in E.164, OR an alphanumeric sender ID up to 11 characters, e.g. 'Tronic'). (a named list of destinations)
- Default Sender Name: Name of the sender identity to use when the agent doesn't specify one. Must match an entry in the Sender Identities list above. (a line of text)
- Webhook Timeout (seconds): Maximum time to wait for 3CX to respond before giving up. Default 15s. Voice calls hear silence during this, so keep it short. (a whole number; default: 15)
threecx_receptionist — 3CX Receptionist
Turns the agent into a receptionist for your 3CX phone system: it finds people, queues, ring groups and menus in the live 3CX directory, sees who is available right now, puts callers through, offers voicemail when someone is busy, can screen callers first, only ever reaches the entries you tick, and can hang up on spam or abusive callers. Each agent connects to 3CX one of three ways: over a phone line with transfers dialled over a PBX trunk, over a phone line with transfers made through the agent’s own 3CX extension (no PBX trunk), or as an extension inside 3CX. Needs 3CX AI Edition (V20 Update 9 or later) and a Service Principal login.
3CX Receptionist
Turn an agent into a receptionist for your 3CX phone system — a live directory, real-time availability, screening, voicemail and transfers, all driven from 3CX itself.
The 3CX Receptionist is a tool you switch on per agent. Once it has a login to your PBX, the agent finds people, departments, queues, ring groups and menus by name in the live 3CX directory, sees whether a person is free right now, puts the caller through, offers voicemail when they are busy, can ask who is calling first, and refuses anyone you have not allowed. There is nothing to type in or keep up to date: when you add a person in 3CX, they appear in the agent’s directory the moment you tick them.
The
3CX_Receptionist tool needs a Service Principal (an API key), and only 3CX Ent/AI
Edition can create one.
No 3CX AI Edition? Use SIP Direct and the transfer tools. On any 3CX version an agent can still send callers to your 3CX users, queues, ring groups or IVRs using SIP Direct: a SIP trunk from the dashboard to your PBX, plus the ordinary
blind_transfer or
attended_transfer tool to any 3CX internal number.
The agent answers, and when the caller asks for someone it dials that extension or queue straight into
3CX.
For set-up steps for SIP Direct, see this video walk-through: youtu.be/NTC66pO1hpM
Setting up SIP Direct (any 3CX version)
Step 1 — Create a PBX trunk to your 3CX
In the dashboard go to Telephony → SIP Trunks → Outbound → Create new trunk (or use the Setup Wizard). The two fields that matter are marked below:
- Trunk Type = PBX is what allows bare extension and queue numbers to be dialled. A PSTN trunk refuses them.
- Address: your 3CX hostname and port. Include the port so DNS SRV is bypassed.
- Caller-ID to show on transfers: leave blank and the real caller’s number flows through to the person in 3CX; type a number to show that instead.
This trunk is for transfers into 3CX. To make outgoing calls (campaigns) go out through the 3CX to customers, use a separate trunk that logs in as a 3CX extension — see Calling out through a 3CX phone system.
Step 2 — List the 3CX destinations on the transfer tool
On the Tools page open blind_transfer on an agent’s panel, and add one destination per person, queue or menu the agent may reach:
- Name is what the agent hears about and what the caller asks for (“Sales queue”, “Alex”). Keep it natural.
- Value:
sip:800@your-pbx.3cx.aufor queue 800. On a PBX trunk you may also type the bare extension (800); a number starting with+is refused, so an outside number needs its own PSTN Trunk override on that row. - Test on the row places a real call to that destination so you can confirm it rings before an agent uses it.
- attended_transfer takes exactly the same destinations if you want the agent to speak to the person first, then join the caller.
What you get, and what you do not
- You get: transfers into 3CX to people, queues, ring groups and IVR menus, on any 3CX edition, with warm or blind transfer and the usual recording and hang-up behaviour.
- You do not get: the live 3CX directory (you type the list yourself and keep it up to date), real-time availability, voicemail by name, caller screening handed to the person, or the tick-list of who may be reached. Those come from the 3CX API, which is what the receptionist and Ent/AI Edition are for.
- Moving up later is easy: licence the API access, create the Service Principal, switch on the 3CX Receptionist, and leave the transfer tools in place for destinations outside the PBX.
Three ways to connect an agent to 3CX
Every agent chooses one of three ways to reach your PBX. They share the directory, the allow-list, availability, screening and the caller policies; they differ in where calls arrive and how a transfer reaches 3CX. Two settings pick the way: How calls reach this agent and, in phone-line mode, How transfers reach 3CX.
- 1. Phone line + PBX trunk (
trunk+pbx_trunk, the default). Calls reach the agent on any SIP trunk. To transfer, the dashboard dials the person back into 3CX over a second trunk that points at your PBX. Warm or blind transfers. Voicemail follows the person’s own 3CX status rules. Needs a PBX-type outbound trunk. Calls in progress survive a dashboard restart.
Choose it when you want warm transfers (the agent briefs the person first) and already have a trunk between the dashboard and 3CX. - 2. Phone line + transfers through the agent’s extension
(
trunk+agent_extension). Calls reach the agent on any SIP trunk. To transfer, the agent’s own 3CX extension rings the person, queue or voicemail box inside 3CX and the dashboard connects the caller to that call. Blind transfers. Voicemail always reaches the person’s mailbox. No PBX trunk needed. The dashboard carries the audio for the rest of the call, so a dashboard restart ends it.
Choose it when your numbers arrive on a carrier trunk and there is no trunk into 3CX, or you need voicemail to be dependable. - 3. Extension mode (
extension). The agent is an extension inside 3CX. 3CX routes calls to it (a DID, an IVR option, a queue overflow), the audio flows over 3CX’s Call Control API, and transfers happen inside the PBX — after a transfer the dashboard is out of the call. Blind transfers. Voicemail always reaches the person’s mailbox. Callers hear ringing until the agent is ready. No trunk at all. A dashboard restart ends calls still talking to the agent.
Choose it when your numbers already terminate on 3CX and you want the agent to sit inside 3CX’s own call flow (menus, queues, after-hours rules).
Setting each way up
Everything below is on the 3CX Receptionist panel — Per-Agent Settings on the agent. Fill the four connection fields first, the same for all three ways: PBX address, Service Principal Client ID, Service Principal API key, Verify the PBX certificate. Then tick who the agent may reach under Who the agent may put callers through to — nothing ticked means nobody is reachable. Then pick the way:
Way 1 — phone line + PBX trunk
- How calls reach this agent: Phone line.
- How transfers reach 3CX: Dial back into 3CX over a PBX trunk.
- Phone system (PBX trunk): the trunk that points at your 3CX. Create it first under Telephony → SIP Trunks → Outbound, Trunk Type = PBX.
- How to connect: Warm (the agent briefs the person first) or Blind (straight through).
- In 3CX: allow the dashboard in — the same trunk set-up as SIP Direct above.
- You ring: your dashboard’s own number.
Way 2 — phone line + transfers through the agent’s extension
- How calls reach this agent: Phone line.
- How transfers reach 3CX: Through the agent’s own 3CX extension. The PBX trunk field disappears — none is needed.
- 3CX voicemail dial code: leave at
*4unless your PBX uses a different code. - In 3CX: nothing beyond the Service Principal.
- You ring: your dashboard’s own number.
Way 3 — extension mode
- How calls reach this agent: Extension. The transfer setting disappears — the agent is already inside the PBX.
- If the agent cannot take the call: optional — a 3CX destination such as
Queue.800.for when no agent picks up within 12 seconds. Leave empty to hang up. - Maximum simultaneous calls and Record calls: optional.
- In 3CX: route something to the Service Principal — a number in its DID Number(s) field, a trunk inbound rule, or an IVR option, queue or ring group pointed at its Client ID.
- You ring: the number 3CX routes to the agent — not your dashboard’s number.
After saving ways 2 and 3, wait about 30 seconds for the connector to start; the agent’s panel shows its state. Then press Run Test, and use Call this extension to ring your own handset and talk to the agent.
How a call works, step by step
- The call arrives. Phone-line modes: on the SIP trunk, through the dispatch rule like any other call. Extension mode: 3CX rings the agent’s extension; the dashboard joins the agent to a call room and only then answers, so the caller hears ringing rather than silence.
- Sign-in. The agent signs in to your PBX in the background with the login you created once in 3CX (a Service Principal). The greeting is never delayed by this.
- Lookup. When the caller asks for someone (“Can I speak to Sarah?”, “Sales please”, “someone who handles invoices”), the agent searches the live 3CX directory, reads back every match and lets the caller choose; it never guesses. Descriptive words the caller adds (“the support queue”) are dropped automatically if the full phrase finds nothing.
- Availability. For a person, the agent sees their 3CX status. Someone on a call, away or on Do Not Disturb is not available; the agent says so and offers voicemail. It checks again just before transferring, so a person who just picked up another call is not rung.
- Screening (optional). The agent asks for the caller’s name, company and reason first. On a warm transfer it tells the person privately who is holding; in extension mode the details are also attached to the call inside 3CX.
- Transfer. The way you chose moves the call: dialled over the PBX trunk (way 1), rung from the agent’s extension and bridged (way 2), or moved by 3CX (way 3). Queues, ring groups and IVR menus are transferred the same way; they have no availability, so they are always offered.
- Voicemail. Ways 2 and 3 send the caller straight into the person’s mailbox, whatever their status. Way 1 transfers to the extension and 3CX applies that person’s own status rules (see Phone-line settings).
- Difficult callers. Spam, abusive or non-cooperative callers can be hung up on, with the same goodbye and clean disconnect as the normal hang-up tool.
One-time setup in 3CX
The agent signs in to 3CX with its own application login, which 3CX calls a Service Principal. You create it once, in the 3CX admin console:
- Click Admin (bottom of the left-hand bar).
- Choose Integrations, then API.
- Click + Add. The Add Application Access (Service Principal) screen below opens.
- Fill it in as described under the screenshot, click Save, then Generate API Key and copy the key — 3CX shows it once.
- Client ID: any name you will recognise, for example
reception. This is also the agent’s extension inside 3CX (extension mode, transfers through the agent’s extension, and test calls). Use one Service Principal per agent. - Generate API Key: appears once the principal is saved. Copy the key straight into the tool — 3CX shows it once; if you lose it, generate a new one and update the tool.
- Enable access to the 3CX Configuration API (XAPI): tick it. This is the directory and presence; without it nothing works.
- Department: the department whose people the agent should reach. System Wide or
DEFAULTcovers everyone on a single-department PBX. - Role: a role that can read users in that department — that is what gives the agent presence. System Owner always works; try Manager or Owner first and press the tool’s Run Test: if it warns that presence is missing, raise the role.
- Enable access to the 3CX Call Control API: tick it. Extension mode, transfers through the agent’s extension, the Call this extension button and the voicemail shortcut all use it.
- DID Number(s): extension mode only — pick the number(s) outside callers dial to reach the agent. Leave empty for the phone-line ways. (You can instead route a number with a trunk inbound rule, or point an IVR option or queue at the Client ID; see Extension mode.)
- Enable access to the 3CX Chat API: no effect today — 3CX has not published the endpoint behind it.
- Extension(s): way 1 only, optional — extensions the agent may divert straight to voicemail on a trunk transfer (see Phone-line settings). Ways 2 and 3 do not need it.
Per-agent settings
- Per-agent settings: Tools → Agent Tool Assignments → Configure on the agent’s row → switch on threecx_receptionist → Per-Agent Settings. Anything you change here overrides the default for that agent only; the panel shows a Customized badge, and Reset to Global throws the agent’s changes away.
Run Test and Call this extension are on the per-agent panel (a test call needs an agent to talk to).
Settings reference
Grouped as the panel shows them. Each group says when it is visible.
Connection — always shown
- How calls reach this agent:
trunk— phone line (ways 1 and 2).extension— the agent is a 3CX extension (way 3). Changing it ends any extension-mode call in progress on this agent. (default: trunk) - PBX address: the 3CX web address including the port, for example
https://your-pbx.3cx.au:5001. Must start with https:// and have nothing after the port. (required) - Service Principal Client ID: the Client ID you created in 3CX — also the agent’s extension inside 3CX. (required)
- Service Principal API key: the key 3CX generated. Stored on this agent only. (required)
- Verify the PBX certificate: leave on. Turn off only for an on-premises PBX with a self-signed certificate. (default: on)
Phone-line block — shown when the agent connects by trunk
- How transfers reach 3CX:
pbx_trunk— dial the person back into 3CX over the PBX trunk (way 1).agent_extension— the agent’s 3CX extension rings the person, queue or mailbox and the dashboard bridges the call (way 2; see Transfers through the agent’s extension). (default: pbx_trunk) - Phone system (PBX trunk) —
pbx_trunkonly: the outbound trunk pointing at this 3CX (Telephony → Outbound Trunks). Must be a PBX-type trunk. The agent re-checks it just before every transfer and refuses to dial if it has been changed or removed. - 3CX voicemail dial code —
agent_extensiononly: what the agent’s extension dials to reach a mailbox directly. 3CX’s default is*4, so*4101reaches extension 101’s voicemail. Change it only if your PBX uses a different code. (default: *4) - How to connect —
pbx_trunkonly:warm— ring the person, tell them privately who is holding and why, then connect the two.blind— put the caller straight through. (default: warm)
Extension block — shown when the agent connects by extension
- If the agent cannot take the call: where 3CX sends a caller when no agent has joined within 12 seconds, the agent drops out mid-call, or the call limit is reached. Written the 3CX way:
Queue.800.,IVR.802.,RingGroup.801.,Extension.101.,External..+61…, or a plain extension number. Leave empty to hang up. Checked when you save. (default: empty = hang up) - Maximum simultaneous calls: calls beyond this go to the fallback above, or are hung up. 1–50. (default: 5)
- Record calls: extension-mode calls do not pass through a SIP dispatch rule, so the recording switch lives here. (default: off)
Behaviour — always shown
- Only transfer to people who are available: use 3CX presence. Busy or away people are offered as voicemail instead; presence is re-checked at the moment of transfer. Needs the Configuration API tick and a role that can read users. (default: on)
- Ask who is calling first: collect the caller’s name, company and reason before putting them through, and pass them on (warm transfer briefing; attached to the call in 3CX in extension mode; on the call record under Screening in every way). (default: off)
- Offer voicemail when the person is busy: on — the agent offers voicemail and sends the caller there if they agree (how, depends on the way; see above). Off — the agent offers to take a message instead. (default: on)
- Who the agent may put callers through to: the allow-list — see Choosing who the agent may reach. (required)
- Blocked extensions (extra): optional second guard, handy for ranges such as
100, 105-110. Anything listed here is refused even if ticked in the allow-list. Never revealed to callers. (default: empty) - Spam or sales calls:
end_call— the agent says goodbye and hangs up.ignore— carry on normally. (default: end_call) - Abusive callers:
end_call— the agent says it is ending the call and hangs up.ignore— carry on. (default: end_call) - Callers who will not say who they are:
end_callorignore. Only applies when screening is on and the caller refuses every ask. (default: end_call) - Allow on calls the agent makes: off by default — on an outbound call the other person did not ring you, so lookup and transfer rarely make sense. Test calls from Call this extension always behave as incoming calls. (default: off)
Choosing who the agent may reach
People often have colleagues who must never be put through to an AI — the managing director, a private line, a test extension. The allow-list makes that explicit. Press Load from 3CX and the tool pulls the whole directory from your PBX: every extension, queue, ring group and IVR menu, grouped, with a filter box and all/none links per group. Tick the entries this agent may reach and save.
- Only ticked entries can ever be found or dialled. Someone added in 3CX later stays unreachable until you open the agent and tick them.
- Unticked people never appear in what the caller hears, and the caller is never told why.
- Each agent has its own list, so two agents on the same PBX can reach different people.
- Nothing ticked yet: the agent tells callers it cannot put calls through on this line and offers to take a message, and Run Test warns you.
- Deleted in 3CX: entries you ticked that no longer exist are shown as “no longer on the PBX” so you can untick them.
- Loading uses the details typed in the form, so you can try a new login before saving it. Leave the key blank and it falls back to the saved one.
Testing: Run Test and Call this extension
Run Test checks this agent’s saved settings without placing a call and reports each step separately: signing in, the directory (Configuration API or 3CX’s MCP server), a phonebook search, presence, and then, depending on the way — the PBX trunk (way 1), or that 3CX sees the Client ID as an app-controlled extension and that the connector is listening (ways 2 and 3) — plus voicemail and the allow-list. Press Save first if you changed anything.
Call this extension, just below, places a real test call: type an extension number, press the button, and the agent rings that phone. Pick it up and you are talking to the agent, so you can try lookups, transfers and voicemail from your own desk. Way 1 dials the extension over the PBX trunk; ways 2 and 3 have 3CX ring it from the agent’s own extension.
- The agent treats it as an incoming call, so lookups, transfers and voicemail work even though the agent dialled out.
- Unknown extensions are refused before dialling, and only one test call per agent can be in progress at a time.
- It costs a normal call (speech recognition, the model, the voice) and appears in Call History like any other call.
- If your phone does not ring, check that your 3CX app is open and registered and that you are not on Do Not Disturb — 3CX then sends the call straight to your voicemail.
Transfers through the agent’s extension (way 2)
Calls arrive on your normal SIP trunk. When the agent transfers, the dashboard asks 3CX to place a call from the agent’s extension to the person (their extension number), the queue, ring group or menu (its number), or the voicemail box (the voicemail dial code plus the extension). When that call is answered — by the person, by the queue, or by the mailbox greeting — the dashboard connects the caller’s audio to it and the agent leaves the call.
- No PBX trunk is needed on the dashboard. The connector (a small helper the dashboard starts by itself within about 30 seconds of saving) handles the 3CX side; its state is shown on the agent’s panel.
- Blind transfers. The agent announces the transfer, then the target is rung for up to 25 seconds. If nobody answers and 3CX does not send the call to voicemail by the person’s own rules, the caller stays with the agent, who offers voicemail or a message.
- The agent announces the transfer before dialling, and says nothing once the person answers. It goes silent the moment the call connects, so it can never talk over the person picking up.
- While the target rings the caller hears silence (there is no ringback on a call placed from an extension).
- The person’s phone shows the agent’s extension as the caller, not the outside caller’s number. Turn on screening if the person needs to know who is calling (the details are on the call record).
- The dashboard stays in the audio path until the call ends; when either side hangs up, the other side is hung up too. A dashboard restart ends these calls.
- One Service Principal per agent — the dashboard refuses to save a second agent using the same PBX and Client ID with the connector.
Extension mode in detail (way 3)
In extension mode the agent is an extension inside 3CX — the Service Principal’s Client ID is the extension. 3CX routes calls to it like any other extension, the voice audio flows between 3CX and the dashboard over the Call Control API (no SIP trunk involved), and transfers, queues and voicemail are done by the PBX. “Put me through to Alex’s voicemail” lands in Alex’s own mailbox even when Alex is on Do Not Disturb, and the caller hears Alex’s greeting.
Sending calls to the agent in 3CX
- A direct number: Admin → Integrations → API → open the Service Principal → DID Number(s), pick the number. Or: Admin → Voice & Chat → open the trunk that owns the number → its inbound rule for that number → destination = the Client ID.
- From inside 3CX: point an IVR option, a queue’s overflow or a ring group’s no-answer destination at the Client ID, so callers reach the agent after pressing a key or when nobody picks up.
- Calls to the SIP trunk number do not use extension mode. A number that still arrives on the dashboard’s own SIP trunk reaches the agent as a phone-line call, and an extension-mode agent cannot transfer it (the agent says it cannot put calls through from this line). Route the number in 3CX as above, or use way 2 for that agent.
What is different on a call
- The caller hears ringing until the agent is ready. The connector answers only once the agent has joined and is able to speak (about one to two seconds).
- Blind transfers, done by 3CX. The agent announces the transfer and 3CX moves the call; the dashboard is then out of the call. If the person does not answer or declines, 3CX follows that person’s own no-answer or busy rule (usually their voicemail), exactly as for a transfer from a desk phone. Only when 3CX cannot complete the transfer at all (the number does not exist) does the caller come back to the agent.
- Voicemail is a direct mailbox transfer — no status rules, no Extension(s) list needed.
- The call record shows the caller’s number and name from 3CX and the number they dialled. The prompt can use
{{caller_name}},{{caller_number}},{{called_did}}and{{referred_by}}(the queue or menu that sent the call). - Several calls at once are handled up to Maximum simultaneous calls; beyond that, and whenever no agent joins within 12 seconds, the caller goes to If the agent cannot take the call.
What the agent is told, and what to put in your prompt
Switching the tool on adds a block to the agent’s Tool Usage Instructions automatically. It tells the agent when to search, to read back every match, to act on availability (transfer / offer voicemail / say it cannot reach that person), how screening works, how departments come back as queues or menus, the difficult-caller rules, and to end the call when the caller is done. The block follows your settings: switch screening off and its paragraph disappears; switch voicemail off and the agent is told to offer a message instead; set a policy to ignore and that rule goes. In the blind-only ways (2 and 3) the warm-transfer steps are not offered to the agent at all. Switching the tool off removes the block again; if you had edited it, the dashboard leaves your text alone and tells you where to tidy it.
Your own prompt therefore only needs the persona and the business rules, for example:
You are Jess, the receptionist at Example Co. Keep every reply to one short sentence.
Connect callers to the right person, team or voicemail. Answer simple general questions
yourself; for anything about a caller's own account, order or support issue, offer to put
them through. If the caller names a problem rather than a person, ask who they'd like to
speak to. Match the caller's language. Never mention extension numbers or internal tools.
Worth stating in the prompt because they are business decisions, not tool mechanics: who to offer when the requested person is unavailable and voicemail is declined, whether to take a message (switch on the Take a Message tool alongside), and what “after hours” means if the agent answers overnight.
What happens automatically
- Connecting to 3CX happens in the background as each call starts, so the greeting is never delayed. If the PBX cannot be reached, the agent says it cannot reach the directory just now and offers to take a message; the reason is recorded on the call record.
- The connector starts by itself within about 30 seconds of saving an agent in extension mode or with transfers through the agent’s extension, stops when no agent needs it, reconnects to the PBX if the link drops, and restarts itself if it fails. It never runs on installs that do not use these ways.
- Several matches (“Jon” finds John, Joan and Jonathan) are all read back and the caller chooses. More than eight matches — the agent asks for a surname or department instead of reading a list.
- Unknown availability (the Service Principal cannot see that person’s department) — the agent says it cannot put them through to that person and asks if someone else can help. It does not guess.
- The agent falls silent the instant a transfer connects (way 2), so it cannot talk over the person answering. Its last words to the caller are the announcement it makes before dialling. In way 3 the PBX moves the call away from the agent, and in way 1 the agent’s sign-off plays while the destination is still ringing, which is intended.
- Screening details collected during the call appear on the call record under Screening.
- Where the caller ended up is recorded. Call History shows the person, queue or mailbox under the number they dialled, and the call’s own page adds a Transferred to line with an exact label such as
3CX-testonly-391— which 3CX, and which extension — plus whether it went over the PBX trunk, through the agent’s extension or inside 3CX. The To number itself stays the number the caller rang. - A PBX trunk that is changed or removed after setup (way 1) makes the agent refuse to dial rather than risk sending an extension out as an outside number.
- Saving is checked: an invalid fallback destination, a call limit outside 1–50, a bad voicemail dial code, or a Service Principal already used by another connector agent is refused with a plain message.
- Hidden fields keep their values when you switch between ways, so switching back restores the old trunk, fallback and limits.
- Test tools (the Agent Tester) stand in for this tool rather than running it, so trying an agent out can never ring a real person.
Troubleshooting
- The agent says it cannot put calls through / has technical issues when transferring (extension mode). The call arrived on the dashboard’s SIP trunk, not through 3CX. Route the number to the agent’s extension in 3CX (Sending calls to the agent), or switch the agent to phone-line mode with transfers through the agent’s extension.
- The status line says the connector is not running. Save the tool again and wait 30 seconds; then press Run Test, which names the problem (wrong API key, Call Control API not ticked, PBX unreachable).
- Every person comes back with unknown availability. The Service Principal’s role cannot read users, or the Configuration API is not ticked.
- Voicemail gives busy tone or the company mailbox (way 1). 3CX applied the person’s own status rule. Fix the rule in 3CX, or use way 2 or 3 where voicemail goes straight to the person’s mailbox.
- A transfer went to voicemail although the person was there. Their 3CX app did not ring (not registered, or Do Not Disturb), so 3CX used their no-answer rule.
- Saving says another agent already uses this Service Principal. Create a second Service Principal in 3CX for this agent; two agents on one extension would both answer every call.
Using it with the other transfer tools
The receptionist covers “can I speak to someone”. Keep Blind Transfer or Attended Transfer on the same agent for fixed destinations that are not in the directory — a mobile, an after-hours number, an outside contractor — and Take a Message for when nobody can take the call. All can be on at once.
Webhooks
Connect your agents to anything with a web address — your CRM, booking system, spreadsheets or an automation platform like n8n.
Build a webhook tool by hand
Webhook tools are custom tools you create that call an external system — your CRM, your booking system, or an automation platform like n8n, Make, or Zapier. During a call, the agent gathers what it needs from the caller and fires the request; the answer comes back into the conversation.
The easy way — the n8n Wizard. If your automation lives in n8n, the blue n8n Wizard button on the Webhooks tab does the whole job in four steps: pick a recipe (capture a lead into your CRM, look up live information the agent speaks back, send the caller a follow-up message, log a support ticket and read back its reference, silently ping your team on Slack or Teams, append call details to a Google Sheet, a Cal.com calendar pair that checks availability and books appointments, a GoHighLevel pair that books appointments and manages your sales pipeline, or a custom one with your own fields), enter your n8n address, tick the agents that should use it, and click Create. The wizard builds the webhook tool and hands you a matching n8n workflow file to import — the address, security key, and field names are baked into both sides so they always fit. In n8n you just activate the imported workflow and swap the red REPLACE ME node for your real action (your CRM, your email sender, your database). You can re-download the file any time from the n8n button on the tool’s card. The manual form below is still there for everything else.
- Function Name: what the agent calls the tool (e.g.
lookup_order) — lowercase letters, numbers, and underscores. Keep it short and descriptive. - Description: a plain-English sentence about what the tool does — this is how the AI decides when to use it, so make it clear.
- Webhook URL: the web address to call (an n8n, Make, or Zapier webhook, or your own API endpoint).
- HTTP Method: POST, GET, PUT, PATCH, or DELETE — whichever your endpoint expects (your integration platform will tell you).
- Custom Headers: extra request headers, typically for authentication keys.
- Parameters: the pieces of information the agent should collect and pass along — each with a name, a type (String for text, Number, Boolean for yes/no, Array for a list, or Object for structured data), a description, and whether it’s required. The description is read by the AI every time it fills the tool in, so say exactly what you want and in what format (e.g. “Appointment date in YYYY-MM-DD format”) — good descriptions are the biggest single fix for wrongly filled tools. Required is enforced, not just a hint: if a required field is still blank, the tool won’t fire at all — the agent is coached to ask the caller for it and only sends once it has an answer. Leave fields the call can proceed without as not required, or the agent will hold the conversation until it collects them. Example: a required
order_numberguarantees the agent gets the caller’s order number before the request ever fires. - System Parameters: toggles that automatically attach call context to every request — the caller’s number (
caller_phone), the number they dialled, call direction and duration, the agent’s name, the conversation transcript or just the last message, and the date/time. Turn on only what your endpoint actually needs. - Timeout (seconds) & the “Allow agent to speak while waiting for response” option: how long to wait for the endpoint before giving up (default 30), and whether the agent may keep talking naturally while it waits instead of going silent.
Webhook tools — the advanced sections
The rest of the webhook popup is optional polish. The defaults are fine to start with; come back when you want tighter control:
- Response Handling: Response Path picks out just the useful part of the endpoint’s reply (e.g.
$.data.message) instead of dumping the whole response on the agent; Error Message Path does the same for error replies; Success Condition defines what counts as success (e.g.$.status == 'success') so the agent knows whether the action worked. - Error Handling: Speak On Error is the exact sentence the agent says if the tool fails; Speak On Delay plus Delay Threshold (seconds) give the caller a “bear with me…” line when the endpoint is slow; Retry Count, Retry Delay (ms), and Retry On Status Codes quietly retry temporary failures before giving up.
- Rate Limiting: Max Calls Per Minute (across all calls) and Max Calls Per Session (per call) stop a confused agent — or a malicious caller — from hammering your endpoint. Empty means no limit.
- Authentication: the Auth Type dropdown handles the common login styles without you hand-crafting headers — Bearer Token (sends
Authorization: Bearer …), Basic Auth (a username and password), or API Key (Header) (your key in a header you name, e.g.X-API-Key— leave Header Name blank to use that). The key box has three buttons: Show (the eye) reveals the key, Copy puts it on your clipboard, and Generate makes a strong random key — copy it into whatever checks it (for n8n: the Webhook node’s Header Auth credential, with the same header name), then Save. If a key is already there, Generate asks first, because whatever uses the old key will reject calls until you update it; for a tool made by the n8n Wizard, re-download and re-import its workflow after saving. The Test button and real calls send exactly the same authentication, so a passing Test means calls will authenticate too. - Availability: restrict when the tool exists at all — Available From / Until (Time) with a Timezone makes a tool office-hours-only (outside those hours the agent simply doesn’t have it), and Available When (Condition) can gate it on call context.
- Testing / Mock Mode: tick Enable Mock Mode and fill in Mock Response (JSON) to have the tool return a canned answer instead of calling the real endpoint — perfect for testing the conversation before the real system is ready. The Test button at the bottom of the popup fires a real (or mock) request immediately so you can check the plumbing.
- If you also add a Custom Header with the same name as the auth header (any capitals), the Auth Type setting wins and the header is sent once.
- If an Auth Type is chosen but no key, token or password is filled in, the request still goes out without one (your endpoint will usually refuse it) — the Test result shows an orange Authentication line saying why, and the agent log adds a warning on every call.
- If a stored key or token contains characters a web request can’t carry (for example a curly quote or an accented letter pasted from a document), the tool doesn’t send the request at all: the call gets the Speak On Error line and the tool’s log says authentication is misconfigured. Re-paste the key as plain text to fix it. Basic Auth passwords are never affected.
- API Key (Query Param) has been removed — it never sent a key for webhook tools. A tool still set to it (or to any other type the form doesn’t offer) opens showing None with an orange note; saving stores None, which is what it was effectively doing. Pick API Key (Header) if your endpoint needs a key.
Walkthrough: your first webhook tool (order lookup)
- Step 1: in your automation platform (n8n, Make, Zapier) create a workflow that starts with a webhook and looks up an order in your system. Copy its webhook URL.
- Step 2: Tools page → create a webhook tool: Function Name
lookup_order, Description “Looks up the status of a customer’s order by order number”, paste the URL, method POST. - Step 3: add one Parameter:
order_number, type String, required, description “the customer’s order number”. Turn on thecaller_phonesystem parameter if your workflow wants it. - Step 4: set Speak On Error (“I’m having trouble reaching our order system…”) and click Test — fix any plumbing now, not during a live call.
- Step 5: assign the tool to your agent, and add a line to its Tool Usage Instructions: “When a caller asks about an order, ask for their order number and use lookup_order.”
- Step 6: prove it in the Agent Tester — ask about an order and watch the tool call and its response appear in the transcript.
The n8n Wizard
The n8n Wizard has its own tab on the Tools page (the blue button on the Webhooks tab opens the same thing). The tab shows every recipe as a tile; click one and the wizard opens with it chosen. It builds both halves of a connection in four steps: 1. Use case (pick one of the options below), 2. Details (the tool’s name, one sentence saying when the agent should use it, and your n8n address), 3. Agents (tick the agents that should get the tool — you can also do this later on the Agent Tool Assignments tab) and 4. Finish (click Create). The finished screen shows the address your workflow will answer at, a Download n8n workflow button and a Test connection button.
- Tool name: lowercase letters, numbers and underscores, e.g.
save_lead. The AI refers to the tool by this name. - What is it for, and when should the agent use it?: one sentence. This matters more than anything else in the wizard — the AI reads it to decide when to use the tool. The wizard turns it into a usage instruction and adds it to the Tool Usage Instructions of every agent you tick.
- Your n8n address: the address you open n8n at, not a workflow URL. For n8n Cloud it looks like
https://yourname.app.n8n.cloud.
Caller lookup (who is calling)
The one recipe that creates no tool: it feeds the built-in lookup_caller tool, which
sends the caller’s number to this workflow the moment a call connects so the agent can greet them by
name with their booking or account details. Pick the agent, paste your n8n
address, click Create: the workflow’s address and secret are saved into the tool’s settings and
the tool is switched on for that agent. Then import the download, replace the Look up the caller
(REPLACE ME) step with your own lookup, publish, and press Run Test on the Tools page. The full guide,
including what the workflow receives and must send back, is under
Tools → Know who is calling before you say hello.
Lead capture / CRM push
The agent collects the caller’s name and contact details and sends them to your CRM, a spreadsheet, or anywhere n8n can reach. Use it for callback requests, quote requests and new enquiries.
- What the agent collects:
name(required — the agent always asks for it first),phone,emailandnotes(one or two short sentences on what the caller wants), all optional. It reads phone numbers back digit by digit and confirms the spelling of email addresses, and never invents a detail the caller didn’t give. - What the agent says: “Just a moment while I save your details…” while it runs. If it fails: “I wasn’t able to save your details just now, but I’ve made a note to have someone follow up with you.” It never tells the caller the details are saved until the tool has succeeded.
- In n8n: replace the red REPLACE ME node with your CRM node (HubSpot, Pipedrive, Google Sheets, an HTTP Request…).
Live data lookup
The agent asks your n8n a question mid-call — order status, opening hours, stock levels — and speaks the answer back to the caller.
- What the agent sends:
query(required) — what the caller wants to know, in plain words. - What comes back: your workflow returns a
result; the agent speaks it as a natural sentence (never raw data or internal IDs). If the lookup fails it apologises and offers a follow-up — it never guesses an answer. - What the agent says: “One moment while I look that up for you…” while it runs. If it fails: “I’m sorry, I couldn’t look that up right now. Is there anything else I can help with?”
- In n8n: replace REPLACE ME with your data source (a database node, an HTTP Request to your API, a Google Sheets lookup…) and return the answer as
result.
Send follow-up message
The agent triggers an SMS or email to the caller — a booking confirmation, a price list, an information pack — through whichever sender you connect in n8n.
- What the agent sends:
info_requested(optional) — what the caller asked to be sent. The caller’s number comes with the call details automatically. The agent confirms what the caller wants before sending, and sends it once per call unless asked again. - Chatbots: not offered for chatbot agents in step 3 — it sends to the caller’s phone number, which website visitors don’t have.
- What the agent says: “One moment while I arrange that for you…” while it runs. If it fails: “I couldn’t send that just now — I’ll make sure someone follows up with you instead.”
- In n8n: replace REPLACE ME with your SMS or email node (Twilio, SendGrid, Gmail, an HTTP Request to your sender…).
Custom workflow
Define your own fields for the agent to collect and send to n8n — the flexible option for anything the other recipes don’t cover.
- Fields the agent should collect: one row per field — a name (e.g.
attendee_name), a type (text, number, yes/no) and a short description of what the AI should put there (this helps accuracy). Tick required only when the tool genuinely can’t run without it — a required field the caller won’t give stops the tool firing. Add field adds another row. - My workflow sends information back for the agent to speak: switch on if your workflow returns an answer (like a lookup); leave off for fire-and-forget actions (saving a record, sending a message).
- What the agent says: “One moment please…” while it runs. If it fails: “I’m sorry, I couldn’t complete that just now.” Both can be reworded on the tool card → Edit.
- In n8n: replace REPLACE ME with whatever node does the work (an HTTP Request, a database node, your app’s node…).
Create support ticket
The agent logs the caller’s problem in your help desk and reads them the ticket reference. For tracked issues that need follow-up — not for simple callback messages.
- What the agent collects:
issue_summary(required — one or two sentences on the problem),customer_nameandurgency(one of low, normal, high, urgent — normal if unsure), both optional. It logs at most one ticket per call unless the caller reports a clearly separate second issue, then reads back the reference your help desk returns. - What the agent says: “One moment while I log that for you…” while it runs. If it fails: “I couldn’t log the ticket just now — I’ll make sure the team hears about this another way.”
- In n8n: replace REPLACE ME with your ticketing node (Zendesk, Freshdesk, Jira, HubSpot Tickets, or an HTTP Request to your help desk) and return the ticket reference.
Notify the team
A silent ping to Slack, Teams or SMS mid-call — an upset caller, an important customer, an urgent problem. The caller never knows.
- What the agent sends:
message(required) — a one-sentence heads-up for your team about this call. - How it behaves: the agent says nothing before or after using it, never tells the caller it’s alerting anyone, and uses it at most once per call.
- What the agent says: nothing — there’s no waiting line, so the conversation carries on uninterrupted. If the alert fails the agent simply continues and doesn’t mention it.
- In n8n: replace REPLACE ME with your Slack, Microsoft Teams or SMS node.
Log to Google Sheets
Appends call details to a spreadsheet as a new row — the no-CRM option. Every field the tool sends becomes a column you can map.
- What the agent sends:
details(required — one short sentence in the caller’s own words) andcategory(optional — one of enquiry, order, complaint, feedback, other). It logs once per topic, not once per sentence, and doesn’t read the entry back unless asked. - What the agent says: “One moment…” while it runs. If it fails: “I couldn’t save that just now, but I’ve made a note of it.”
- In n8n: replace REPLACE ME with a Google Sheets Append Row node and map each field to a column.
Calendar booking (Cal.com)
Creates two tools from one name — a check-availability tool (<name>_check) and a book-appointment tool (<name>_book) — wired to your Cal.com account through n8n, plus two matching workflow files.
- Check availability: the agent sends
booking_date(required, YYYY-MM-DD) andbooking_time(optional, as the caller said it, e.g. “2pm”), and speaks the free times that come back. - Book: the agent sends
name,email(spelling confirmed),booking_dateandbooking_time, all required — only after checking availability and after the caller has confirmed the exact date and time. - Built-in guard: the book tool refuses to book until the check tool has actually run in the same call.
- What the agent says: “One moment while I check the calendar for you…” and “One moment while I book that in for you…”. If either fails, the agent offers to take the caller’s details and have the team confirm.
- In n8n: import both files as two separate workflows and paste the same Cal.com API key and event type ID into each one’s Config node — if the event type IDs differ, the agent checks one calendar and books another. Then activate both.
GoHighLevel appointments & sales
The GoHighLevel appointments & sales tile creates two tools from one name
prefix (e.g. ghl_check and ghl_book) and hands you two matching
n8n workflow files. The check tool tells the caller which times are free in your GHL calendar;
the book tool creates the contact, books the appointment, and creates a new sales opportunity in
your pipeline — or advances an existing one to your “booked” stage.
- Step 1 — run the wizard: Tools → Webhooks → n8n Wizard →
GoHighLevel appointments & sales. Enter a name prefix (e.g.
ghl), your n8n address, tick your agents, click Create, and download both workflow files. - Step 2 — import into n8n: import each file as its own workflow (three dots → Import from File…).
- Step 3 — connect your GHL account: in each workflow, open the GoHighLevel nodes and pick (or create once) your HighLevel account credential. n8n’s HighLevel credential uses a GHL Marketplace app — n8n’s credential screen links to the exact setup steps.
- Step 4 — paste your IDs: each workflow’s sticky note lists exactly which placeholders to replace and where to find each value in GHL — the Calendar ID (use the SAME calendar in both workflows), and in the booking workflow the Location ID (Settings → Business Profile), Pipeline ID and booked Stage ID (Opportunities → Pipelines).
- Step 5 — activate both workflows (top-right toggle in n8n), then use the wizard’s Test connection buttons and make a test call: ask for a time, hear the real availability, and book it. Check the appointment and the opportunity appeared in GHL.
What happens automatically: appointments are booked for 30 minutes (the sticky note shows the one line to change for longer slots); every booking creates the opportunity under your pipeline’s booked stage, or advances an existing opportunity for that phone number; and the agent only ever says “booked” when GHL really returned an appointment — if anything is mis-configured the caller hears an honest “let me take your details and have the team finalise it” instead. The optional Customize Opportunity Fields node can also stamp your GHL custom fields on each opportunity; until you configure it (field IDs + a Private Integration Token credential) it is simply skipped and bookings still work.
SIP Trunks
The carrier connection your calls travel over.
A SIP trunk is the link between the phone network and your agents. Yours is already set up — it was created with your account, along with your phone number and dispatch rule. For most clients this page is just somewhere to confirm the connection exists.
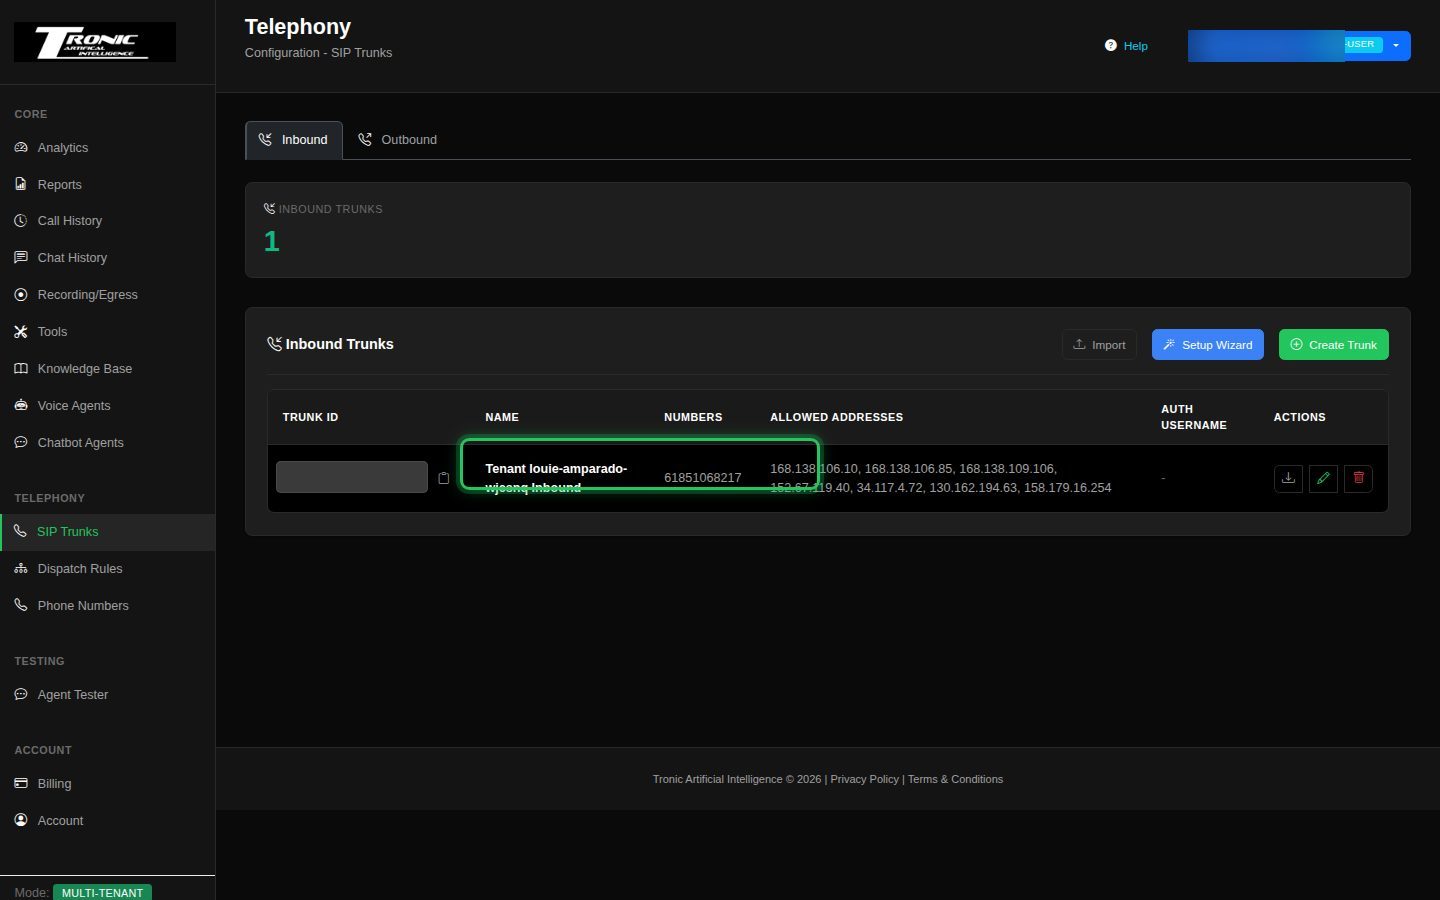
Setup Wizard — bringing your own carrier
If you already have phone numbers with another provider and want to use them with your agents, you don’t have to move them. The Setup Wizard button walks you through connecting your existing carrier instead. It creates the inbound trunk, the outbound trunk and the dispatch rule for you in one go.
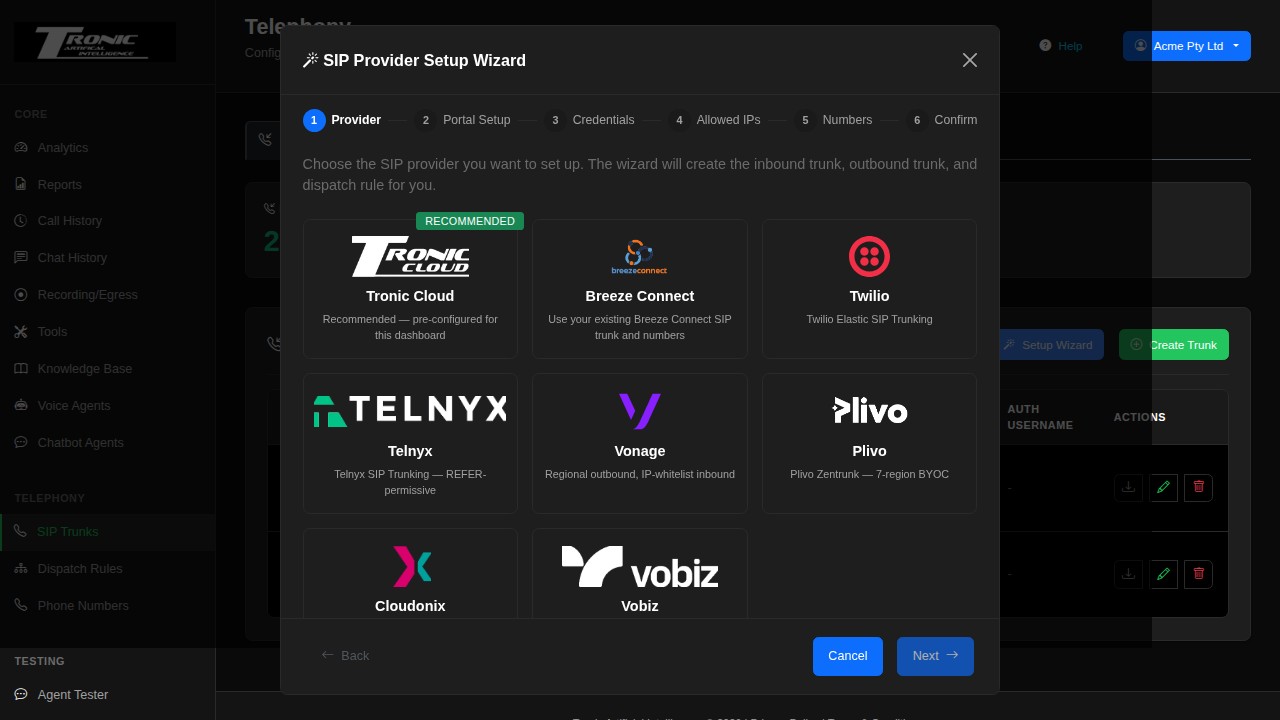
The wizard has six steps:
- Provider — choose from Tronic Cloud, Breeze Connect, Twilio, Telnyx, Vonage, Plivo, Cloudonix or Vobiz, and give your trunks a name.
- Portal Setup — what to collect from your provider before continuing, with a link straight to their portal and a full setup guide.
- Credentials — the username and password your provider issued you.
- Allowed IPs — which addresses may send calls to you.
- Numbers — the phone numbers you want to bring across.
- Confirm — review, then create.
Breeze Connect
If you’re a Breeze Connect customer, choose Breeze Connect at step 1 to use your existing trunk and numbers. Most of the configuration is filled in for you — you only need the username and password Breeze Connect issued you, plus your assigned numbers. Step 2 gives you two links: Open Breeze Connect Portal to fetch those details, and Open full setup guide for the complete walkthrough.
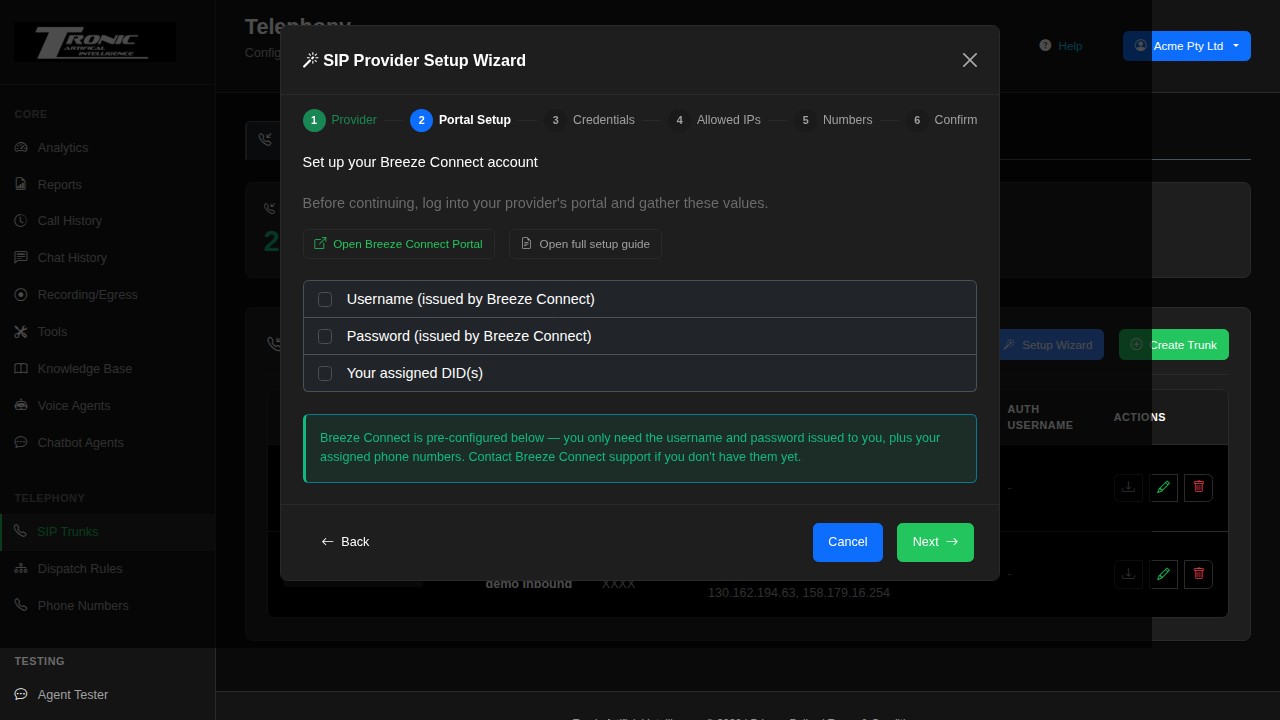
Dispatch Rules
The routing that decides which agent answers which number.
A dispatch rule is the link between a phone number and an agent: “calls to this number are answered by that agent.” One was created for you when your account was set up — you just need to point it at the agent you want (see Step 6).
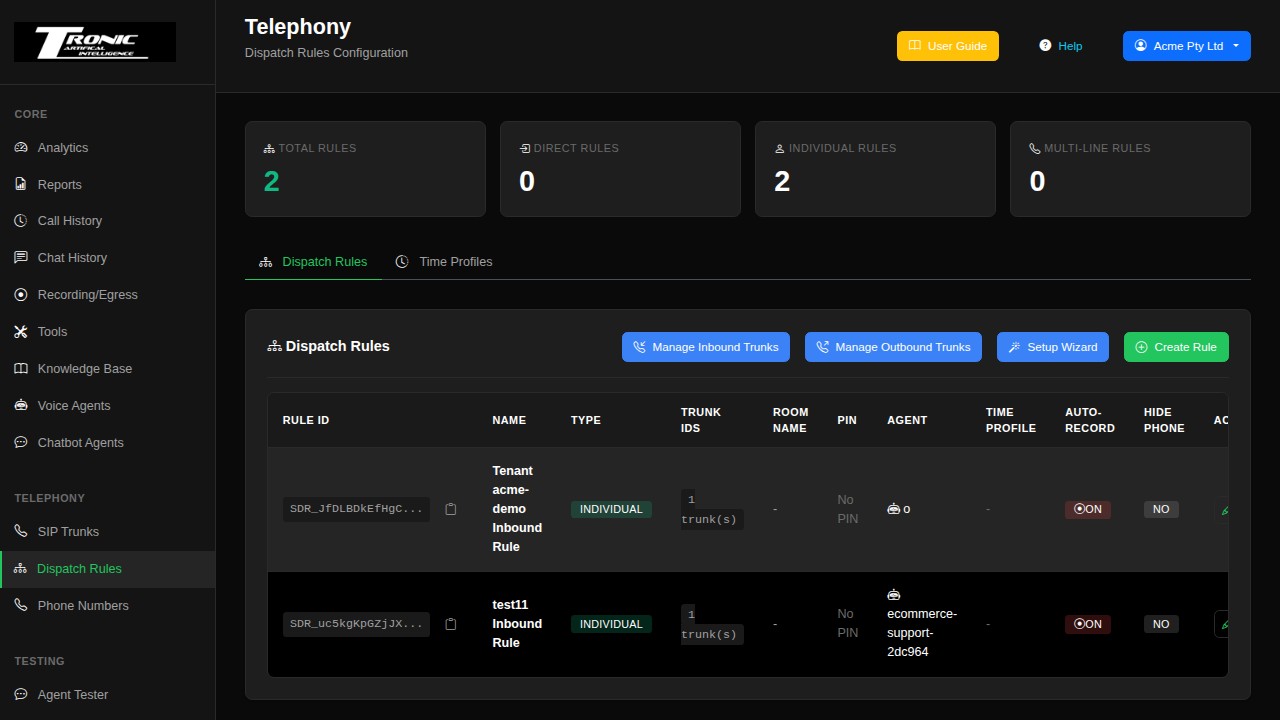
In the edit dialog you’ll find:
- Agent Name — which agent answers calls on this number.
- Auto-Record Calls — whether calls on this number are recorded.
Changes take effect on the next call — there’s nothing to restart.
Phone Numbers
The number (or numbers) connected to your account.
Your Australian number was assigned when your account was created and appeared in your welcome email. This page is where to find it again, and the copy icon beside it puts it on your clipboard.
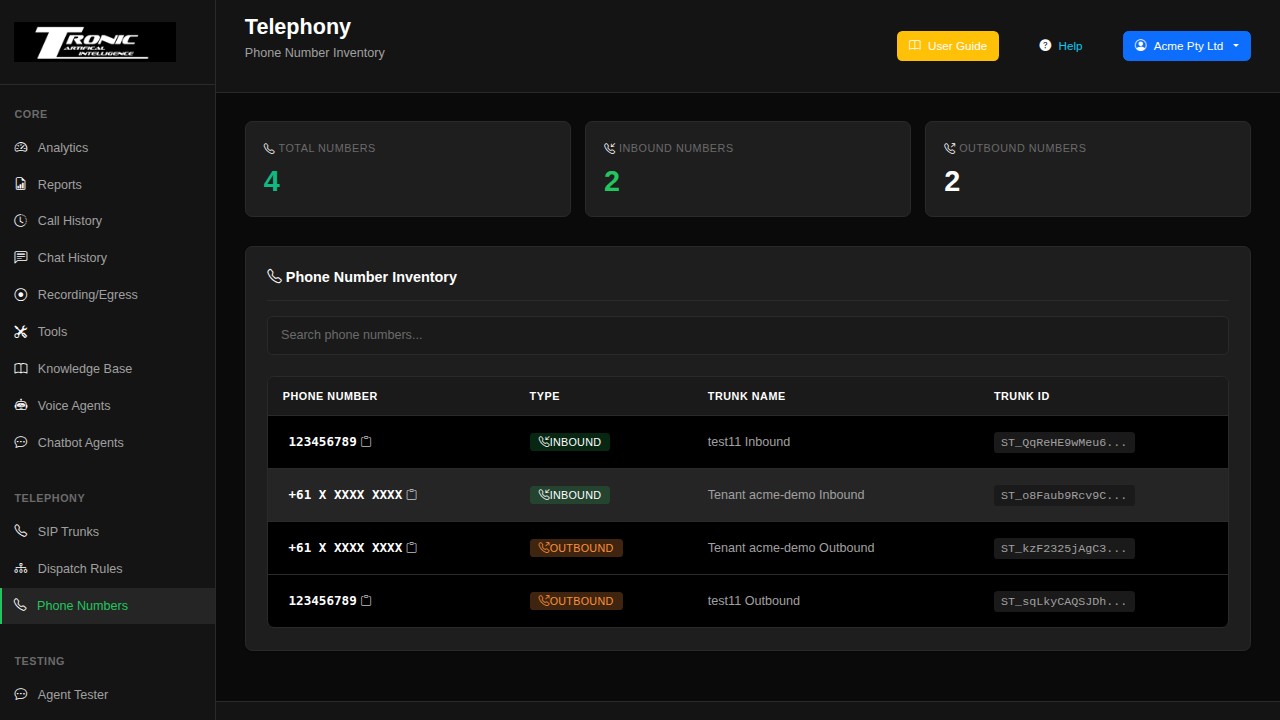
Need another number, or one in a different area code? Email support@tronic.com.au and we’ll add it to your account. If you already own numbers with another carrier, the Setup Wizard can bring those across instead.
Campaigns
Outbound auto-dialing — give an agent a contact list and it calls everyone for you.
A campaign automatically dials a list of contacts using a chosen outbound trunk and agent. The system paces the calls, tracks the outcome of every number, and lets you retry the ones that didn’t answer. Typical uses: appointment reminders, follow-ups, surveys, and sales outreach.
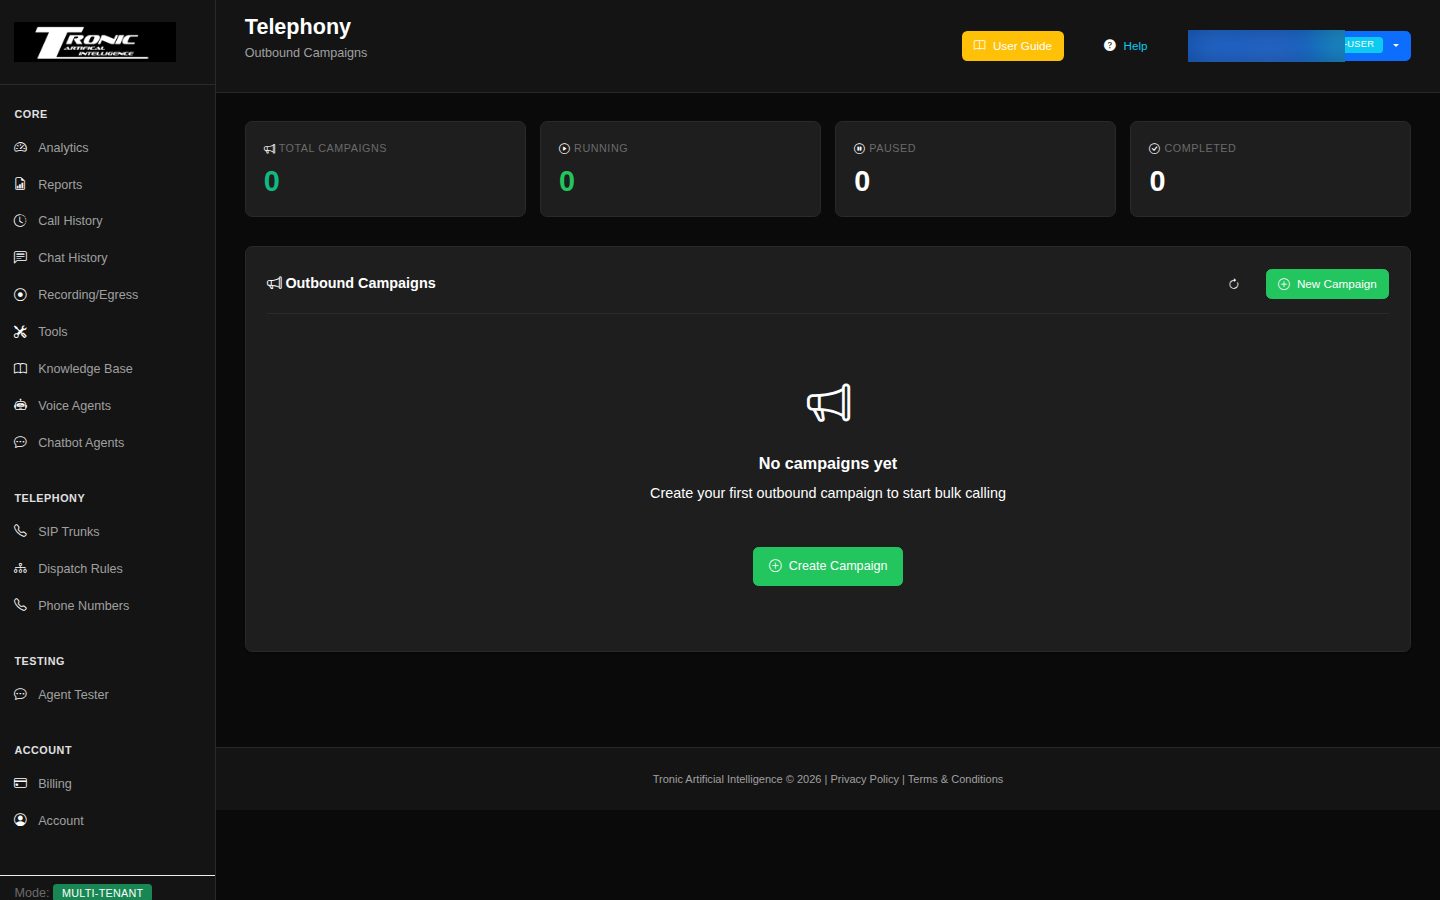
1 Create the campaign
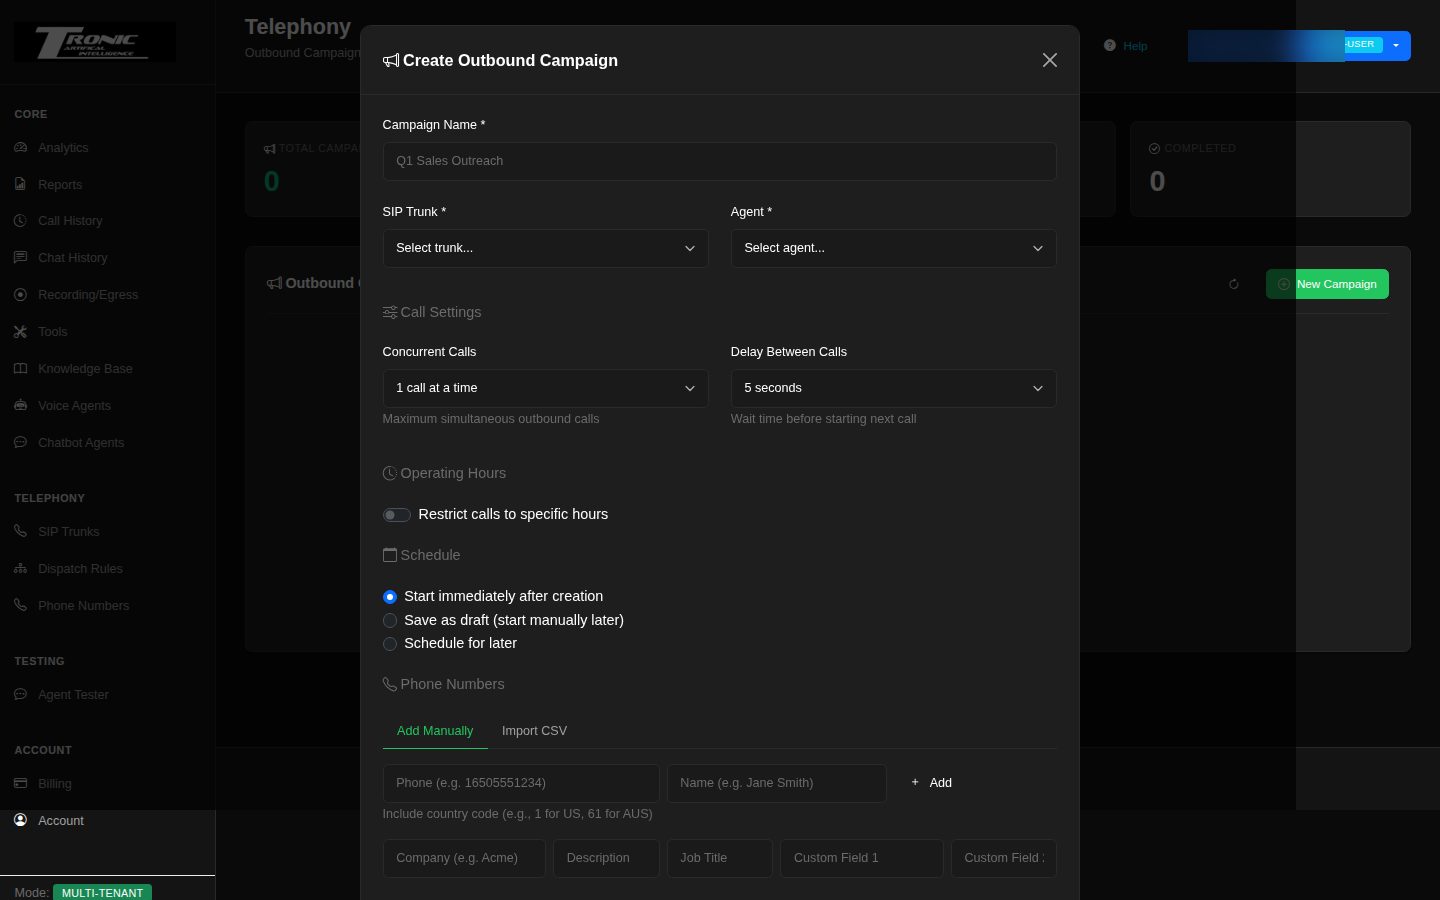
- Campaign Name: a descriptive label (e.g. “March Reminder Calls”).
- SIP Trunk: the outbound trunk to dial through. It must have a valid caller ID number configured.
- Agent: the agent that handles every call in this campaign.
- Concurrent Calls: how many calls run at once (choose 1, 2, 3, 5 or 10). More is faster but harder on your system and your carrier.
- Delay Between Calls: the pause before each new call starts — anywhere from 3 seconds up to 15 minutes.
- Operating Hours — Restrict calls to specific hours: tick this and set a Start Time, End Time, and Timezone (your contacts’ timezone, not yours!) and the campaign only dials inside that window — it pauses itself outside the hours and resumes the next day until the list is finished. Strongly recommended: it’s what stops a big campaign from ringing people at 9 pm.
2 Add contacts — by hand or CSV
Manual entry: add contacts one at a time. Only the phone number is
required — enter it with the country code and no + sign (e.g.
61412345678). A number must be 8 to 15 digits including the country code;
anything shorter or longer is skipped and never dialled. On a PBX trunk the
phone column holds extensions, queue numbers or names instead (for example 101,
queue302, reception — letters, digits, dot, underscore and
hyphen only). The optional fields (Name, Company, Description, Job Title, and
two custom fields) feed the personalisation variables below.
CSV import: upload a .csv file (not Excel .xlsx)
for big lists. With a header row, columns can be in any order using these exact names:
phone, name, company_name,
company_description, job_title, custom_field_1,
custom_field_2. Without a header row, the columns must appear in exactly that
left-to-right order. Only phone is required.
⬇ Download the CSV template
— a ready-made file with the header row and three example contacts (one with only a
phone number and name, to show that the other columns can be left blank). Open it in Excel,
Google Sheets or Numbers, replace the example rows with your own contacts, save it as
.csv and upload it. The same link sits under the upload box on the Campaigns page.
Smith and Co, not Smith, Co) — an unquoted comma
starts a new column. Files saved from Excel or Google Sheets quote such values for you, so
they are fine. And in Excel, set the phone column to
Text before typing or pasting numbers — otherwise Excel can show a long
number as something like 6.14E+11 and save it that way, which breaks it.
3 Personalise every call with variables
Put these placeholders anywhere in the agent’s System Prompt and each call fills them with that contact’s real data:
- {{Name}}: the contact’s name — “Hi {{Name}}, how are you?”
- {{CompanyName}} and {{CompanyDescription}}: their company and a line of context about it.
- {{JobTitle}}: their role.
- {{CustomField1}} and {{CustomField2}}: anything you like — account numbers, appointment dates, product interest.
- {{user_number}}: the number being dialled.
4 Schedule and run
- Start Immediately: dialing begins as soon as you save.
- Save as Draft: the campaign sits in Idle until you press Start.
- Schedule for Later: pick a date and time; the campaign starts itself.
Status badges tell you where things stand: Idle (created, not started), Scheduled, Running, Paused (can resume), Completed, or Cancelled (permanently stopped).
5 Track results and retry
The progress bar colours each contact’s outcome: green (answered/completed), red (failed), yellow (no answer). Click the eye icon for the detailed per-contact call log. A number that rings out is marked No answer; a busy line, a declined call or one the carrier could not connect is marked Failed with the reason shown against it (for example “Line busy or call declined”). Both are redialled by Retry Failed. After a campaign finishes:
- Retry Failed: redials only the numbers that failed or didn’t answer.
- Export Results: downloads a CSV of every contact with the outcome of their call — see What’s in the export below.
- Delete: removes a completed or cancelled campaign and its data.
What’s in the export
One row per contact, in this order:
- Contact columns:
phone,name,company_name,company_description,job_title,custom_field_1,custom_field_2— exactly as you uploaded them. - Outcome columns:
status(completed, no_answer, failed, voicemail, transferred…),called_at(when the call ended),durationin seconds, anderror(why a call failed). The campaign’s operating hours follow if it has them. - One
extracted_…column per Data Extraction field on the campaign’s agent (Voice Agent editor → Advanced tab → Data Extraction Fields). A field namedvehiclebecomes the columnextracted_vehicle, filled with what the AI summary picked out of that call. A field that collected several answers lists them separated by;. summary— the short AI summary of the call.transcription— the whole conversation, one line per turn. It is the last column on purpose: it is long, and everything you usually filter on sits to its left.
6.14E+10, no lost leading 0. In a plain text editor
those numbers look like ="61412345678"; that is normal, and you can upload the
file again as a new campaign without changing it.
summary and extracted_… cells.
Agent Tester
Talk to your agents right in the browser — no phone call, no cost of a real line.
The Agent Tester is the quickest way to try out an agent while you build it. Chat with it by text, or hold a full voice conversation through your computer’s microphone. It works for both voice agents and chatbot agents.
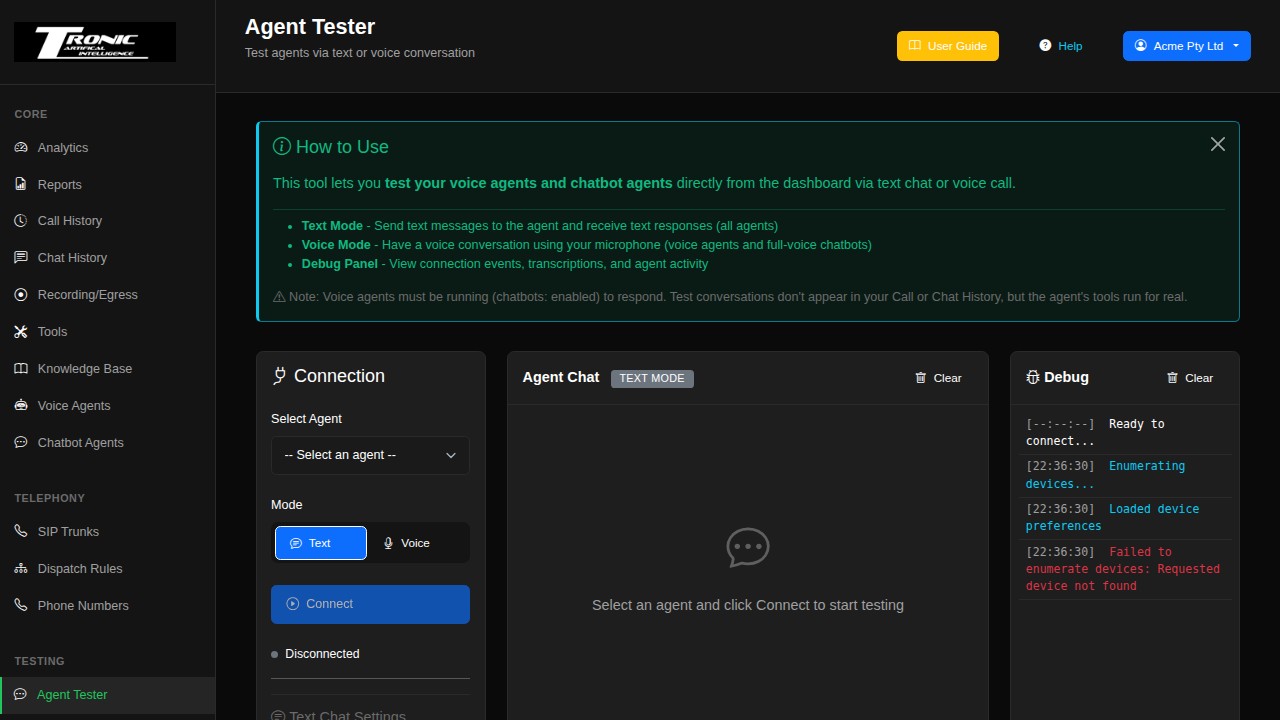
1 Select an agent
The Select Agent dropdown lists your agents in two groups — Voice Agents and Chatbot Agents. Pick the one you want to test.
2 Choose Text or Voice mode
- Text Mode: type messages and read the agent’s replies. Fast, silent, and great for testing prompts, tools, and knowledge lookups without saying a word.
- Voice Mode: a real spoken conversation through your microphone — the agent replies in its configured voice. Your browser will ask for microphone permission the first time. Voice mode is available for voice agents and full-voice chatbots; text-only chatbots test in Text mode only (the Voice toggle greys out for them).
3 Connect and talk
Click Connect. The connection status changes as the test session starts, and the agent greets you just like it would a real caller. Everything you say (or type) and every reply appears in the transcript, and every tool the agent uses shows up in the Debug panel (step 6) — so you can see exactly what it did and why. Click Disconnect when you’re done.
A few small controls on the left panel are worth knowing:
- Connection status: the dot-and-text indicator below the Connect button — it moves from Disconnected through connecting to connected, so you can tell a slow start from a failed one.
- Voice Settings — Microphone / Speaker: in Voice mode, pick which of your computer’s microphones and speakers the test uses (handy with headsets). Default uses whatever your browser prefers; your choice is remembered for next time.
- Mute button & connection quality bars: while connected in Voice mode you can mute your own mic mid-test, and the signal bars show the connection quality between your browser and the server — if the agent sounds choppy but the bars say Excellent, the problem is the agent, not your network.
- Connected to / Room: shows which agent you’re actually connected to and the internal session name.
4 The per-test LLM override (voice agents, Text mode)
When testing a voice agent in Text mode, a Text Chat Settings panel lets you pick which LLM Provider and Model processes your messages for this test only — without changing the agent’s saved configuration. It’s a cheap way to answer “would this agent behave better on a different brain?” before committing. The agent’s backup models are only used when the model you pick is the agent’s own main model (and its backup switch is on); any other model you pick is tested on its own. If the main model fails and a backup answers, the Debug panel shows a Backup model line saying so.
5 Testing chatbot agents
Chatbot test sessions run the exact same pipeline as the website widget — same prompt, tools, knowledge base, and welcome message — but in a throwaway session: nothing is saved to Chat History. Be aware that the chatbot’s tools (webhooks, SMS sends) do run for real during a test, exactly as they would for a website visitor.
6 The Debug Panel
The panel on the right shows a live feed of technical events — connection status, participants joining, audio tracks, data messages, and transcriptions. You can ignore it day to day, but when an agent misbehaves it’s a goldmine: it shows whether your words were heard correctly and whether the agent actually responded. Voice mode also shows a live Microphone level meter so you can confirm your mic is working.
Tool activity
Every time the agent uses one of its tools during a test — checking a calendar, booking an appointment, calling a webhook, searching the knowledge base — a line appears in the Debug panel. This works in both Text and Voice mode, for voice agents and chatbots.
- 🔧 tool name ✓ (green): the tool ran and reported success. The line shows how long it took and the start of what came back.
- 🔧 tool name ✗ failed (red): the tool reported a problem. The text after the dash is the reason the tool (or the service behind it) gave — the same message the agent received.
- Details: click to expand what the agent sent to the tool (for example the name, email and time it tried to book) and the full result.
- “no reply text — the tool ended the turn”: normal for tools such as hang up or a transfer, which finish the conversation rather than returning an answer.
Which testing tool, when?
- Agent Tester (this page): while you’re building — make a change in the editor, talk to the agent, adjust, repeat. Instant and interactive.
- A real phone call: the final check — only a real call exercises your SIP trunk, caller ID, and true phone audio quality. Always make one before going live.
Analytics — your home page
The first page you see after logging in: charts and figures for everything your agents have been doing.
The Analytics page (click Analytics in the sidebar, or the logo) shows your call volumes, costs, response speeds, AI insights. Everything on the page respects the date range you pick at the top.
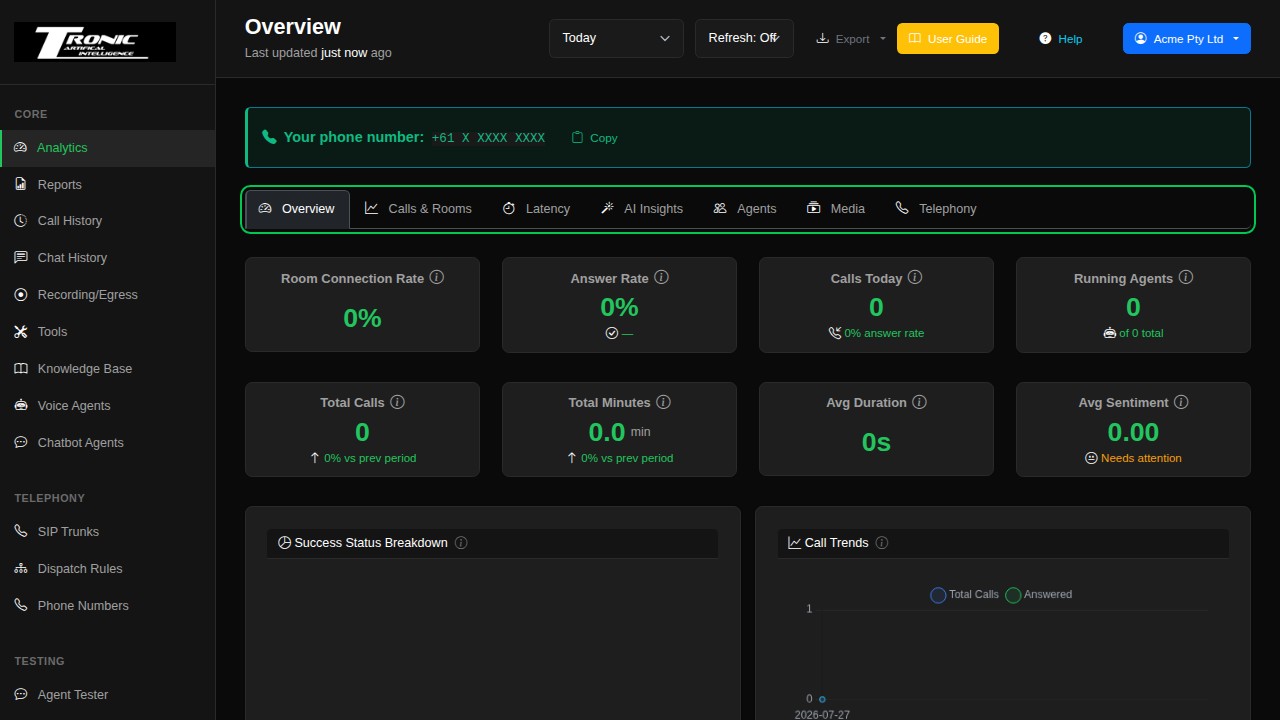
The controls at the top
- Date Range dropdown: choose the period the whole page reports on — Today (the default, and the fastest to load), Last 2 days, or the last 7 / 14 / 30 / 60 / 90 days.
- Custom range…: the last item in the dropdown. A small picker appears with From and To date boxes — pick any two dates up to 90 days apart and click Apply. Click Cancel, press Escape, or click outside the picker to close it without changing anything. Once applied, every chart and the Export button use exactly those dates. The picker opens already filled in with the range you were looking at, so switching from Last 7 days to Custom starts from those 7 days.
- Auto-refresh toggle: turn this on to have the page update itself automatically every 30 seconds, 60 seconds or 2 minutes — handy on a wall screen in the office.
- Export: downloads the data from whichever tab you’re currently on, for the selected date range, as a CSV file (opens in Excel) or JSON (for technical use). Works on every tab.
Overview tab
The at-a-glance summary. Key figures include Room Connection Rate, Estimated Cost, Answer Rate, Active Rooms, Calls Today and Running Agents, plus rolled-up numbers from the other tabs such as Trunk Status, SIP Success Rate, Total Calls, Total Minutes, Average Duration and Average Sentiment. Below the cards you’ll find a Success Status Breakdown pie chart — Success (the call connected and ended normally) against Failure (it failed, went unanswered or lasted 0 seconds) — and a Call Trends graph. If something looks off anywhere in the system, this tab usually shows it first.
Calls & Rooms tab
Everything about call volume and outcomes:
- Volume & outcomes: total calls, answer rate, call volume trends, and outcomes (completed / transferred / missed / failed).
- Direction: inbound vs outbound split.
- When calls happen: hourly distribution, Busiest Day/Hour, and a Call Distribution Heatmap — a day-by-hour grid where darker squares mean more calls. Great for deciding staffing or opening hours.
- Talk time: a Talk Time Breakdown chart (total vs average per day), plus your Longest and Shortest calls in the period.
- Rooms: real-time room analytics and historical room trends, including the Room Connection Rate.
Latency tab
How quickly your agents respond. The key measure is TTFB (“time to first byte”) — in plain terms, the pause between the caller finishing a sentence and the agent starting to speak. The tab shows the average and the P50 / P90 / P99 percentiles, a breakdown of where the time goes (speech recognition, the AI “thinking”, and voice generation), an hourly trend, and a per-agent comparison.
- Under 500 ms: feels natural — like talking to a person. This is the target.
- 500–1000 ms: a noticeable but acceptable pause.
- Over 1000 ms: feels slow — callers start saying “hello? are you there?”. Worth investigating (often the AI model choice — see the FAQ).
AI Insights tab
What the AI learned from your conversations: the average sentiment score (how happy callers sound), sentiment distribution (positive / neutral / negative), the top topics people call about, pending action items extracted from calls, the interruption rate, and AI-classified call outcomes. The Call End Reasons breakdown shows who hung up — three bars: Customer Ended, Agent Ended and Other — with a detailed reason table.
Agents tab
Per-agent performance: total agents, agents active today, average success rate and your top performer, plus a table comparing each agent’s calls, answered count, success rate, minutes and average duration, and a calls-by-agent chart. Use this to spot an agent that’s underperforming compared to its siblings.
Media tab
Recording and streaming statistics. The Recording & Storage section shows active recording jobs, the recording success rate, a chart of recording types and how much storage you’re using. The Ingress/Streaming section covers active streams, connection quality, stream types and average bitrate.
Telephony tab
Phone-line analytics: total trunks, connection success rate, trunk status, how many dispatch rules you have, and call volume over your trunks, with quick links to manage trunks and dispatch rules.
Walkthrough: a five-minute weekly health check
- Step 1 — Overview tab, range set to 7 days. Call volume trending the right way? Any day with a sudden dip (an outage?) or spike (something viral, or abuse)?
- Step 2 — Calls & Rooms tab. Scan end reasons: a rise in errors or abandoned calls is the earliest sign something changed for the worse.
- Step 3 — Latency tab. Response speed still mostly green (<500ms)? If it drifted up, the breakdown shows whether hearing (S), thinking (L) or speaking (T) got slower — that tells you which provider or setting to look at.
- Step 5 — Media. Done — anything odd, drill into Call History for the affected day and read a few calls.
Call History — every call, kept and analysed
The full record of every call your agents have handled, with AI summaries, transcripts and response-speed stats.
Open Call History in the sidebar. Every finished call appears here automatically — phone calls, browser test calls, everything — usually within a minute of hanging up, once the AI has written its summary.
Finding a call — the filters
- From Date / To Date: limit the list to calls between two dates.
- Agent: show only calls handled by one agent (or All Agents).
- Direction: Inbound (someone called you), Outbound (your system called them), or All Directions.
- Status: filter by the review status on each call — e.g. Needs Review, Reviewed, Resolved, Flagged, Escalated, Callback, Agent Issue or In Progress.
- Health: filter by the call’s health score (Excellent / Good / Fair / Poor / Critical / Not Scored) — a quick way to jump straight to the calls that went badly.
- LLM Model: show only calls answered using a particular AI model.
- Sort by: Newest first (default), or by cost — high to low or low to high.
- Search: type a phone number or Call ID to find a specific call.
What each row shows
- Time / Duration: when the call started and how long it lasted.
- Call ID: the call’s unique reference — click it to copy the full ID to your clipboard (handy when reporting a problem).
- From / To / Direction: the two phone numbers and whether the call was inbound or outbound.
- Agent: which agent answered, with a small badge underneath showing the AI model that was used. A purple Test badge marks browser test sessions (billed, but excluded from analytics totals). An orange warning triangle means the caller was heard speaking in two or more turns but nothing was transcribed — usually the speech-to-text provider stalled mid-call (see below).
- Cost: the call’s estimated cost, with a small badge explaining how it was worked out — actual (computed from real usage figures), est. (estimated from per-minute averages), or Legacy pricing (an older call whose cost was stored under the previous pricing model and is preserved unchanged). Click the column’s arrows to sort by cost.
- TTFB: the call’s average response speed (see the Latency Metrics card below).
- Health: the call’s health rating — Excellent / Good / Fair / Poor / Critical — a quick quality score based on response speed and technical warning signs during the call.
- Transcript / Summary: small indicator icons that light up when the call has a transcript and an AI summary.
- Status: the review status badge you (or your team) have set on the call — new calls show Needs Review.
Bulk actions & export
- Checkboxes: tick individual calls, or use the header checkbox to select everything visible on the page.
- Delete Selected: permanently removes the ticked call records (any recordings are left in place). There is no undo, so double-check before confirming.
- Delete with Recordings: removes the ticked call records and their audio recordings in one go — also permanent.
- Export Selected / Export Recent (CSV / JSON): download the ticked calls, or your most recent 100, 200, 500 or 1000 calls, as a spreadsheet-friendly CSV or a JSON file. Export Recent follows the agent, direction and date filters you have set. Each row includes the call details, AI summary, cost, notes, latency figures and the full transcript. The file is built in the background, so the rest of the dashboard keeps working while a big export is prepared. If your call history lives in S3 or Google Cloud Storage, a 1000-call export can take a little while because every transcript is fetched from the cloud.
Exporting everything — “Export all”
For more than 1000 calls, open Export and choose All matching calls — CSV or — JSON. The file contains every call that matches the agent, direction, date range and search filters you have set on the page (the health, model and sort filters are not applied), with exactly the same columns as the other exports. Set the filters first, then start the export.
- It runs in the background: the progress window shows how many calls have been written so far and which day of your history it is working through. You can close the window and carry on using the dashboard — a notice at the top of the page shows the progress, and turns into a View export button when the file is ready. The notice also comes back if you leave the page and return.
- Download: click Download in the window (or open it from the notice). The file is kept for 24 hours; starting another “Export all” on this page replaces it. Only the person who started an export can download it.
- One export at a time: only one “Export all” runs on the dashboard at once. If someone else’s is running you’ll be asked to try again in a minute.
- Size limit: up to 50,000 calls per file. Above that the export stops and asks you to narrow the date range — export a few months at a time instead.
The Latency Metrics card
Near the top of the page is a collapsible Latency Metrics card — click it to expand (the data loads when you open it). It shows how fast your agents have been responding across all calls:
- Avg TTFB: the average pause between the caller finishing a sentence and the agent starting to speak.
- P50: the middle value — half your calls responded faster than this, half slower. A good “typical” number.
- P90: 90% of calls were faster than this — shows what your slower calls look like.
- P99: 99% of calls were faster than this — catches the worst-case outliers.
The card also includes a doughnut chart splitting the delay between speech recognition, the AI model and voice generation, an hourly trend chart (with 24-hour / 7-day / 30-day views), and a per-agent comparison table. If calls slower than 1000 ms are detected, a warning appears — the target is under 500 ms for natural conversation.
Call detail — inside a single call
Click any call in the list to open its detail page: summary, transcript, recording, costs and more.
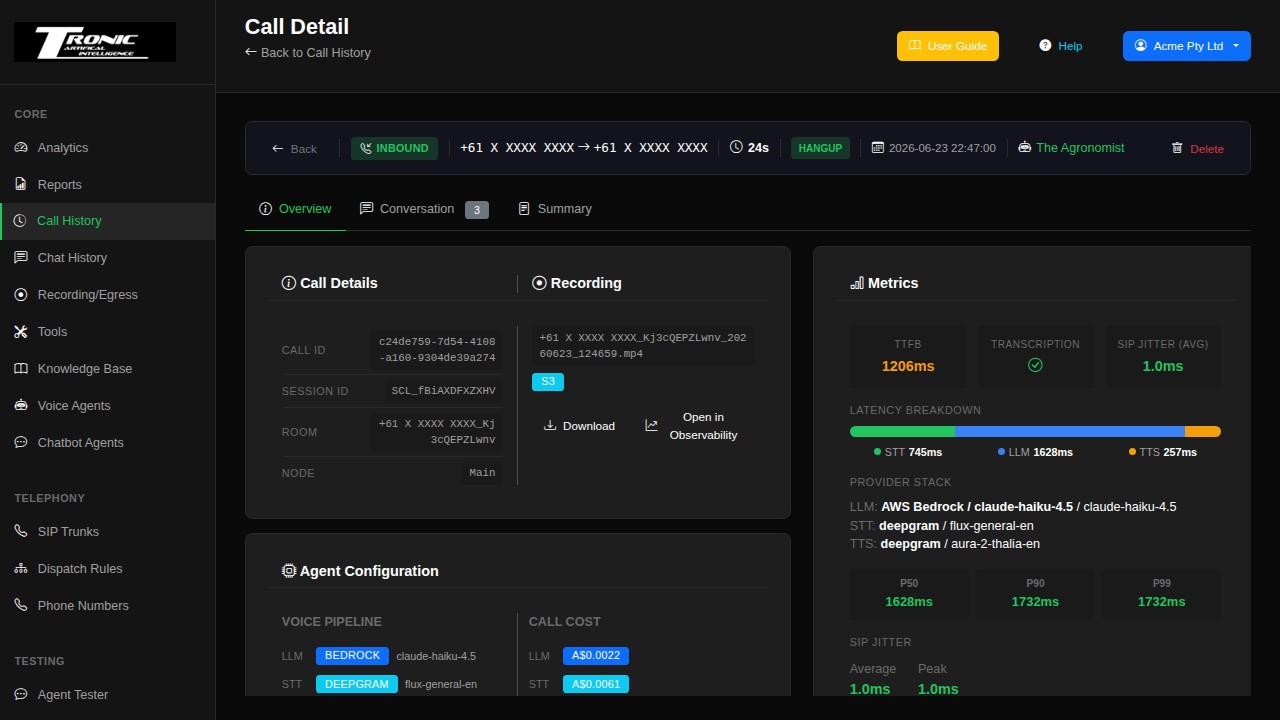
The page is split into tabs: Overview (details, recording, costs, health, status and notes), Conversation (the full transcript, with a message count on the tab), Summary (the AI’s analysis — a “Not generated” badge appears if it hasn’t been written yet, with a button to generate it, and Generating… while an attempt is running right now).
What you’ll find on the page
- Possible STT stall: a yellow notice above the transcript when the caller spoke in two or more turns that were never transcribed, with how many seconds of speech went missing. It usually means the speech-to-text provider stalled. If the agent does not have STT Stall Recovery switched on, the notice links to the agent so you can turn it on. A single missed turn shows only a small grey note.
- AI Call Summary: a plain-English write-up of the conversation — what the caller wanted, what happened, the caller’s intent, key information captured, action items, and an outcome classification.
- Key topics: the subjects discussed, extracted automatically.
- Reasoning tokens: when the agent’s model does hidden “thinking” (reasoning models), the LLM cost line shows how many of the output tokens were spent on it. It is informational — those tokens are already inside the output line, so nothing is charged twice.
- End reason: the badge next to the duration says how the call ended — Hangup (someone hung up normally), Transfer, Max Duration, a silence timeout, or Error. Outbound calls that were never picked up show No Answer (the phone rang out), Busy (the line was busy or the call was declined) or Not Connected (the carrier could not connect it, or the call ended before it was answered). The agent ends these calls on its own as soon as the phone stops ringing, so they are short.
- Answered by: on outbound calls made by an agent whose Outbound Call Detection uses LiveKit answering-machine detection, a badge next to the direction says who picked up — Person, Voicemail, Mailbox unavailable, Phone menu or Unknown. Hover it for the detail: how the verdict was reached, how long after the answer it was decided, and which action the agent took. Calls that used the classic method, and inbound calls, have no badge.
- Caller Sentiment Journey: a small sparkline chart tracking the caller’s mood from the start of the call to the end, with a trend indicator (improving / stable / declining). A call that starts angry and ends happy is a win.
- Interruption Analysis: estimates how often people talked over each other — “User interrupted AI” vs “AI interrupted User” counts, with a warning if the rate is high.
- Transcript: the full conversation with speaker labels and timestamps, colour-hinted by sentiment. Long calls can be expanded and collapsed.
- Tool calls (purple): when the agent used a tool during the call — hanging up, transferring, sending an SMS, checking the time — it appears inline in the transcript with purple styling, showing the tool’s name, what it was asked to do, and the result.
- Recording playback: if the call was recorded (Auto-Record on the dispatch rule), a player appears on the Conversation tab so you can listen right on the page. The speaker button and slider at the right of the play button set the playback volume, and it goes well beyond a normal player: 100% is as loud as the recording can be made. Each side of the call is levelled on its own, so a quiet caller is brought up toward the agent instead of staying faint, and loud passages are rounded off rather than crackling. It starts at 70% every time you open a call (the level is not remembered); the speaker button mutes and unmutes.
- Latency Breakdown: this call’s own response-speed figures — a visual bar splitting the delay between speech recognition, the AI model and voice generation, with percentiles and turn count.
- SIP codec: for phone calls, the audio codec negotiated with your phone provider (e.g. G.711 µ-law, G.722 HD) — useful when diagnosing audio quality.
- Agent Configuration: the Voice Pipeline this call actually ran — which speech-recognition, AI-model and voice providers were in play, or for a Realtime call the realtime provider and model — taken from the call’s own record, so changing the agent afterwards doesn’t change how its past calls look. Details the call record doesn’t keep (a realtime agent’s voice and language) are shown only while the agent still uses the same realtime provider and model, marked (current setting). Very old calls that didn’t record any of this show the agent’s current settings with a note saying so. LLM Used appears only when a backup model took over from the agent’s main one.
- Call Cost: what this call cost, broken down by service, including any auxiliary costs (the AI summary, knowledge-base lookups and so on). The Effective rate line shows the cost per minute, and View per-model breakdown opens an itemised list of every model the call used and what each one cost. Calls from before per-model pricing was introduced carry a Legacy pricing badge — their stored cost is preserved unchanged.
- Call Health: a score out of 100 with a rating (Excellent / Good / Fair / Poor / Critical) and a table comparing each component — response speed and other technical checks — against its threshold, so you can see exactly which check dragged the score down. Warning flags (e.g. slow responses) appear as small badges.
- Call Status: set a review status on the call — Needs Review, In Progress, Reviewed, Flagged, Agent Issue, Callback Requested (with fields for the phone number, preferred time and notes), Escalated or Resolved. The page records who set it and when, and the Status filter on the list page uses these values.
- Notes: add your own notes to the call — e.g. “followed up by phone 2pm” — so the team knows it’s been dealt with.
- Agent Observability: where enabled, a technical timeline of everything the agent did during the call — each listening, thinking and speaking step with its timing. Mostly useful when diagnosing a slow or misbehaving call.
Walkthrough: investigate a bad call in five minutes
Someone says “the agent messed up my call this morning”. Here’s the routine:
- Step 1 — find it. Filter by the agent and this morning’s date, or search the caller’s number. A red/unusual End Reason often flags the right row instantly.
- Step 2 — read the summary first. The AI summary and sentiment give you the 20-second version of what happened before you commit to the full transcript.
- Step 3 — read the transcript at the failure point. Find the turn where it went wrong. Was the caller misheard (the transcript shows wrong words)? Did the agent say something wrong (prompt problem)? Did a tool fail (check the tool calls and their results)?
- Step 4 — listen if it’s a hearing problem. Play the recording next to the transcript. If the caller clearly said “Broadbeach” and the transcript says “broad bench”, that’s a speech-recognition fix: add the word to the agent’s vocabulary.
- Step 5 — fix in the right place. Wrong words → Speech Recognition tab (vocabulary). Wrong behaviour → System Prompt. Tool error → the tool’s configuration or the external system it calls. Slow replies → check the call’s latency numbers and consider a faster model.
Chat History — your chatbot conversations
Every conversation your Chatbot Agents have had — on your website widget — kept and searchable, just like Call History.
Open Chat History in the sidebar. While Call History covers voice calls, this page covers text conversations handled by your Chatbot Agents: chats from the website widget.
Finding a conversation — the filters
- From Date / To Date: limit the list to conversations between two dates.
- Agent: show only conversations handled by one chatbot agent (or All Agents).
- Media: filter by channel — Web (the website widget), Voice, or All channels.
- Search: type an agent name or phone number to find a specific conversation.
What each row shows
- Time / Duration: when the conversation started and how long it ran from first to last message.
- Media: the channel badge — Web (website widget), or Voice (widget voice sessions).
- From: who the conversation was with — a visitor reference for the website widget.
- Agent: which chatbot agent handled it.
- End Reason: how the conversation finished (for example the visitor closing the chat, a timeout, or an error) — colour-coded so problem endings stand out.
- Cost: the conversation’s estimated AI cost.
- Transcript / Summary: indicator icons showing whether the full transcript and an AI summary are available.
- Rows per page: below the table — show 10, 20, 50 or 100 conversations per page.
Opening a conversation
Click a row to read the whole exchange — every message from the visitor and every reply from the chatbot, in order. Small cards at the top show the Chat Details (channel, agent, timing), the LLM (which AI model and any fallbacks were used), the Cost breakdown, and Metrics (average AI response time and the number of conversation turns). Where the AI has analysed the conversation you’ll also see a summary and analysis, the same way voice calls get one in Call History.
Recordings of full-voice web chats
When a chatbot has Record full-voice sessions switched on (Chatbot Agents → Voice tab) and the visitor tapped Agree, the conversation’s page shows a Recording card: an inline player, a download link, and a consent receipt (“Consent given at …” plus the exact notice the visitor saw). Rows with a recording carry a small red dot next to the Web badge. A recording that is still uploading shows “still being processed” for up to ten minutes after the chat ends.
The list is remembered for a few minutes between visits and refreshes in the background, so a return visit opens instantly; a brand-new conversation can take a moment to appear. Deleting a conversation removes it from the list at once.
Bulk actions & export
- Checkboxes + Delete Selected: tick conversations and delete them in one go. Deletion is permanent.
- Export Selected / Export Recent (CSV / JSON): download the ticked conversations, or your most recent 100, 500 or 1000, as CSV or JSON, following the agent and date filters. Exports cover voice and web-call chats; text widget conversations are not included. The file is built in the background, so the rest of the dashboard keeps working while it is prepared.
Exporting everything — “Export all”
For more than 1000 chats, open Export and choose All matching chats — CSV or — JSON. The file contains every voice and web-call chat that matches the agent and date range filters on the page, with the same columns as the other chat exports. Text-widget conversations are not included. It works exactly like Call History’s Export all (see the screenshots there):
- It runs in the background: the progress window shows how many chats have been written so far and which day of your history it is working through. You can close the window and carry on using the dashboard — a notice at the top of the page shows the progress, and turns into a View export button when the file is ready. The notice also comes back if you leave the page and return.
- Download: click Download in the window (or open it from the notice). The file is kept for 24 hours; starting another “Export all” on this page replaces it. Only the person who started an export can download it.
- One export at a time: only one “Export all” runs on the dashboard at once. If someone else’s is running you’ll be asked to try again in a minute.
- Size limit: up to 50,000 chats per file. Above that the export stops and asks you to narrow the date range — export a few months at a time instead.
Recording / Egress — your call recordings
Where every recorded call lives: listen, download, delete.
Open Recording/Egress in the sidebar. (“Egress” is the technical word for getting audio out of a call — think of this simply as the Recordings page.)
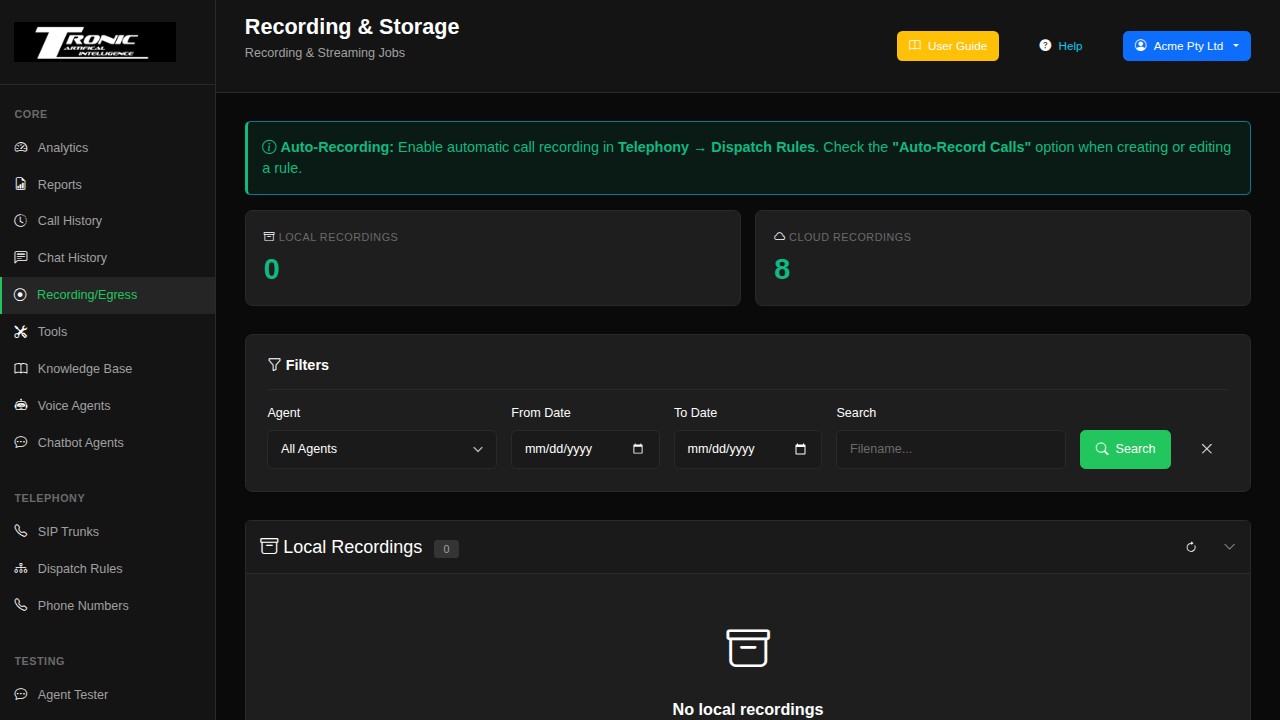
How do calls get recorded in the first place?
Recording is switched on per dispatch rule. New rules have Auto-Record ticked by default; for an older rule go to Telephony → Dispatch Rules, edit the rule that routes your calls, and tick Auto-Record. From then on, every call handled by that rule is recorded automatically and appears on this page (and as a player on the call’s detail page in Call History).
Recording & Streaming Jobs (active)
The top of the page shows recordings currently in progress — the room being recorded, its status and duration. You can stop an active recording here if you need to.
Filters
- Include chat sessions: recordings of full-voice website chat sessions (Chatbot Agents with Record full-voice sessions on) are hidden by default so phone recordings stay uncluttered. Switch it on to list them too — the choice is remembered in your browser. Chat recordings are also shown on each conversation’s page in Chat History.
- Agent: show only recordings from calls handled by one agent.
- From Date / To Date: limit the list to a date window.
- Search: filter by filename.
Local Recordings
Recordings stored on the dashboard’s own server. Each row shows the filename, agent, date, duration and file size, with per-recording actions:
- Play Recording: listen right in the browser — no download needed.
- Download: save the audio file to your computer.
- Upload to cloud: when cloud storage is configured, a cloud-upload button pushes an individual local recording to your bucket on demand.
- Delete: remove the file permanently.
- Bulk delete: tick multiple recordings (or the select-all box in the header), then click Delete Selected. Checkboxes only appear for users with delete permission.
- “No call-history record” badge: shown in the Agent column when the call record this recording came from has since been deleted from Call History, so its agent can no longer be identified. The recording itself still plays fine.
Cloud Recordings
If cloud storage is configured (Amazon S3 or Google Cloud Storage), a second section lists the recordings in your cloud bucket. You can stream them for playback directly through the dashboard, download them, and bulk-delete them — the same as local ones. An extra Storage column shows which provider each file lives on (S3 or GCS). This section only appears once cloud storage is set up.
Reports — automatic emails about your calls
Have the system email you (or your team) automatically — after every call, or as a daily/weekly digest.
Open Reports in the sidebar. A report is a rule that says: when this happens, send an email (or webhook) with this information to these people. Once set up, it runs by itself.
The reports list
- Name / Trigger / Agents / Recipients: what the report is, what sets it off, which agents it covers, and who receives it.
- Delivery: whether it goes out by email or webhook.
- Last Sent / Runs: when it last fired, and how many times it has run, so you can confirm it’s working.
- Status: whether the report is active or paused.
- Actions: ⏸ pause (or ▶ resume) a report without deleting it — handy for a noisy one; ▶ Run Now sends it straight away to test the delivery (a per-call report run this way has no call attached, so most details are blank); ✎ edit; { } download the n8n file (failsafe reports only); 🗑 delete — this cannot be undone.
- Recent Executions: below the list, a log of every send attempt — the Report, its sent/failed Status, the Agent and Trigger involved, the Recipients, any Error message (why a send failed), and the Time. Your first stop when a report doesn’t arrive.
Creating a report
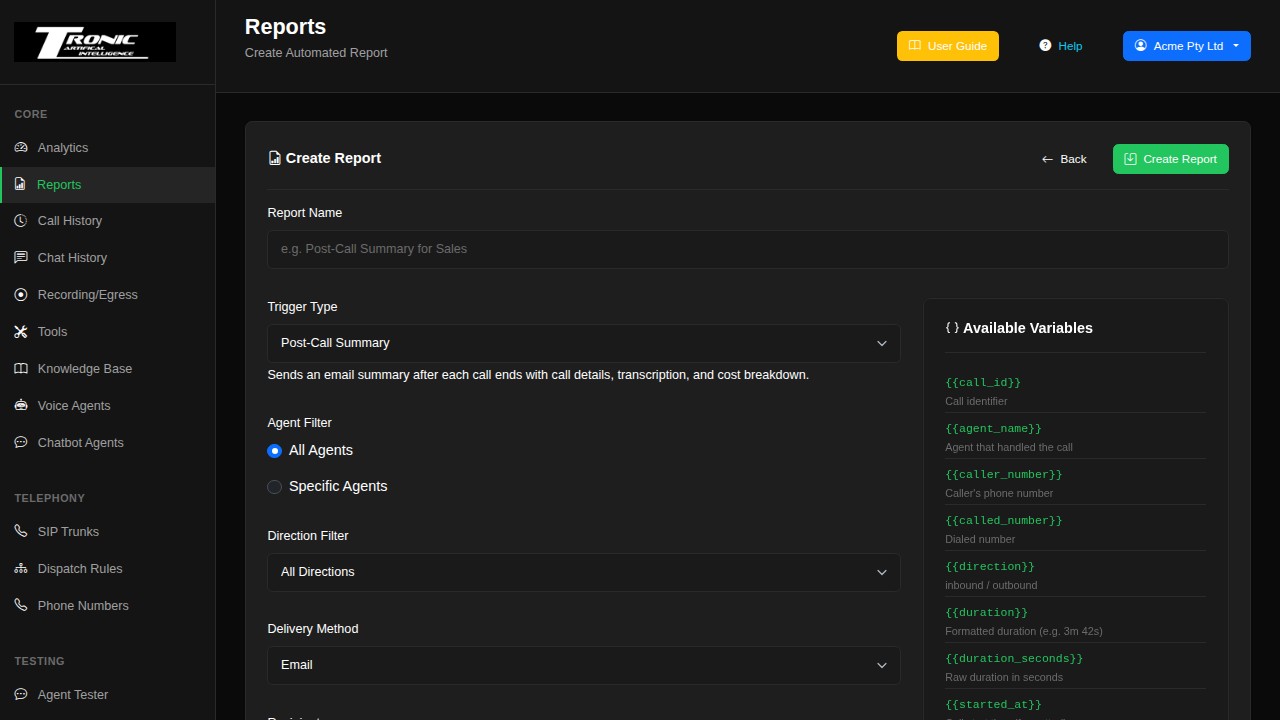
Click New Report. The form is the same for every report type; the parts that don’t apply to the type you pick are hidden.
1 Name it and pick a trigger
- Report Name: anything that helps you recognise it later, e.g. “Daily summary to management”.
- Trigger Type: what makes the report send — after each call, once the AI has analysed a call, on a daily/weekly schedule, or when a particular event happens. The description under the box says what the chosen type does, and each type has its own page under Report types.
2 Choose which calls it covers
- Agent Filter: All Agents, or Specific Agents — then tick the voice agents and/or chatbot agents to include. (Hold Ctrl, or Cmd on a Mac, to pick more than one.)
- Direction Filter: All Directions, Inbound Only or Outbound Only. (Chatbot conversations count as inbound.) Hidden for the types where it means nothing, such as the Scheduled Summary.
3 Set the schedule (Scheduled Summary only)
- Frequency: Daily or Weekly.
- Day of Week: for weekly reports, which day it goes out.
- Time (UTC): the send time. Note this is in UTC (world time), not your local time zone — adjust accordingly.
4 Choose how it’s delivered
- Delivery Method: Email (the usual choice) or Webhook (sends the report data as JSON to a web address — for connecting to other systems).
- Recipients: the email addresses that receive the report — add as many as you like.
- Email Template: which email design to use. When you pick a trigger and no template is chosen yet, the matching one is filled in for you, and a warning appears if the chosen template was built for a different type.
- Attach call recording (Post-Call Summary and AI Conversation Analysis
emails only — off until you switch it on): sends the call’s recording with the
email as an audio file (
call-recording-<date>-<time>.m4a) that plays on a phone or computer. Hover the ⓘ next to it for a reminder of how it works. - Webhook options: if you chose Webhook — the Webhook URL, the authentication type (None, Basic Auth, Bearer Token or API Key Header), any custom headers, and which fields to include in the payload (the panel on the right turns into a list of tick boxes). The Bearer Token and API Key boxes have three buttons: Show (the eye) reveals the key, Copy puts it on your clipboard, and Generate makes a strong random key for you — copy it into whatever receives the report (e.g. your n8n Header Auth credential), then Save. If a key is already there, Generate asks first, because the receiving side keeps expecting the old one until you update it.
Save the report and check its Status shows it as active. Done — it now sends itself.
Attaching the call recording
With Attach call recording switched on, each email carries that call’s recording. What happens automatically:
- The email waits for the recording. A recording finishes saving 20–30 seconds after the caller hangs up, so these emails arrive a little later than usual — usually under a minute after the call, never more than 3 minutes. Reports without the switch send as quickly as before.
- Long calls get a smaller copy. Email systems refuse big files, so a recording over about 6.5 MB is sent as a smaller copy that is still clear to listen to. Calls up to about 25 minutes fit.
- When the recording can’t be attached the email still goes out, with one
line at the bottom saying why, and a link to listen on the call’s page: the call
wasn’t recorded, it was shorter than the minimum recording length, it was too long to fit, it was still saving after 3 minutes, or the mail service
refused the file. If your email template already uses
{{recording_note}}, the line goes there instead of the bottom. - Recent Executions shows a 📎 line for these reports: “Recording attached (2.1 MB)”, or the reason it wasn’t.
- Webhooks never carry the recording — the switch only appears for email delivery.
Report types
Each type below has its own page: when it sends, what’s in it, which settings apply, and the fields you can pick for a webhook.
- Post-Call Summary — one email after every call or chat, with the details, transcript and cost.
- AI Conversation Analysis — one email once the AI has summarised a call: summary, sentiment, intent and extracted data.
- Scheduled Summary — a daily or weekly digest of call numbers and totals.
- Campaign Completion Report — when an outbound campaign finishes.
- Widget Abuse — Daily Limit Reached — when a website chatbot hits its daily session limit.
Post-Call Summary
One email (or webhook) after every call or chatbot conversation ends. Best sent to whoever follows up on calls.
- When it sends: within about 30 seconds of a call ending. Chatbot conversations send too (see the chatbot note under Creating a report).
- What’s in it: who called and which number they rang, the agent, the direction, start and end times, the duration, how the call ended, the number of turns and the agent’s average response time, the full transcript, the call’s cost (the total, plus the AI model, speech recognition, voice and phone-line parts where they’re known), a link to the call’s page, a link to listen to the recording (on the same call page) when the call was recorded, and the callback details if the call was marked for a callback. With Attach call recording on, the recording itself comes with the email.
- What’s not in it: the AI summary and the agent’s Data Extraction Fields — they aren’t ready when the call ends. Use AI Conversation Analysis for those.
- Settings that apply: Agent Filter, Direction Filter, delivery, Attach call recording (email only).
- Webhook extras: a webhook also receives the transcript as a list of
speaker/text lines, and can include
tool_calls— every tool the agent used, with its result. Ticktool_call_http_detailsas well to include what each webhook tool sent and got back. - Fields (webhook payload):
call_id,agent_name,caller_number,called_number,direction,duration,duration_seconds,started_at,ended_at,end_reason,turn_count,avg_latency_ms,transcription,total_cost,llm_cost,stt_cost,tts_cost,sip_cost,recording_url,dashboard_link,callback_requested,callback_phone,callback_time,callback_notes. Email only:recording_attached(“yes” when the recording is attached) andrecording_note(the sentence about it).
AI Conversation Analysis
Arrives a little after the call, once the AI has analysed it. Usually the more useful per-call email, and the one to use for sending call results to a CRM.
- When it sends: as soon as the call’s AI summary is ready. If the summary isn’t ready after 5 minutes, the report goes out without it — unless the dashboard is still retrying the summary, in which case it waits (up to an hour) and then sends either way.
- What’s in it: everything in the Post-Call Summary, plus the short and detailed AI summary, what the caller wanted, the sentiment and its score, key topics, the outcome and its details, action items, whether follow-up is needed, the caller’s name, email and phone if they gave them, and every Data Extraction Field set on the agent (the booking date, the order number…).
- Settings that apply: Agent Filter, Direction Filter, delivery, Attach call recording (email only — by the time the summary is ready the recording usually is too).
- Fields (in addition to the Post-Call Summary’s):
summary,detailed_summary,caller_intent,sentiment,sentiment_score,key_topics,outcome,outcome_details,action_items,follow_up_needed,extracted_name,extracted_email,extracted_phone,extracted_data(all the Data Extraction Fields as one JSON object — the one to use for a webhook).
Scheduled Summary
The digest — call volumes, durations and cost totals for the period. Best for managers who want the shape of the day, not every call.
- When it sends: daily, or weekly on the chosen day, at the chosen time (UTC). A daily report covers the 24 hours before it sends; a weekly one the 7 days before. It never sends for a time slot from before the report was created. If a send fails it tries again every 5 minutes, up to 3 times, then waits for the next slot.
- What’s in it: the period and dates, total calls and minutes, the average call length, inbound and outbound counts, completed and missed calls, the total cost and the average cost per call, the five busiest agents, and the busiest hour (UTC). Test calls are left out.
- Settings that apply: the schedule, the Agent Filter and delivery. With Specific Agents, every figure — the call counts, minutes, cost, busiest agents and busiest hour — covers only the calls and chats of the agents you ticked.
- Fields:
period,date_range,total_calls,total_minutes,avg_duration,inbound_count,outbound_count,completed_count,missed_count,total_cost,avg_cost_per_call,top_agents,busiest_hour,dashboard_link.
Campaign Completion Report
One email when an outbound campaign has called everyone on its list, with how each call went.
- When it sends: once the campaign has no numbers left to call. It then waits up to 5 minutes for the calls’ AI summaries (longer while a summary is being retried, up to an hour) so they can go in the email.
- What’s in it: the campaign name, the agent, how many calls completed, failed, weren’t answered or are still pending, the success rate, when it started and finished and how long it took, and a table of every contact — status, number, name and company, call length and the AI summary of the call.
- Settings that apply: Agent Filter (the campaign’s agent), delivery.
- Fields:
campaign_name,campaign_id,agent_name,total_calls,completed_count,failed_count,no_answer_count,pending_count,success_rate,started_at,completed_at,duration,contacts_table,dashboard_link.
Widget Abuse — Daily Limit Reached
A warning that a chatbot’s website widget has reached its daily session limit and has paused for the rest of the day — normal busy traffic, or someone trying to run up your AI costs.
- When it sends: the moment a chatbot reaches its Max sessions per day (the chatbot editor’s Daily Limit (Abuse Protection) setting). Once per chatbot per day (UTC).
- What’s in it: the chatbot, the limit it reached, when, and a link to the chatbot’s settings so you can raise the limit.
- Settings that apply: Agent Filter (tick chatbots), delivery. The matching email template is System-Widget Abuse Alert — pick it yourself.
- Fields:
agent_name,agent_id,cap,hit_at,dashboard_link.
Walkthrough: a daily management digest in two minutes
- Step 2: Reports → New Report → name it “Daily summary”, Trigger Type Scheduled Summary.
- Step 3: Frequency Daily, pick a Time (remember it’s UTC — e.g. 21:00 UTC for a 7am AEST inbox).
- Step 4: Delivery Email, add the recipients, save, check its Status shows it as active.
- Step 5: next morning, confirm it arrived; if not, the Recent Executions log’s Error column tells you why.
Walkthrough: feed call results into another system (webhook)
- Step 1: in your other system (CRM, n8n, Make, Zapier, a spreadsheet automation), create an incoming-webhook and copy its URL.
- Step 2: New Report → Trigger AI Conversation Analysis (so the payload includes the summary and extracted data), pick the agents it covers.
- Step 3: Delivery Webhook → paste the URL, set the authentication your endpoint expects (None / Basic / Bearer / API Key Header), and tick which fields to include in the payload — fewer fields = simpler to handle on the other side. Report webhooks authenticate exactly like webhook tools. If the stored key contains characters a web request can’t carry (for example a curly quote pasted from a document), nothing is sent and the run shows as failed in Recent Executions with “Authentication is misconfigured” — re-paste the key as plain text, or click Generate.
- Step 4: save, make a test call to the agent, and watch the Recent Executions log — a green sent status means your other system received the data; a failed one shows the exact error the endpoint returned.
n8n Failsafe Wizard
The most expensive call is the one that nearly worked: the caller was halfway through booking, the line dropped, and the enquiry vanished. The n8n Failsafe Wizard button (top of the Reports page) builds a safety net for those lost leads.
When a caller hangs up before their booking or enquiry is completed — the line drops, they give up mid-way, the tool never runs — an n8n workflow emails your team the caller’s details so someone can ring them back. If the booking or cancellation tool did run successfully, or the caller was transferred to a person, nothing is sent. The wizard creates both sides in one pass: a post-call report with webhook delivery already configured (address, security key, field list), and a matching n8n workflow file you download and import — guaranteed to fit together.
- Failsafe (tool check): rule-based. You tick which of your tools mean “the call was handled” (your booking / cancellation / enquiry tools). An alert goes out only when none of them completed successfully — a tool that ran but failed still alerts, because that lead is still lost. Optionally, AI reads the transcript and puts the caller’s name, spoken phone number and request into the email.
- Failsafe (AI classify): an AI reads each missed call and decides whether the request was completed before emailing. When in doubt it emails — better a duplicate alert than a lost lead. Needs an AI (OpenRouter) credential in n8n.
- Enquiry keywords: optional comma-separated words (booking, quote, hire …). If set, only calls mentioning one of them alert — keeps wrong numbers out of your inbox.
- Handoffs: by default a hand-over to another AI agent does NOT count as handled — the second agent still has to complete the booking, so the alert still fires if it doesn’t. A checkbox flips this if you prefer. Transfers to a human always count as handled.
- Withheld numbers: a caller with a hidden caller ID who says their number out loud is still alerted on — the AI pulls the spoken number from the transcript.
https:// and be reachable from the internet — not an address
on your own network. An n8n cloud account works straight away; a self-hosted one needs a real
domain name with a certificate.
Billing Overview
Your balance, this month’s usage, and recent activity.
Tronic Cloud is pre-paid. You hold a credit balance, and calls draw it down as they happen — so there’s no end-of-month invoice to be surprised by, but there is a balance to keep an eye on.
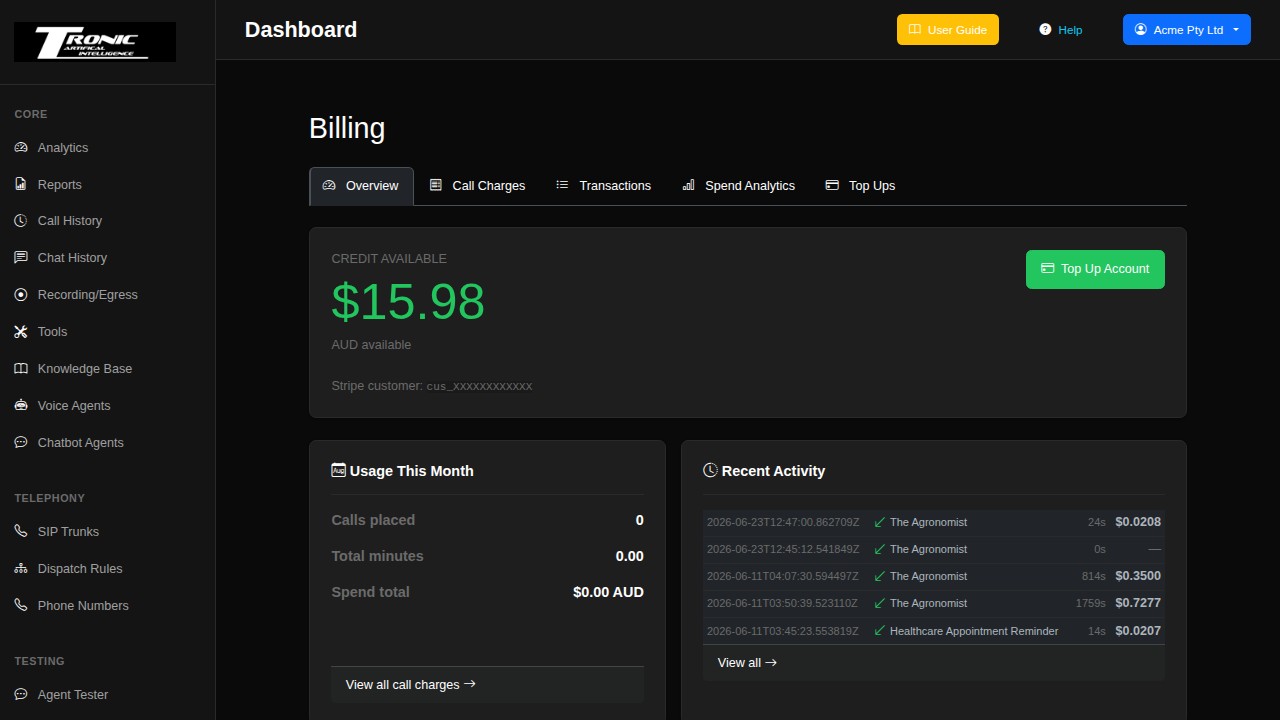
The page also shows Usage This Month (calls placed, total minutes and spend) and Recent Activity — the last handful of charges, so you can see at a glance what’s been drawing your balance down.
Call Charges
An itemised cost for each call.
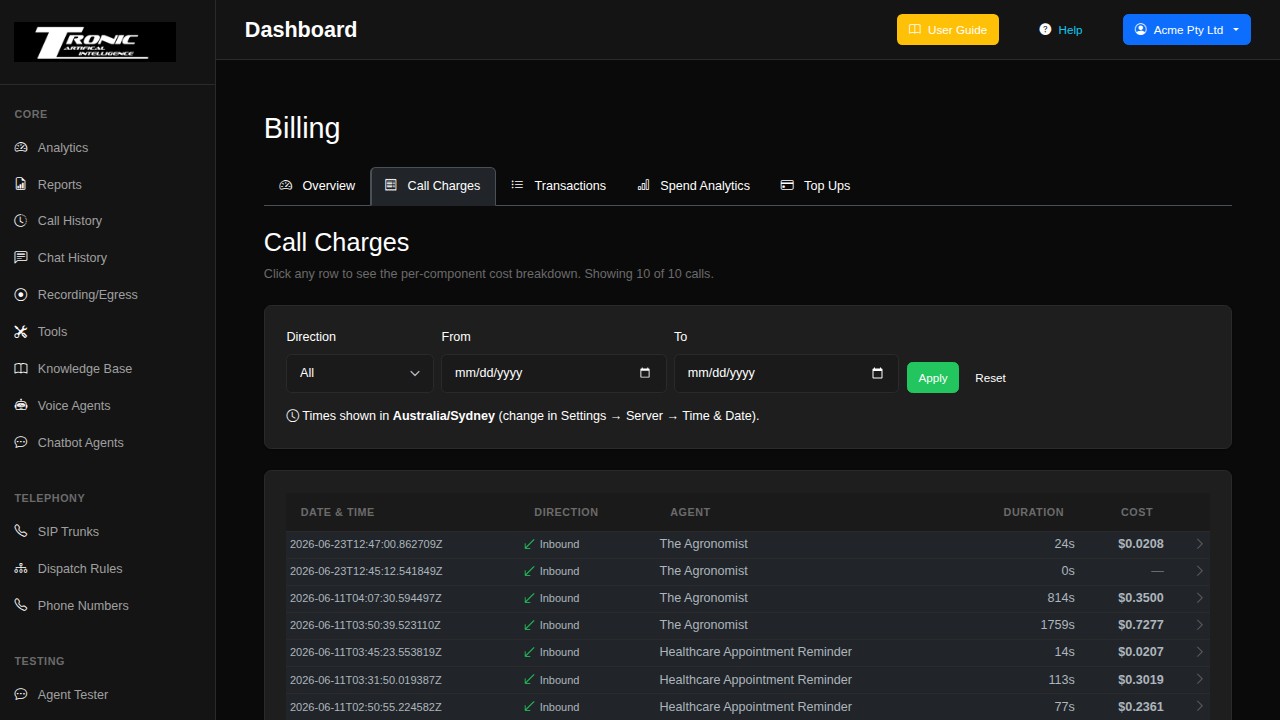
How a call is priced
Each call is made up of several separately-metered pieces:
- Speech recognition — turning what the caller says into text, charged by the minute.
- The AI model — the thinking, charged by the amount of text processed.
- The voice — turning the agent’s words into speech, charged by the amount spoken.
- Telephone minutes — the call itself.
They’re added together into the figure you see. Short, efficient calls cost very little; the surest way to reduce your spend is an agent that gets to the point.
Transactions
Your money-in, money-out history.
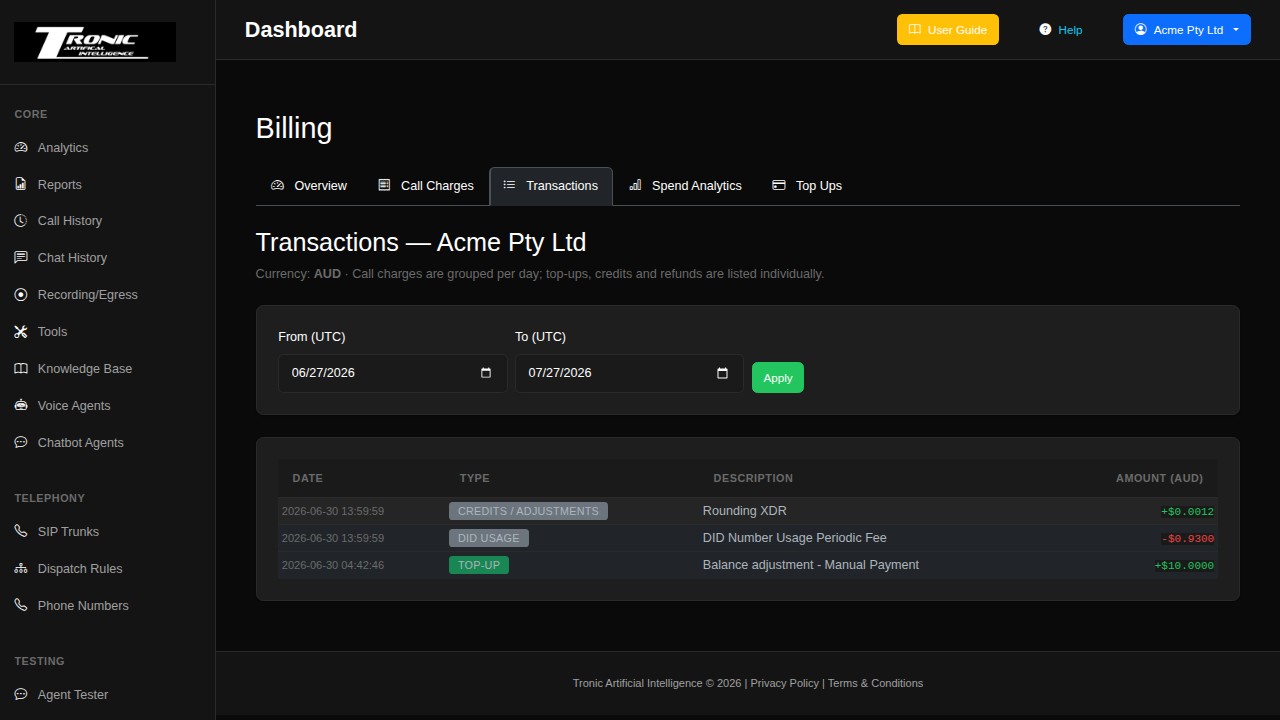
You’ll see top-ups (card payments you’ve made), credits (amounts we’ve added, including your $10 starting credit) and charges (usage drawn down). This is the page to reconcile against your card statement.
Need a tax invoice or receipt for your accountant? Email support@tronic.com.au with the date and amount and we’ll issue it.
Spend Analytics
Where your money actually goes.
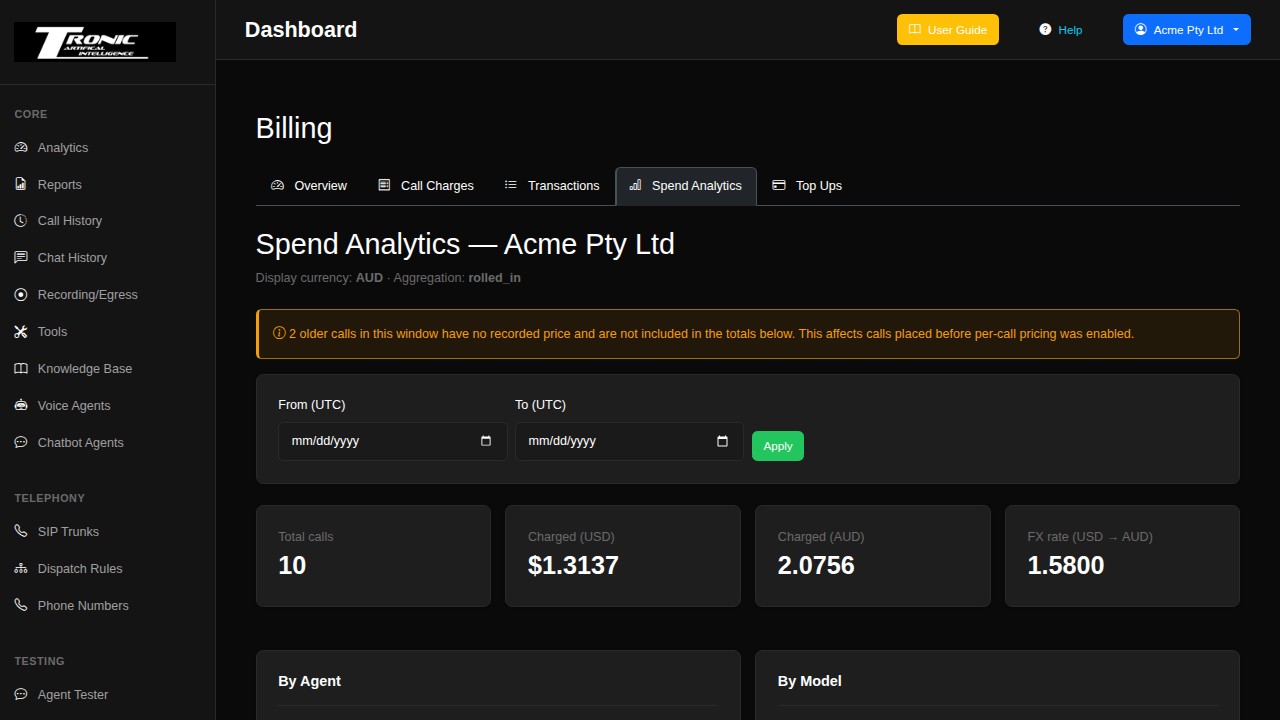
Set the date range, then read the two breakdowns. By agent tells you which agent is costing you money — useful if one is unexpectedly expensive. By model shows which AI services are driving it, which is what to look at if you’re considering switching an agent to a cheaper model.
Top Up Balance
Add credit securely by card.
$ Add credit
Open Billing › Top Ups, enter an amount, and pay by card through our secure checkout. Payments are handled by Stripe — Tronic Cloud never sees or stores your card number. Your balance updates automatically once the payment clears, usually within seconds.
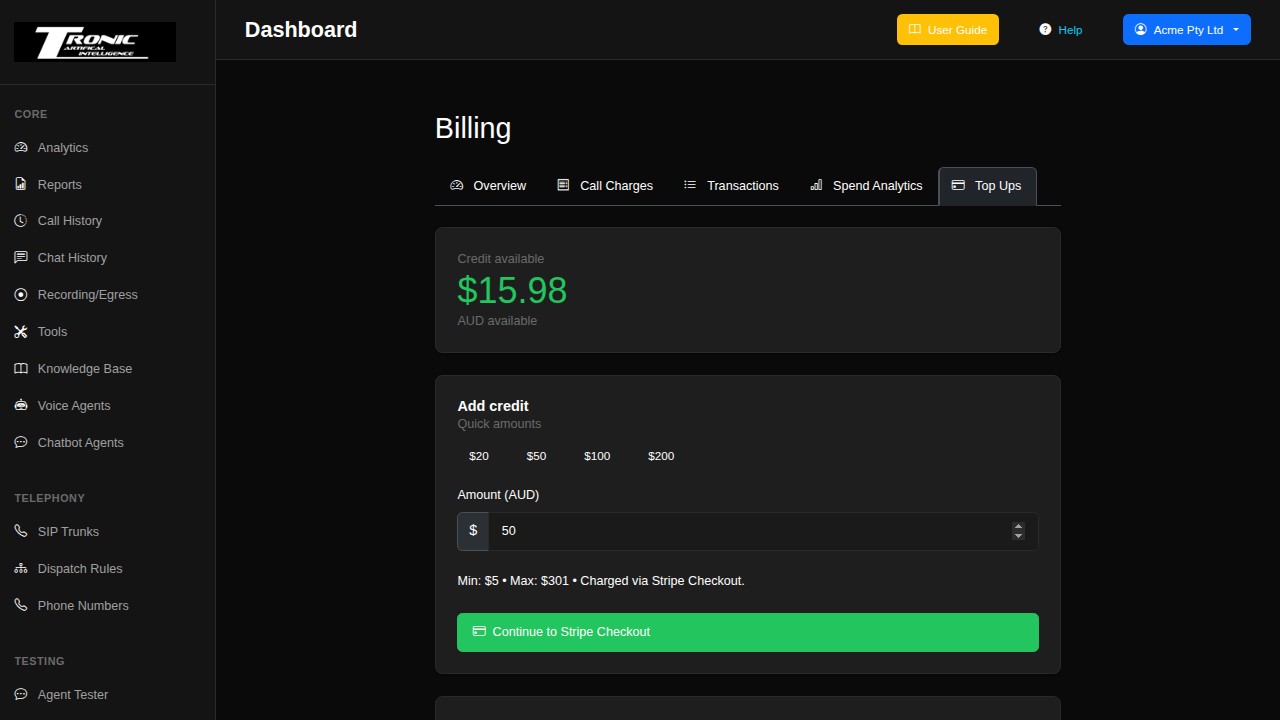
Your bank may ask you to confirm the payment in its app or by SMS — that’s standard card security, not something we control. If a payment is declined, nothing is charged and your balance is unchanged; try again or use a different card.
Account Settings
Your company details and contact information.
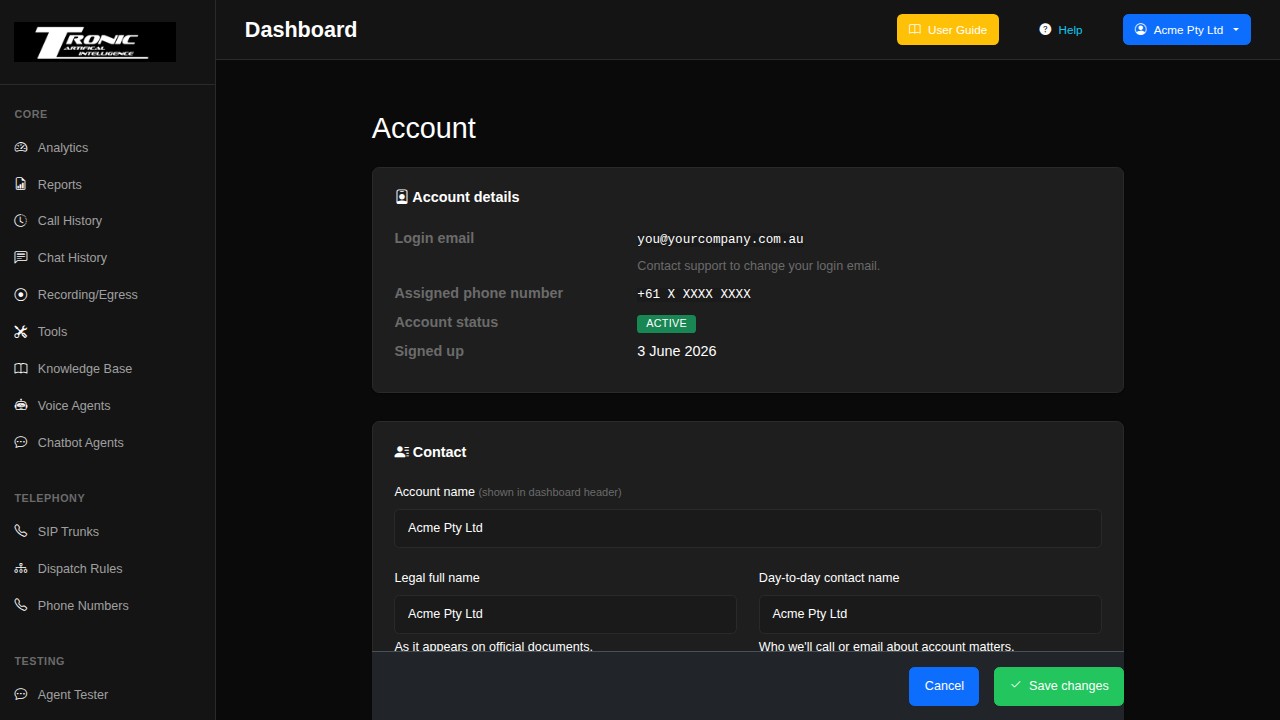
Account details (read-only) shows your login email, your assigned phone number, your account status and when you signed up.
Contact is editable:
- Account name — what shows in the dashboard header.
- Legal full name — as it appears on official documents, used for invoicing.
- Day-to-day contact name — who we’ll call or email about account matters.
- Phone — your contact number (not your agent’s number).
Click Save changes when you’re done.
Troubleshooting & FAQ
The questions that come up most, and what to check first.
My phone isn’t being answered — the four checks
Work down this list in order. One of these four is the answer almost every time, and you can do all of them in about two minutes.
- Is the agent running? Open Voice Agents. The agent must show RUNNING. If it says stopped, press the green Start button — that’s the whole fix.
- Does the dispatch rule point at that agent? Open Dispatch Rules and click the pencil. If the rule names a different agent — or one you’ve since deleted — calls go nowhere. Pick the right one and save.
- Is your credit above the cut-off? Open Billing. Below the cut-off shown there, incoming calls are refused before they reach your agent. A top-up restores service within seconds.
- Are you ringing the right number? Confirm it on Phone Numbers. It’s also in your welcome email.
If all four are fine, the call should be in Call History. If it isn’t there at all, the call never reached us — email support with the time you rang and the number you rang from, and we’ll trace it.
My campaign stopped on its own halfway through.
Almost always one of two things, and they behave differently.
Operating hours. If you ticked Restrict calls to specific hours, the campaign pauses itself at the end of the window and the badge reads Paused. Nothing is wrong. It starts again on its own at the next opening and carries on down the list — you don’t need to touch it.
Money. If your balance has run low it stops making calls, but what happens to the untried numbers depends on how low. If the account has been suspended, the remaining numbers simply wait, and the campaign carries on by itself once you top up. If there is still some credit but not enough to start a call safely, the numbers it tries get marked failed instead — so after you top up, use Retry Failed to go back over them.
My calls have no recording.
Recording is off unless you turn it on. Telephony → Dispatch Rules → edit your rule → tick Auto-Record Calls. It applies to calls from that point on — earlier calls can’t be recovered.
The agent is slow to respond — there’s a long pause before it speaks.
Check the Latency tab on the Overview page and the metrics on an individual call. Common causes: a “thinking” AI model chosen on the Behavior tab instead of a fast one, or a very long system prompt. Shortening the prompt often helps more than people expect.
The agent keeps mishearing names, products or suburbs.
Two fixes, best used together: set the correct language on the Speech Recognition tab, and list the troublesome words in the System Prompt so the agent knows to expect them.
My calls cut off after a set time.
Check Resource Limits on the agent’s Advanced tab — there may be a maximum call length set. Raise it if your calls legitimately run longer.
Who ended the call — the caller or the agent?
Open the call in Call History. The detail page records how the call ended.
How do I make the agent transfer callers to a real person?
Tools → assign the transfer tool to your agent, then tell the agent in its System Prompt when to use it: “If the caller asks for a human, or is upset, transfer the call.”
The chat widget doesn’t appear on my website.
Check the Domains tab of the chatbot editor first — your site’s address must be allowed. Then confirm the embed snippet actually saved on your site and that you’re looking at the live page rather than a cached copy.
How much are my calls costing me?
Billing → Call Charges for individual calls, or Spend Analytics for the pattern over time. Every call also shows its own cost on its detail page.
Why was I charged for a browser test?
Because a test uses the same AI services as a real call. The amounts are tiny, and test sessions are marked as tests in your Call History.
Do I need a phone number to try an agent?
No — use the Agent Tester to talk to an agent entirely in your browser.
What happens if the AI provider I’m using has an outage?
Set fallback models on the agent’s Behavior tab and calls will automatically continue on a backup provider instead of failing.
What happens if I delete something?
Deleting an agent, a collection or a rule is permanent and there’s no undo. Call history is unaffected by deleting an agent. If you’re unsure, stop the agent instead of deleting it — a stopped agent costs nothing.
Why does it say “Sub-User” next to my name?
It’s just a label on the account menu — it doesn’t limit anything you do. Every login on a Tronic Cloud account carries it, including the main one. Ignore it.
Can my website chatbot talk out loud?
Yes. On the chatbot’s Voice tab, change Chat Mode. The friendliest option for a website is Voice with avatar — visitors still type, but the answers are spoken, and the browser never asks for microphone permission. See Letting your chatbot talk.
How do I get a real person to take over a website chat?
Turn on Human Handoff on the chatbot’s own tab, and point it at a web address your team watches — usually an n8n workflow that posts into Slack, Teams or your help desk. Your team member replies from there and the visitor sees it in the chat. See Handing a chat to a real person.
How do I get the agent to book appointments?
Tools → Webhooks → n8n Wizard, and pick Calendar booking (Cal.com) or GoHighLevel appointments & sales. The wizard builds both the tool and the matching workflow so they fit together. See The n8n Wizard.
It won’t accept my n8n web address.
Two rules. It must start with https://, and it must be an address reachable
from the internet — not one on your own network like
http://192.168.1.50:5678 or localhost. An n8n cloud account
works straight away; a self-hosted one needs a real domain name with a certificate.
Where do I put the number the agent transfers callers to?
Tools → Agent Tool Assignments → Configure next to the agent → switch on the transfer tool, and the destination fields appear underneath it. Each agent can transfer somewhere different.
I set up a handoff between agents and nothing happens.
Check the AI model. Handoffs aren’t supported on every model — the editor shows an orange warning above the handoff switch when the one you’ve chosen can’t do them, and in that case your handoffs are silently ignored on calls. Switch to a model the warning names.
My agent shows a red “Config Error” badge.
That badge means one of the AI services your agent uses isn’t responding to us. It isn’t something you can fix from your side — those connections are ours. If the agent is also failing to answer calls, email support and quote the agent name.
I can’t see a page this guide mentions.
Some features are enabled per account. If something in this guide isn’t in your menu, it isn’t switched on for you — contact support and ask.
How long is my data kept?
Indefinitely. Your call records, transcripts, summaries and recordings are not deleted on a timer — a call from two years ago is still in Call History, and its recording still plays. The same goes for your website chat conversations.
That means you don’t have to race a deadline to save anything. It also means the record stays there until somebody removes it, so:
- You can delete things yourself — individual recordings from the Recording / Egress page, and calls from Call History. Deleting is permanent.
- Keep your own copies of anything critical anyway. Use the download button on a recording, and Export on Call History for transcripts. Your own archive is the one you control.
- Tell callers what you do with recordings. If you record calls, your privacy policy should say so and say you keep them. Obligations vary by industry and state, so check what applies to your business.
Glossary
Plain-English translations of the terms in the dashboard.
- Agent — the AI that answers your calls or chats.
- System prompt — the standing instructions that tell the agent who it is and how to behave.
- Greeting — the first thing the agent says when it answers.
- Dispatch rule — the setting that says “calls to this number are answered by that agent”.
- SIP trunk — the connection between the phone network and your agents. Yours is set up for you.
- Knowledge base — documents you upload so the agent can answer from your own information.
- Tool — something the agent can do as well as say: transfer a call, hang up, or send details to another system.
- Webhook — a tool that sends information to another system over the internet.
- Campaign — a list of phone numbers your agent rings, instead of waiting to be rung. See Campaigns.
- Egress — the dashboard’s word for call recording.
- LLM — “large language model”: the AI that does the thinking.
- Speech recognition (STT) — turning the caller’s speech into text.
- Text to speech (TTS) — turning the agent’s words into a voice.
- Latency — the delay before the agent replies. Lower is better.
- Credit / balance — your pre-paid funds. Calls draw this down.
- Inbound / outbound — a call to you, or a call from you.
- Handoff — passing a conversation from one agent to another. A transfer is one the caller is told about; a transition is one they don’t notice.
- Human handoff — on a website chat, passing the conversation from the chatbot to one of your team.
- n8n — an automation tool that connects your agent to other software (your CRM, calendar, spreadsheets). The wizards in the dashboard build ready-made n8n workflows for you.
- Data extraction field — a detail you’ve asked the agent to pull out of every call, such as a callback number, shown on the call record.
- Health score — a 0–100 rating of how technically smooth a call was. It measures responsiveness, not whether the agent gave good answers.
- TTFB — “time to first byte”. How quickly the agent started replying. A rough speed indicator on each call.
Getting help
When something isn’t right, here’s how to get it sorted quickly.
Start with Troubleshooting & FAQ above — it covers the great majority of questions. If that doesn’t resolve it, email support@tronic.com.au — or simply reply to any email we’ve sent you about your account.
What to include when reporting a problem
Including these turns a day of back-and-forth into a single reply:
- The Call ID from Call History, if it’s about a specific call — this is the single most useful thing you can give us.
- The date and time it happened, and the number that was rung.
- Which agent was involved.
- What you expected to happen, and what happened instead.